
How to Protect a Backpack from Rain: Practical Methods That Actually Help

Rain usually exposes the weak points in a backpack fast: the zipper track, the seams, the bottom panel, and whatever you packed loosely inside. If you want the shortest answer, use two layers of protection:
- Put valuables in sealed inner bags or a pack liner
- Add an outer rain cover when the rain is steady or heavy
That combination covers both problems: water getting on the outside of the pack and water sneaking in through openings. A backpack rain cover is an external shield; a pack liner protects the contents even if moisture gets into the bag.
If you’re already outside and rain starts suddenly, don’t waste time trying to make the backpack “waterproof” on the spot. Cover the bag, seal the contents, and reduce exposure. That’s the practical win.
Fastest fix if you’re caught in rain now
If you have only a minute or two, do this in order:
- Move electronics and papers into a zip-top bag, dry pouch, or inside pocket
- Close the backpack fully and tighten any top closure
- Put on a rain cover if you have one
- If you do not have a cover, use a jacket, poncho, or plastic bag as a temporary outer layer
- Keep the bag off wet ground and head for shelter
- Once indoors, open the bag and air-dry it as soon as possible
If you have nothing else, the best fallback is to seal the important items first and use any temporary outer barrier you can find. That is better than trying to protect the whole bag with nothing inside sealed.
What You Need Before You Start
You do not need a full outdoor kit to get decent rain protection. Choose based on how often you face wet weather and how much you’re carrying.
Quick emergency items
- A jacket, poncho, or large plastic bag for temporary outer coverage
- Zip-top bags for phone, charger, papers, or snacks
- A dry pouch for electronics or documents
- A spare grocery bag or trash bag in a pinch
Reusable protection
- Backpack rain cover
- Pack liner
- Dry bag for high-value items
- Waterproofing spray for compatible fabrics
- Optional zipper pulls or small cord loops if your zippers are hard to manage with wet hands
What each item does
- Rain cover: protects the outside of the backpack
- Pack liner: protects the contents inside the backpack
- Dry bag: protects specific items inside the bag
- Waterproof spray: improves water repellency on fabric, but does not seal the whole backpack
- Zip-top bag: a cheap, temporary barrier for small items
If your backpack is nylon or polyester, the best approach can change depending on how wet the weather is. A nylon or polyester commuter pack often benefits more from a rain cover and internal protection than from spray alone. A canvas pack may respond to wax or fabric treatment, while leather usually needs leather-specific care products rather than generic waterproof spray.
Choose the Right Protection for the Rain You Expect
The amount of rain matters. So does wind. A light drizzle on the walk from the train is not the same as a 30-minute downpour on an exposed street.
Light drizzle or brief exposure
If you only expect a short walk in light rain, a water-resistant backpack may be enough for the shell, especially if the contents are already sealed inside. But water-resistant fabric only sheds light moisture for a while; it does not reliably protect loose electronics, notebooks, or papers unless those items are sealed in inner bags, sleeves, or folders. The seams and zippers can still let water in.
Steady commuting rain
For regular city use, a rain cover plus internal organization is the most practical setup. The cover keeps the shell from soaking through, while sealed inner bags protect the items that matter most. This is the best balance for students, commuters, and parents carrying books, tablets, or spare clothes.
Heavy rain or long exposure

If you expect serious rain, use multiple layers:
– pack liner inside the backpack
– dry bag or zip-top bag for electronics and documents
– rain cover outside
A spray may still help, but it should be treated as a bonus layer, not the main defense.
Quick comparison table
| Method | Protects outside shell | Protects contents | Best use | Main limitation |
|---|---|---|---|---|
| Rain cover | Yes | Indirectly | Commuting rain, travel, school runs | Can shift in wind if poorly fitted |
| Waterproof spray | Partly | No | Light moisture on compatible fabric | Not enough for heavy rain |
| Pack liner | No | Yes | Keeping contents dry inside the bag | Does not stop exterior soaking |
| Dry bag | No | Yes, for selected items | Electronics, clothes, documents | Adds bulk and organization effort |
| Water-resistant backpack | Somewhat | No | Short exposure, light rain | Seams and zippers still vulnerable |
Simple decision rule
If you want the simplest purchase for normal commuting rain, buy a rain cover first. Add a pack liner or sealed pouches if you carry electronics, books, or papers. Waterproof spray is optional for light moisture, but it is not a substitute for inner sealing.
Step 1: Protect Valuables Inside the Backpack First
This is the part people skip, and it causes the most regret.
If rain gets past the outer shell, the items most likely to be damaged are the ones packed loose in the main compartment. Put your laptop, tablet, notebook, passport, papers, and chargers in sealed inner protection before you leave.
Simple packing order that works
- Put electronics in a padded sleeve or dry pouch
- Place documents in a zip-top bag or waterproof folder
- Keep clothes or soft items in a separate compartment or dry bag
- Use a pack liner if the whole load needs protection
For books and papers, the risk is not just direct dripping. Pages can wick moisture from the edges, and pressure from other items can transfer dampness through the stack. Keep documents in a sealed folder or zip-top bag, and place them in the middle of the pack where they are less likely to get compressed against wet fabric or the bottom panel.
A pack liner is especially useful if your backpack has standard zippers and unsealed seams. It creates a second barrier inside the bag. That matters because even a decent rain cover cannot stop water from entering through the top opening when you unzip it in wet weather.
For readers who want a deeper cleaning and care routine after a wet day, Queryoro’s guides on how to clean the inside of a backpack and how often you should clean a backpack are useful follow-ups once the rain is over.
Step 2: Use a Backpack Rain Cover Correctly
A rain cover works only if it fits well and stays in place. A loose cover that flaps in the wind can expose the pack’s sides, bottom, or shoulder strap area.
How to fit it properly
- Match the cover size to the backpack volume
- Pull it down over the entire body of the pack
- Make sure the bottom edge sits below the pack’s widest point
- Check that the cover does not leave the top corners exposed
- Tighten any elastic or drawcord so it grips the pack
That “match the cover size” point matters. A cover that is too small may ride up and expose the lower corners or the back panel. A cover that is too large can sag and shift. The goal is coverage with enough tension to stay put.
When a fitted cover beats a cheap universal one
A universal cover is convenient and usually easier to replace. A fitted cover generally stays closer to the bag’s shape, which helps when you’re walking into wind or riding a bike. If you commute in gusty weather, fit matters more than a slightly lower price.
What a rain cover cannot do
A cover does not seal the zipper opening. If you open the main compartment in the rain, water can still get in. It also does not protect items that are already wet or leaking inside the backpack.
Step 3: Apply Waterproof Spray When It Helps
Waterproof spray can be useful, but think of it as a fabric treatment, not a full rain solution.
These sprays are often sold as DWR treatments, which means they help fabric shed water instead of soaking it up. That can reduce how quickly the outer shell gets damp. But it does not make most backpacks fully waterproof.
Best use cases
- Nylon or polyester backpacks that need extra water repellency
- Canvas packs that are compatible with wax or fabric treatment
- Bags that see light rain more often than heavy rain
Where spray falls short
- It does not seal seams
- It does not close zipper openings
- It does not protect the contents if water enters from the top
- It usually will not replace a rain cover in steady rain
How to use it safely
- Read the care label first
- Test on a small hidden area if the fabric is delicate
- Apply in a well-ventilated area
- Let it dry completely before use
If you’re unsure whether your pack is nylon, polyester, canvas, or leather, check the manufacturer tag before spraying. The wrong product can leave residue or affect the finish.
Step 4: Add Extra Protection for Zippers, Seams, and Bottom Panels
These are the places water usually finds first.
Zippers
Standard zippers are common leak points because they are not sealed. Water-resistant zippers can slow water entry better than standard exposed zippers, but they still are not the same as fully waterproof zippers. If your pack has standard zippers, keep the main compartment closed as much as possible and avoid overpacking the bag so the zipper line is strained open.
Seams
Stitched seams can let water in over time, especially if the pack gets soaked. Sealed seams or taped seams offer better real-world protection because they reduce the number of openings where water can work through the stitching. If the seams are unsealed, a rain cover helps from the outside, but a pack liner is the better defense for the contents.
Bottom panels
The bottom of a backpack often gets wet first when you set it down on damp pavement, bus floors, or wet grass. If you place the bag down in rain, the bottom panel can wick moisture upward. A cover helps here, but so does simply keeping the pack off wet ground whenever possible.
Roll-top closures
If you’re choosing a new backpack for wet weather, a roll-top closure usually offers better weather resistance than a standard open-top main compartment. It is not magic, but it gives you a more secure top seal.
How to Handle a Sudden Downpour When You’re Already Out
If you get caught without a rain cover, do the simple things first.
Emergency fallback plan
- Move valuables into a zip-top bag or dry pouch if you have one
- Put the backpack under your jacket, coat, or poncho if possible
- Keep the bag closed tightly
- Avoid setting it on wet surfaces
- As soon as you get shelter, empty and dry the bag
A plastic bag can be a temporary outer layer in a pinch, but it is not a long-term solution. It can tear, trap condensation, and slip around. Use it only as a stopgap until you get indoors.
For travelers, this is often enough to save a laptop sleeve or document folder from the worst of the weather. For parents and students, the bigger win is keeping the contents organized so one wet item does not soak everything else.
Rain Cover vs Waterproof Spray vs Pack Liner
Here’s the practical decision rule:
- Need to protect the backpack shell right now? Use a rain cover.
- Need to protect electronics and papers from leaks? Use a pack liner or dry bags.
- Want to improve fabric repellency for light rain? Use waterproof spray.
- Need reliable protection in real rain? Combine cover + internal sealing.
Trade-offs
- Rain cover vs spray: a cover gives more immediate protection in rain; spray helps the fabric resist wetting but won’t block water entry well.
- Rain cover vs pack liner: the cover protects the outside; the liner protects the contents.
- Pack liner vs dry bags: a liner is simpler for the whole bag; dry bags are better when you want to separate items like clothes, chargers, and papers.
- Cheap universal cover vs fitted cover: universal is easier to buy fast; fitted usually stays in place better.
Common Mistakes That Let Water In
These mistakes show up constantly in wet-weather gear.
- Using a rain cover that is too small
- Assuming “water-resistant” means waterproof
- Leaving a laptop or notebook loose inside the main compartment
- Forgetting that zippers and seams can leak
- Relying on spray alone for heavy rain
- Setting a wet backpack on the floor and letting the bottom soak
- Storing the bag before it is fully dry
The biggest one is overconfidence. If the backpack shell looks dry, people assume the contents are safe. Often they are not.
Troubleshooting: What to Do If Your Backpack Still Gets Wet
If water still gets in, find the entry point.
If the top opening is the problem
Use a pack liner or close items in dry bags before zipping the bag shut. A rain cover cannot fully solve water entry through an open top.
If the zippers are leaking
Treat the bag as weather-resistant, not waterproof. Keep sensitive items sealed inside and avoid overfilling the pack, which can force the zipper line open.
If the cover keeps slipping
The cover may be too large, too small, or not tightened enough. Recheck the size and make sure the elastic edge is sitting below the pack’s widest point.
If the bottom gets soaked
Stop placing the backpack directly on wet ground. Even a good outer cover can’t help if the base is sitting in standing water.
How to Dry and Store a Wet Backpack Safely
Drying matters because trapped moisture leads to odor, mildew, and fabric damage over time.
Safe drying steps
- Empty the backpack completely
- Open every compartment
- Wipe the exterior with a dry cloth
- Hang it in a ventilated area
- Let air move through the main compartment and pockets
- Wait until both the shell and interior are fully dry before storing
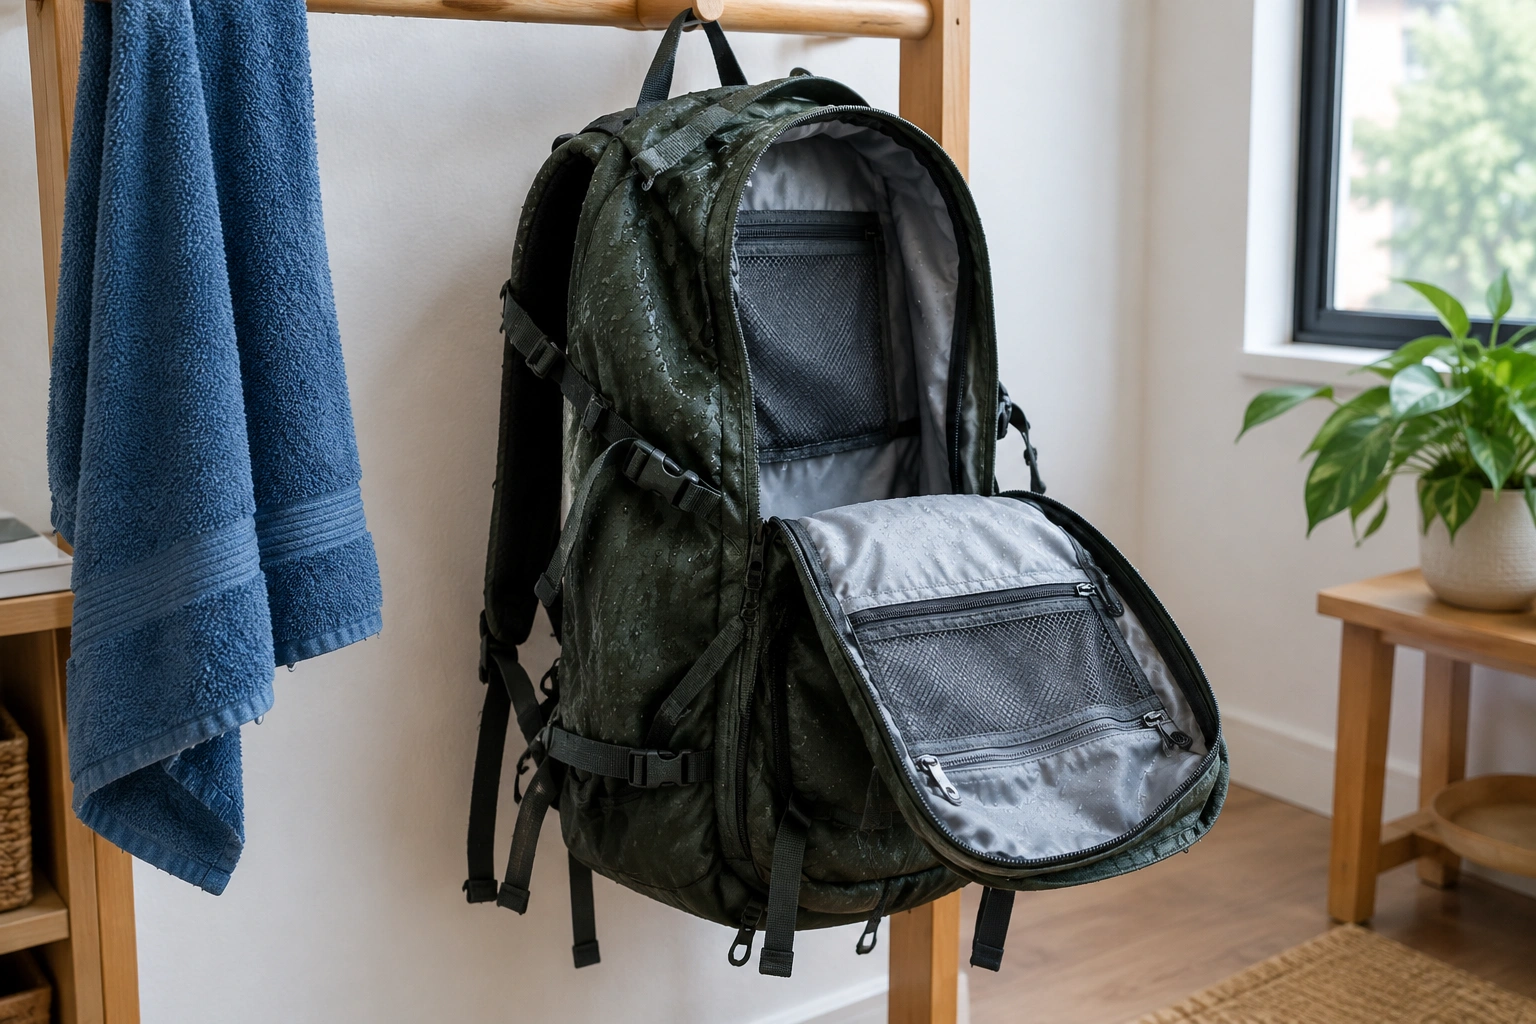
Avoid direct heat for long periods. High heat can damage coatings, adhesives, and some fabrics. If you’re tempted to use a dryer, check the care label first. Queryoro’s guide on whether you can put a backpack in the dryer covers why many packs should be air-dried instead.
If your pack is leather or canvas, use the material-specific cleaning guidance for that fabric after it dries. Queryoro also has separate care guides for leather backpacks, canvas backpacks, and polyester backpacks.
When to Upgrade to a More Weather-Resistant Backpack
If rain is a weekly problem, add-on protection may not be enough on its own.
Consider upgrading if:
- You commute in rain often
- You carry a laptop or paperwork every day
- Your current bag has exposed zippers and unsealed seams
- You dislike carrying extra accessories like covers or liners
- You want a roll-top or more weather-ready design
A water-resistant backpack is usually fine for short, light exposure. A more weather-resistant or waterproof design is better if rain is part of your routine, not an exception. The upgrade often pays off in convenience: fewer separate accessories to remember and less scrambling when the weather changes.
Practical Examples for Commuters, Students, and Travelers
Commuter in a sudden storm
A commuter with a nylon backpack gets caught in a 10-minute downpour between the train and office. The fastest save is a jacket or temporary outer cover, with the laptop already inside a zip-top bag or sleeve. That protects the contents first, which is what matters most.
Student walking across campus
A student heading to class in steady rain should use a fitted rain cover and keep notebooks and electronics in a pack liner or dry pouch. That setup handles repeated exposure better than spray alone.
Parent carrying school items and snacks
A parent with a standard backpack and non-waterproof zippers can keep papers, snacks, and a tablet in separate zip-top bags. That is simpler than trying to make the whole bag waterproof and works well for everyday school-run rain.
Traveler moving through airports and city streets
A traveler with a polyester backpack can use waterproof spray before the trip, then pack a dry bag for clothes and documents. The spray helps the outside shed moisture, while the inner protection handles the real risk.
When to See a Luggage Repair Specialist
If your backpack has damaged seams, failing waterproof coatings, broken zippers, or a fabric finish that is peeling after wet use, a repair specialist can tell you whether the bag is still worth saving. That’s especially useful for higher-end travel packs or work bags you use every day.
Quick Takeaway
If you want the simplest reliable setup, use this:
– Rain cover on the outside
– Pack liner or sealed pouches on the inside
– Air-dry the bag fully after rain
That gives you protection for the shell and the contents, which is the real goal when the weather turns.