
How to Remove a Dried Stain Without Damaging Fabric, Backpacks, or Luggage

A stain that has already dried is not automatically permanent. The catch is that dried stains usually bond more tightly to fibers, so the first move matters more than the tenth.
The goal is not to attack the stain with the strongest cleaner you can find. It is to match the stain type and the material, then work in small, controlled steps. That approach gives you the best shot at lifting the mark without fading the fabric, damaging a coating, or spreading the stain deeper.
Use this quick decision path before you start:
1. Identify the stain type: protein, oil, dye, mud, wax, or unknown.
2. Check the care label and material: washable, spot-clean only, dry-clean only, coated, foam-backed, or water-resistant.
3. Test a hidden area: look for fading, peeling, discoloration, or residue.
4. Choose the method: wash, soak, or spot-clean based on the material and stain type.
If the stain is on clothing, this guide pairs well with how to remove stains from coloured clothes and how to remove stains from kids’ clothes. For oily marks on outerwear, how to remove oil stains from a jacket is a useful follow-up.
Can a Dried Stain Still Be Removed?
Often, yes. A dried stain may not come out in one pass, but many can be reduced a lot or removed completely with pretreatment, soaking, or repeated spot cleaning. Older stains often respond best to a product matched to the stain type, followed by laundering if the item is washable.
That is the part people usually miss: old stains are often a process, not a single scrub. If the item has already been through the dryer, your odds are lower, but not zero. The main factors are the stain type, the fabric, and whether heat has already set it.
Think of it this way:
– Protein stains like food, dairy, blood, or sweat often respond to enzyme cleaners.
– Oil-based stains usually need a degreasing cleaner such as dish soap or a liquid detergent.
– Dye-based stains like coffee, tea, juice, or ink may need repeated treatment and sometimes oxygen-based stain removers.
– Mud and dirt often come out better after the dry soil is removed first, then the residue is loosened.
If the item is expensive, coated, or hard to replace, that last point matters. A careful home treatment is worth trying, but not at the cost of peeling a water-resistant finish or warping a suitcase panel.
What You Need Before You Start
Gather your supplies before you wet the stain. Once a dried mark is rehydrated, you want to work steadily instead of hunting for tools.
Choose supplies based on the stain and material:
– For most stains: cold water, microfiber cloths or clean white towels, a small bowl or spray bottle
– For protein stains: enzyme cleaner or enzyme liquid laundry detergent
– For grease or oil: dish soap or liquid detergent
– For dye-based stains on color-safe fabric: oxygen-based stain remover
– For mud and dry soil: soft brush or old soft toothbrush
– For seams, zippers, and corners: cotton swabs
For backpacks and luggage, keep a dry towel nearby to protect padding and zippers. On a bag, you are usually spot cleaning rather than soaking the whole item.
A quick note on cleaners
Different cleaners solve different problems, and they should not all be used together. Dish soap is good for grease. Enzyme cleaners are useful for protein-based stains. White vinegar can help with some residue, but it is not harmless on every fabric or finish. Hydrogen peroxide can lighten stubborn stains, but it can also bleach or discolor some materials. Never mix cleaners unless the product label says it is safe to do so.
Check the Care Label and Identify the Material
Before you touch the stain, check whether the item is washable, spot-clean only, or dry-clean only. If the care label says dry-clean only, home treatment should stay conservative unless the manufacturer gives you another instruction.
Material matters just as much as the label:
– Cotton is usually more forgiving and can handle more water-based treatment.
– Polyester and nylon are common in backpacks and luggage linings; they often clean well, but strong chemicals can affect dyes or coatings.
– Canvas can tolerate scrubbing better than many synthetics, but it may still discolor.
– Coated fabric, water-resistant panels, foam-backed sections, and technical finishes are the ones I treat most carefully. Aggressive soaking or strong solvents can damage the coating even if the stain lifts.
– Foam-backed panels can trap moisture, so they usually do better with light spot cleaning than with soaking.
If you are unsure, treat the item like it is delicate. That means spot test first, use cool water, and avoid anything that could strip a finish.
For delicate garments, manufacturer care labels are worth checking before you use any cleaner. For luggage, the general rule is simpler: if the panel has a coating or waterproof treatment, do less, not more.
Identify the Stain Type Before Choosing a Method
This is the decision that saves the most mistakes. Do not pick a cleaner first and hope it works on everything.
Use this rule of thumb
- Protein stain: food, milk, egg, blood, sweat, baby formula
Best first step: enzyme cleaner or enzyme detergent - Oil-based stain: grease, salad dressing, sunscreen, makeup, butter
Best first step: dish soap or liquid detergent - Dye-based stain: coffee, tea, juice, wine, ink
Best first step: cold water, then stain remover or oxygen-based treatment if the fabric allows - Mud and dirt: dry soil, track-in grime
Best first step: let the mud dry fully, brush off loose soil, then treat residue - Wax: candle wax, crayon, similar residue
Best first step: let it harden, then remove the solid excess before any further treatment
Choose wash, soak, or spot-clean
- Wash if the item is machine-washable and the stain is on a fabric that can be fully laundered.
- Soak if the item is washable but the stain is old or set-in and the care label allows it.
- Spot-clean only if the item is spot-clean only, coated, foam-backed, structured, or likely to trap water.
Cold water versus warm water
For an unknown dried stain, cold water is the safer starting point. Warm or hot water can help some grease-based stains once you know what you are dealing with, but heat can also set protein and dye stains. If cold water is recommended by the care label, increasing temperature brings a real risk of shrinkage or color loss.
That trade-off is why I do not recommend guessing. If the stain type is unclear, begin cold and gentle.
Test the Cleaner on a Hidden Area First
Before using anything on the visible stain, test it on a hidden spot: inside a hem, under a strap, behind a pocket flap, or near a seam.
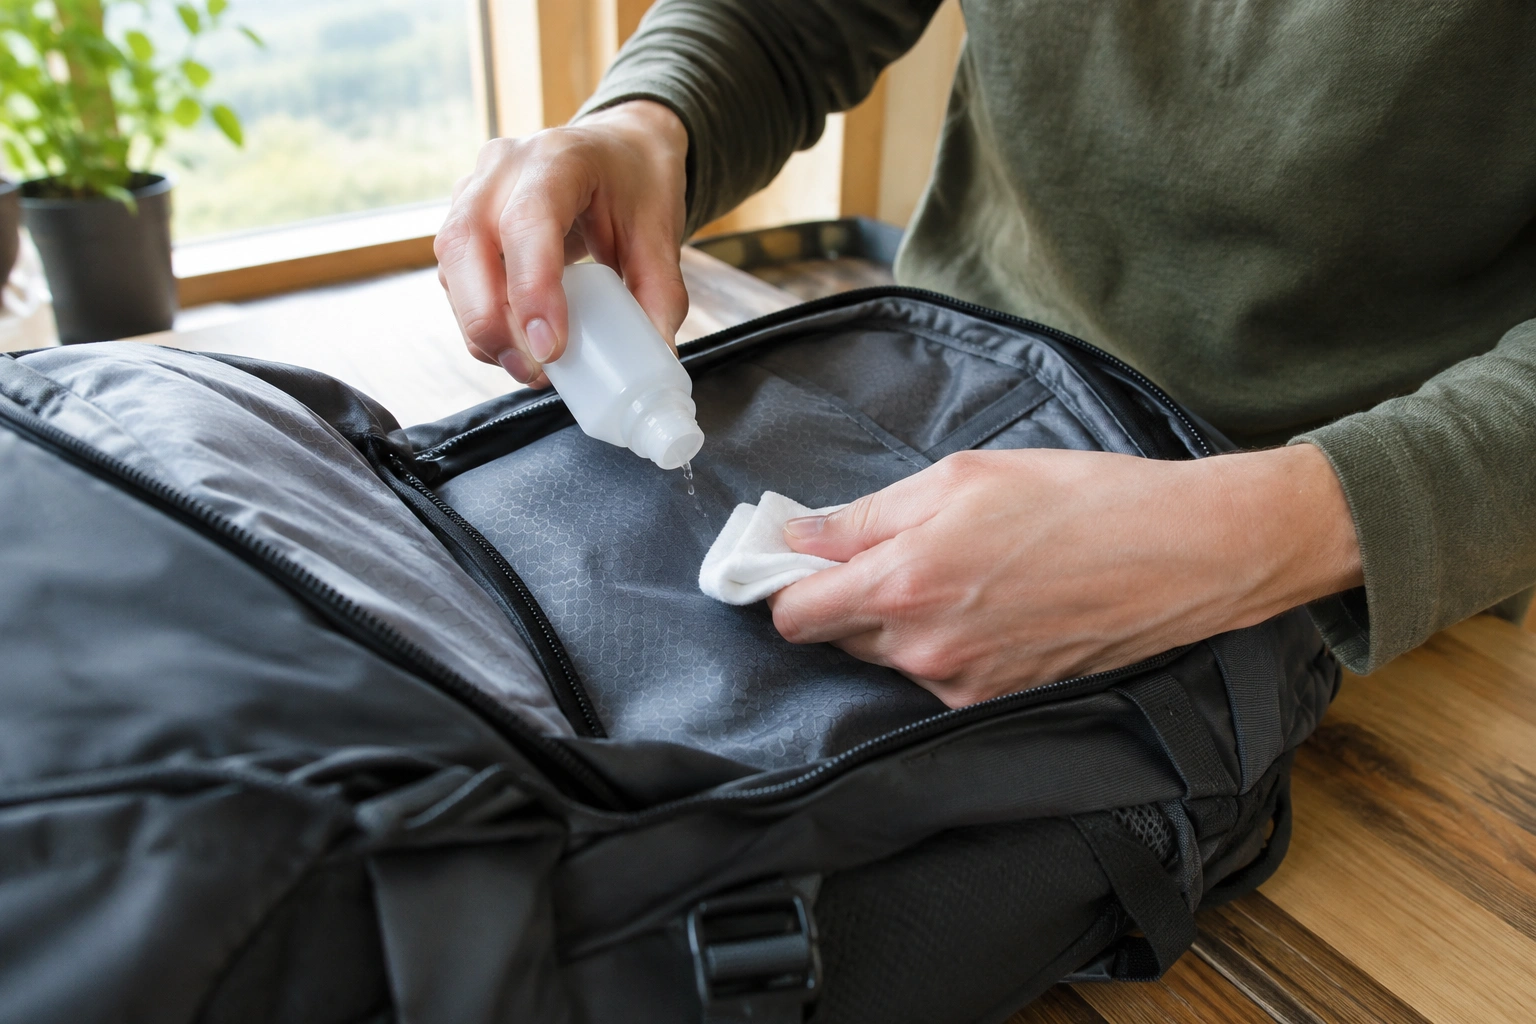
Use a small amount of cleaner, wait a few minutes, and check for:
– color change
– fading
– peeling
– sticky residue
– softening or roughening of a coating
This is especially important on backpacks, luggage shells, padded organizers, and synthetic fabrics. A cleaner that seems mild on a shirt can still dull a coated panel or leave a patchy mark on a bag.
If the test spot changes, stop there. Switch to a milder method or hand the item off to a professional.
Step-by-Step: How to Remove a Dried Stain at Home
This process works best when you move slowly and repeat lightly instead of scrubbing hard once.
1) Remove loose residue first
If the stain has crusted on top, lift off what you can without grinding it in. A soft brush works well for dirt. For wax, let it harden fully, then scrape off the excess first.
2) Rehydrate the stain
Dampen the area with cold water or lay a damp cloth over it. The point is to soften the stain so the cleaner can reach it. Do not flood a coated bag panel or luggage seam.
3) Apply the right cleaner
- Protein stains: apply an enzyme stain remover or enzyme detergent and let it sit as directed.
- Grease stains: work in a small amount of dish soap or liquid detergent.
- Dye-based stains: use a stain remover suitable for the fabric; oxygen-based products are often used for older stains on color-safe fabrics.
- Mud: after brushing away dry soil, treat the remaining mark with detergent and water.
4) Blot, don’t grind
Use a microfiber cloth or clean towel to blot from the outside edge toward the center. Scrubbing can spread the stain and push it deeper into fibers.
5) Rinse carefully
Rinse the treated area with cold water if the material allows it. For bags and luggage, use a damp cloth instead of running water when the item should not be soaked.
6) Repeat if needed
If the stain is still visible, reapply the cleaner and wait again. For old stains, several rounds are normal. Stop if the fabric starts to fade, pill, peel, or feel damaged.
7) Wash only if the care label allows it
If the item is washable, launder according to the label once the stain has been loosened. If it is spot-clean only, keep working locally instead of soaking the whole piece.
Stain-Specific Methods for Common Dried Stains
Coffee, tea, or juice
These are dye-based stains. Start with cold water and blotting. If the fabric is color-safe, a stain remover or oxygen-based product can help with older marks. Do not jump straight to hot water. That can lock in the color.
Grease or oil
Use dish soap or liquid detergent directly on the stain. Work it in gently with your fingers or a soft brush. Oily stains often need the soap to sit briefly before rinsing. This is one area where a little patience beats force.
Ink
Ink is unpredictable because pens vary. Test first. Use a targeted stain remover if the fabric allows it, and keep the treatment small. On luggage linings or backpack interiors, too much liquid can spread the ink into padding.
Food stains
If the stain contains protein, enzyme cleaner is often the better choice. If it is oily sauce, start with dish soap. Mixed food stains sometimes need both steps in sequence.
Mud
Let it dry completely, then brush off as much as possible before adding water. If you wet muddy fabric too soon, you can turn a surface stain into a deeper one.
How to Treat Dried Stains on Backpacks, Luggage, and Coated Gear
Backpacks and luggage are not just fabric. They often include foam, backing, coatings, zippers, and structured panels. That changes the method.
Use spot cleaning first
For a backpack pocket, suitcase panel, or packing cube, I usually avoid full soaking unless the manufacturer says it is safe. Water can get trapped in foam or behind liners and leave a ring or odor problem later.
Match the method to the material
- Polyester backpacks and packing cubes: usually handle mild detergent or enzyme cleaner well, but test dye transfer first.
- Nylon shells and linings: often clean well with a small amount of dish soap or detergent, but avoid harsh solvents.
- Coated canvas: use very light pressure and minimal liquid so you do not dull the finish or create a halo.
- Foam-backed panels: spot-clean only, because moisture can stay trapped inside the padding.
- Water-resistant finishes: avoid bleach, peroxide, and heavy scrubbing unless the care instructions specifically allow them.
Protect coatings and finishes
Water-resistant fabric and coated nylon can react badly to harsh bleach, strong solvents, or heavy scrubbing. If the stain is on a glossy or textured surface, use a microfiber cloth and very light pressure.
Watch the seams and padding
Liquid that reaches the seam tape or padding can take longer to dry than the visible surface. That is why I prefer small amounts of cleaner applied gradually.
If the item is a premium travel bag, check the brand’s care page. Manufacturer guidance is worth following when you are unsure about a finish or material.
What to Do If the Stain Has Already Been Heat-Set
If the item has gone through a dryer or been ironed, the stain may be harder to remove. Heat can lock in protein and dye stains, and that changes the odds.
At this point, the question is not whether the stain is old. It is whether another careful home attempt is still reasonable.
What may still work
- Reassess the stain type.
- Try one gentler repeat treatment with the right cleaner.
- Focus on blotting and short dwell times.
- Use the least aggressive method that matches the material.
When to stop
Stop home treatment if:
– the stain is not changing after several careful rounds
– the fabric starts to fade or pill
– the coating softens, peels, or becomes tacky
– the item is delicate, coated, or structurally important
For wax, let it harden, remove the excess, and then follow the item’s care instructions carefully. Wax is one of the few cases where controlled heat can help, but only after the residue is removed and only if the material can tolerate it.
Common Mistakes to Avoid
A few errors cause most of the damage I see:
– putting the item in the dryer before the stain is gone
– using hot water on an unknown stain
– scrubbing hard enough to fuzz or thin the fabric
– skipping a hidden-area test
– mixing cleaners that should not be combined
– soaking a bag or luggage piece that should only be spot-cleaned
– using bleach or peroxide on a material that can discolor
– giving up after one attempt when the stain is still loosening
The biggest one is heat. If you remember only one rule, make it this: do not dry the item with heat until the stain is gone or clearly reduced.
When to Repeat Treatment and When to Stop
Repeat treatment is reasonable when the stain is visibly lighter, the fabric still looks sound, and the cleaner is not causing new problems. That is the pattern I look for on repair benches: less stain, no fresh damage.
Stop when:
– the color starts to fade unevenly
– the coating peels or softens
– the stain is not changing after several careful rounds
– the fabric begins to fray or pill
– the item is structurally important and you do not want to risk it
For many stains, several light rounds can be more effective than one aggressive attempt.
When to See a Luggage Repair Specialist
If the stain is on an expensive suitcase, a technical backpack, a dry-clean-only item, or a panel with coating damage, a professional cleaner or luggage repair specialist is the safer move. The same is true if the stain sits near zippers, seams, wheels, handles, or structural foam.
Clear stop/go rule
- Still worth another home attempt: the stain is getting lighter, the fabric looks stable, and the item is washable or spot-cleanable.
- Hand it off: the hidden test caused discoloration, the stain is on coated or foam-backed gear, the item is heat-set and delicate, or the cleaner is starting to damage the finish.
Professional cleaning costs more, but it can be cheaper than replacing a bag or ruining a finish.
How to Dry the Item Safely After Treatment
Once the stain is treated, dry the item slowly and naturally unless the care label says otherwise. Air drying is the safest default for backpacks, luggage, and coated gear.
Lay the item flat or hang it where air can circulate. Open pockets and unzip compartments so moisture does not sit inside. If you used a lot of liquid, stuff the item lightly with a dry towel to draw out moisture, then replace the towel as needed.
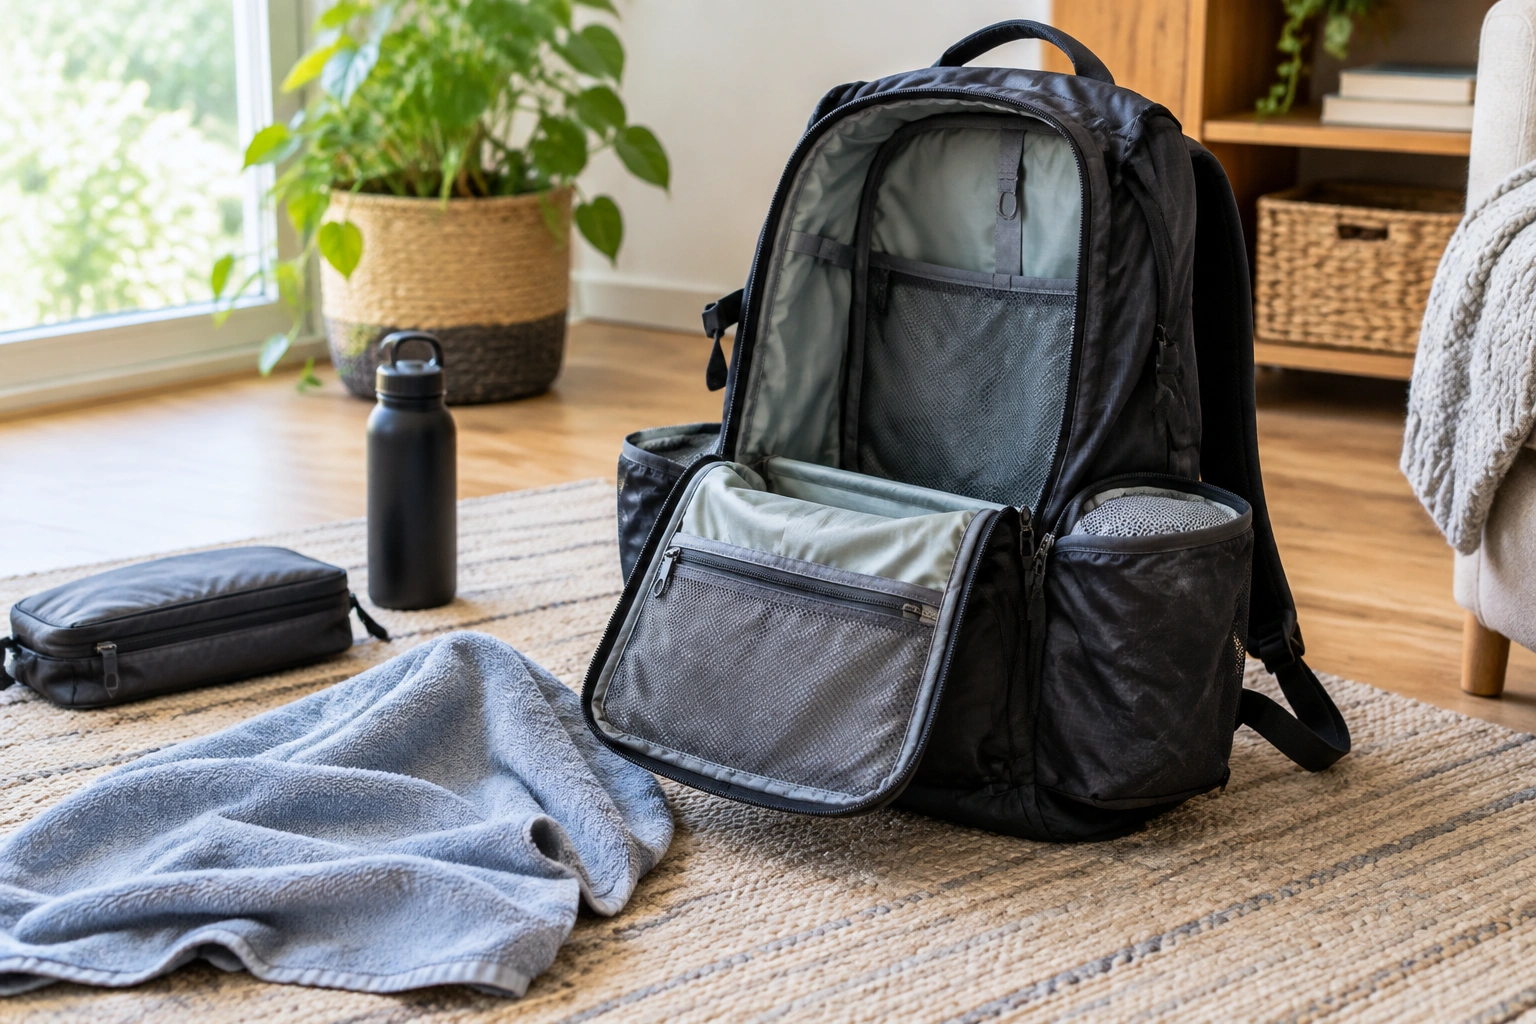
Do not use a dryer or iron until you are sure the stain is gone. If any trace remains, heat can make the next round harder.
FAQs
Can a dried stain really come out?
Often yes, especially if you match the cleaner to the stain type and avoid heat. Older stains usually need more than one treatment.
Is soaking better than spot cleaning?
Soaking helps on washable fabric, but spot cleaning is safer for backpacks, luggage, and coated materials that should not be submerged.
Should I use cold or warm water?
Cold water is the safest first choice for unknown dried stains. Warm water can help some oily stains, but it can also set others.
How do I know if a stain has been heat-set?
If it went through a dryer, iron, or hot wash and now resists normal treatment, assume it may be heat-set and switch to gentler repeat cleaning.
When should I stop trying at home?
Stop if the fabric fades, the coating changes, or the stain is not improving after several cautious rounds. At that point, professional cleaning is the safer call.
Can oxygen bleach help old stains?
On color-safe fabrics, oxygen-based stain removers are often used for older stains. Always check the care label and test first.
What if the stain is on a child’s backpack or school gear?
Treat it like a synthetic bag first: spot test, use minimal liquid, and avoid soaking padding. If the stain is deep in the lining, let the item dry fully between rounds.
Are vinegar and baking soda good for dried stains?
They can help in some situations, but they are not universal fixes. Use them as tools for a specific stain and fabric, not as a default solution.