
How to Remove a Stain After Washing Without Ruining the Fabric

A stain that survives the wash is frustrating, but it is not always permanent. In a lot of cases, the stain is still sitting in the fibers, just loosened enough to be treated again. The main rule is simple: do not put the item back in the dryer until the stain is gone or clearly fading. Heat can make some stains much harder to remove.
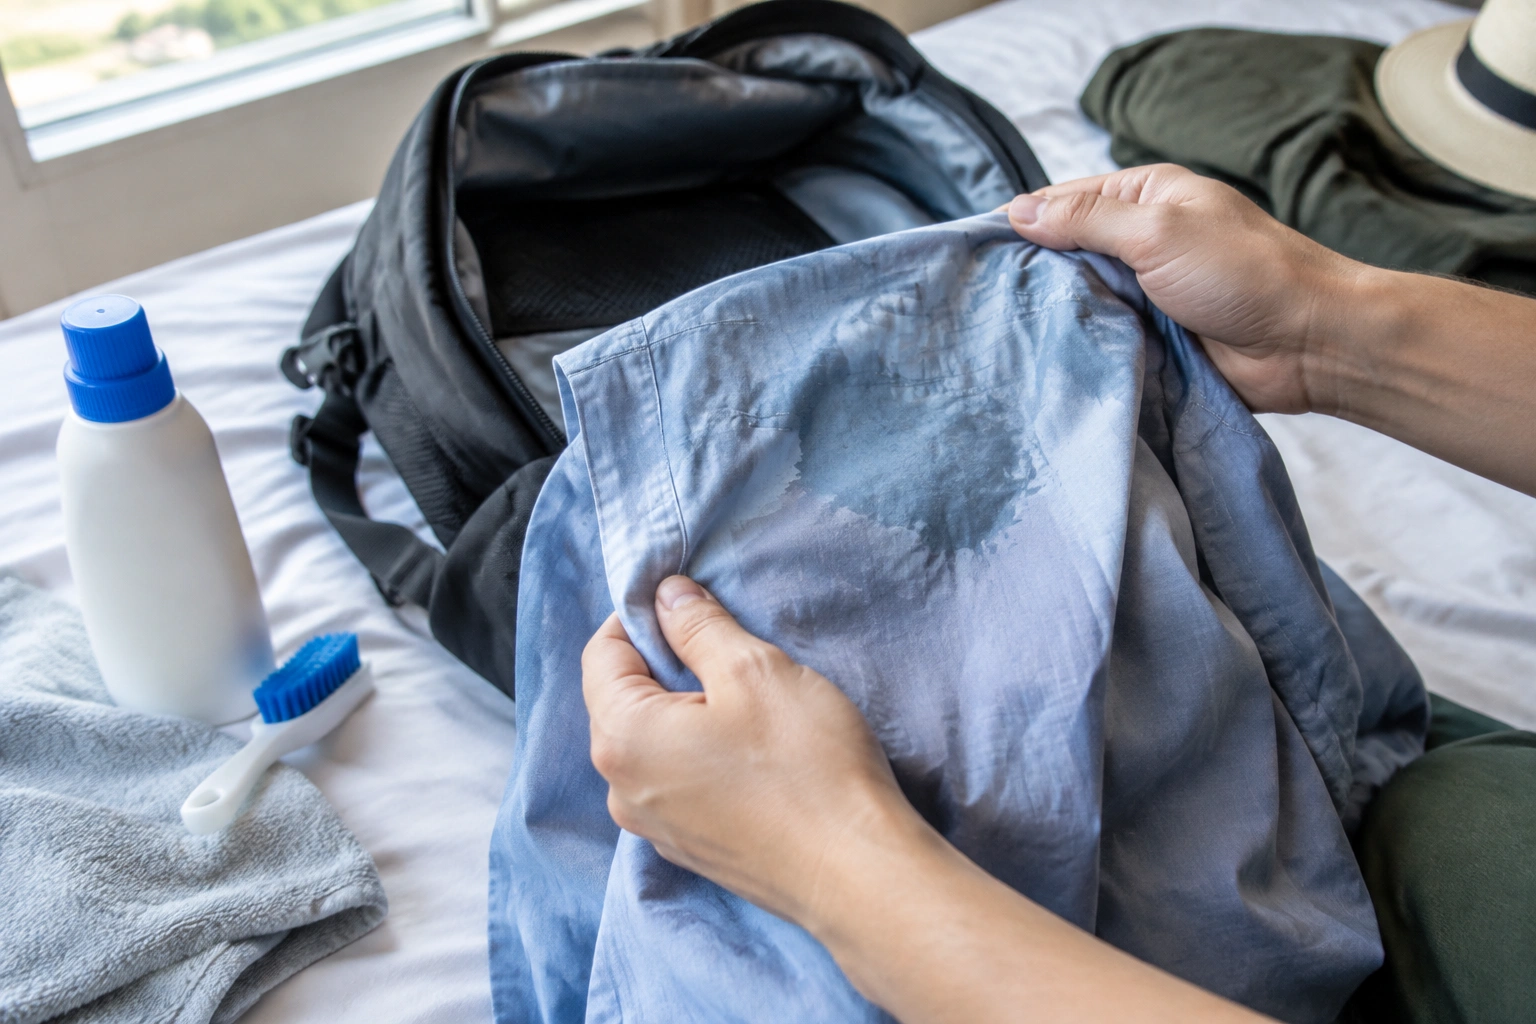
If you’ve just noticed a stain after washing, use this quick decision rule:
- If the stain is still visible, keep it out of the dryer.
- Identify the stain type if you can.
- Spot test first on a hidden area.
- If the fabric is sturdy and washable, re-treat right away while it is still damp.
- If the fabric is delicate, coated, or color-sensitive, let it air-dry first, then spot-treat more cautiously.
For travelers and commuters, this matters just as much for a shirt as it does for a backpack lining, toiletry pouch, or luggage interior. The approach is usually the same: identify, spot test, treat gently, then rewash or rinse.
Can a Stain Still Be Removed After Washing?
Yes, often it can. Washing does not always remove a stain completely, especially if the stain is oily, protein-based, old, or trapped in a synthetic weave. Sometimes the first wash only breaks the stain apart enough that it looks lighter but not gone.
The biggest factor is whether heat has set it. If the item went through a dryer cycle, the stain may be tougher, but not automatically permanent. Some stains still respond to pretreatment and another wash.
A useful decision rule:
- Still damp and not heat-dried? Good chance to improve it.
- Already dried once but the stain is faint? Treat again before giving up.
- Stain is dark, unchanged, and the fabric is delicate or coated? Use a cautious spot test first, and consider professional cleaning if the item is valuable.
The Smithsonian’s conservation guidance notes that stain removal may take repeated applications because only part of a stain may come out each time. That matches real-world laundry experience: one pass often helps, but stubborn stains may need a second careful attempt.
What to Do Immediately Before You Dry It Again
The first job is to stop the stain from setting further.
If the item is still warm from the wash, let it cool and inspect it in good light. Then make the first decision: reattreat immediately if the fabric is sturdy and still damp, or air-dry first if the item is delicate, coated, or prone to color loss. That gives you a chance to retreat the spot without locking it in with heat.
If the stain is on something like a backpack lining or luggage interior, remove the item from the dryer path and keep it flat or hung where you can see the mark clearly. For bags, I often tell people to treat the affected panel separately rather than washing the whole piece again unless the care label allows it.
For a broader care reference on bag drying, see how to dry a backpack after washing.
Identify the Stain Type and Check the Fabric First
Before using any cleaner, ask what kind of stain survived the wash.
Oil-based stains
These include grease, sunscreen, salad dressing, makeup, and some food stains. They often look darker after washing because water alone does not break down oil well.
Protein-based stains
Blood, sweat, dairy, egg, and some food stains fall here. These usually respond better to enzyme detergent or a pretreating product than to plain detergent alone.
Dye-based stains
Ink, coffee, tea, lipstick, and some colored sauces can behave like dye stains. They may need repeated treatment and a careful spot test, especially on colored fabric.
Mud and dirt
These often contain both soil and organic residue. They can look gone when wet, then reappear after drying if particles remain in the fibers.
Now check the fabric care label. That label should guide water temperature, bleach use, and cycle choice. A cotton T-shirt can usually tolerate more than a coated commuter bag or delicate lining. If the label says cold wash only, do not jump to hot water just because the stain is stubborn.
For color-sensitive garments, how to remove stains from coloured clothes is a useful companion guide. For kid gear and clothing that gets repeat messes, how to remove stains from kids clothes covers some practical stain patterns that show up after washing.
Tools and Materials You May Need
You do not need a crowded shelf of products. A small, sensible kit is enough:
- Enzyme detergent
- Oxygen bleach
- Laundry stain remover or pretreat spray
- Dish soap
- White vinegar
- Baking soda
- Hydrogen peroxide
- Chlorine bleach, only for bleach-safe whites or fabrics specifically labeled for it
- Clean white cloths or paper towels
- Soft toothbrush or small cleaning brush
- Basin or sink for soaking
Two cautions matter here:
- Do not mix bleach with vinegar or ammonia.
- Spot test first on hidden fabric, especially if the item is colored, coated, or printed.
General fabric guidance for these products:
- Enzyme detergent: Usually a good first choice for protein, sweat, food, and other organic stains on washable cottons and many synthetics.
- Oxygen bleach: Often suitable for color-safe cottons and many washable synthetics, but always check the care label first.
- Hydrogen peroxide: Best treated as a cautious spot cleaner for some whites and colorfast fabrics; it can lighten or bleach color, so avoid it on delicates, prints, and coated materials unless you have tested it.
- White vinegar: Can help with some residue, odor, or mineral-related marks, but it is not a universal stain remover. Avoid it on silk, wool, leather, and many coated or glued materials.
- Baking soda: Useful as a mild paste or deodorizing aid on sturdy washable fabrics, but it is not a strong stand-alone stain remover and can leave residue on delicate or coated materials.
- Chlorine bleach: Reserve it for bleach-safe white cotton or other fabrics specifically approved on the care label. Do not use it on wool, silk, spandex, many synthetics, colored items, or coated gear.
Step-by-Step: How to Remove a Stain After Washing
1. Keep the item out of the dryer
If the stain is still visible, do not add heat yet. Air-dry or leave it damp while you work.
2. Inspect the stain in natural light
Bathroom lighting can hide stains. Daylight makes it easier to tell whether the mark is oil, pigment, or residue.
3. Spot test a hidden area
Try the cleaner on an inside seam, hem, or lining corner. Wait for discoloration, texture change, or bleeding.
4. Pretreat the stain
For many set-in stains, use a pretreat spray, enzyme detergent, or a small amount of dish soap depending on the stain type.
- Oil/grease: dish soap works well because it breaks surface tension and helps lift oily residue.
- Organic stains: enzyme detergent is usually the better first try.
- General set-in stains on washable fabric: oxygen-based pretreatment is often a safe next step if the fabric allows it.
Speed Queen’s laundry guidance recommends soaking clothes in warm water, applying an oxygen-based pretreatment directly to the stain, rubbing it in, letting it sit for at least ten minutes, then washing and using a warm-water rinse cycle. That is a practical sequence for many washable items.
5. Let the treatment sit
Give the product time to work. Ten minutes is a useful minimum for some oxygen-based pretreatments, but stubborn stains may need longer if the product label allows it.
6. Wash again using the safest effective setting
Use the warmest water the care label allows when the fabric can handle it. For delicate or color-sensitive pieces, stay within the label limits. Maytag’s guidance for old or set-in stains is to pretreat first, then wash in the warmest water recommended by the care tag.
7. Check before drying
If the stain is still there, repeat the treatment once more rather than drying it.
8. Air-dry to confirm the result
Once the stain appears gone, air-dry the item. This avoids accidentally setting a faint remnant with heat.
Quick Match Table: Stain Type, Fabric, and Safest First Move
| Stain / Fabric | Best first treatment | Use caution with | Good next step if it lingers |
|---|---|---|---|
| Grease on cotton | Dish soap or pretreat spray | Hot water too early | Rewash warm if label allows |
| Sweat on synthetics | Enzyme detergent | Chlorine bleach on colored fabric | Repeat pretreat and wash |
| Ink on colorfast fabric | Spot test, then pretreat | Rubbing hard | Repeat on both sides of fabric |
| Mud on washable fabric | Let dry, brush off, then pretreat | Scrubbing while wet | Rewash and air-dry |
| Coffee or tea on light cotton | Oxygen bleach if safe | Bleach on non-white fabric | Second pretreat and wash |
| Blood on washable fabric | Cold water and enzyme detergent | Hot water | Repeat before any heat |
How to Treat Common Stains That Survived the Wash
Grease and oil
Use a small amount of dish soap directly on the stain. Work it in gently with your fingers or a soft brush, then rinse and rewash. If the item is washable and color-safe, oxygen bleach can be the next step.
Sweat and body oils
Sweat often leaves yellow or gray marks, especially around collars, backpack straps, and bag back panels. Enzyme detergent is usually the better starting point. If the fabric is white cotton and bleach-safe, oxygen bleach may help with lingering discoloration.
Protein stains: blood, milk, egg, and some food residue
For protein stains that survived washing, cold water and enzyme detergent are usually the safest first move. If the item has already been heat-dried, avoid hot water at first because it can make the residue harder to lift. If the stain is still visible after one careful treatment, repeat once before moving to stronger methods.
Food stains
Food is a mixed category, so the best approach depends on what it contains. Sauce with oil needs a different treatment than a fruit stain or dairy residue. If you do not know the exact source, pretreat with enzyme detergent first, then rewash.
Dye-based stains: ink, coffee, tea, lipstick, and colored sauces
Ink and other dye-like stains are often the toughest after washing and drying. Treat them carefully and test first. A pretreat spray or a small amount of oxygen bleach may help on colorfast fabrics, but avoid aggressive scrubbing. If the stain is on a delicate or printed item, stop after a cautious spot test and consider professional cleaning.
Mud and dirt
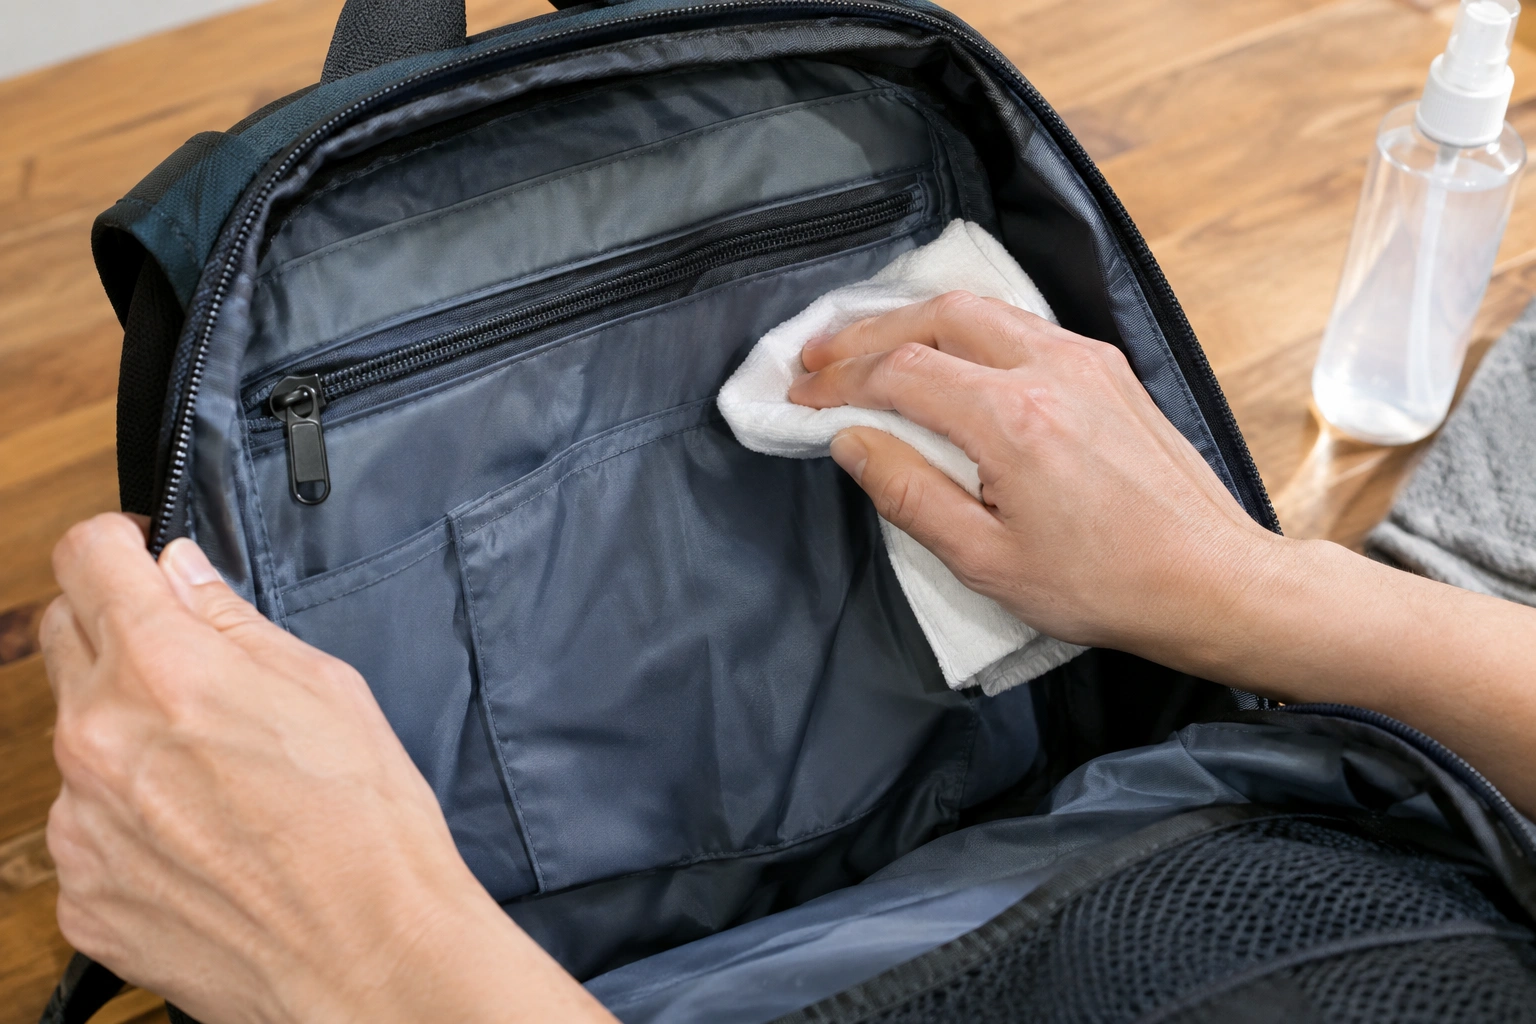
If the stain survived washing, there may still be fine particles in the weave. Brush off any dried residue, pretreat, then rewash. For luggage interiors or backpack fabric, use a damp cloth and a small brush rather than soaking the whole compartment.
Fabric-Specific Rules for Cotton, Synthetics, Delicates, and Coated Materials
Cotton
Cotton is usually the most forgiving. It can often handle enzyme detergent, oxygen bleach, and warmer water if the care label allows it. White cotton gives you more options than colored cotton.
Usually okay: enzyme detergent, oxygen bleach, cautious hydrogen peroxide on whites or colorfast items, and chlorine bleach only when the label says it is safe.
Avoid or limit: chlorine bleach on colored cotton, vinegar on blends with sensitive trims, and baking soda paste on heavily finished or printed cotton if residue is hard to rinse out.
Synthetics
Polyester and nylon can hold onto oily stains and body oils. They also dry fast, which is helpful, but they can be more sensitive to heat than people expect. Use the label as your limit, not your guess.
Usually okay: enzyme detergent, oxygen bleach if the label allows it, and mild dish soap for grease.
Use caution: hydrogen peroxide on colored synthetics, chlorine bleach unless the item is clearly bleach-safe, and vinegar on coated or waterproof synthetics.
Avoid: high heat, repeated harsh scrubbing, and baking soda on textured or coated synthetic surfaces if it may leave residue.
Delicates
Silk, wool, lace, and similar fabrics need a lighter touch. Skip strong bleach unless the label explicitly allows it, and avoid aggressive brushing. Spot test and consider hand treatment only.
Usually okay: a very mild detergent or a tiny amount of enzyme cleaner only if the care label permits it and the fabric is washable.
Use caution: oxygen bleach, hydrogen peroxide, vinegar, and baking soda, because each can affect color, texture, or finish.
Avoid: chlorine bleach, soaking, and any cleaner that might distort the fabric or trim.
Coated or treated materials
This matters for many backpacks, luggage linings, rain covers, and commuter bags. Waterproof coatings, printed panels, adhesives, and zipper tape can react badly to harsh chemicals. Stick with mild soap, a damp cloth, and the smallest effective amount of cleaner.
Usually okay: a mild detergent solution, gentle blotting, and a careful spot test.
Use caution: oxygen bleach, hydrogen peroxide, vinegar, and baking soda, especially on glued seams, printed interiors, or waterproof coatings.
Avoid: chlorine bleach, soaking, vigorous scrubbing, and anything that could weaken adhesive bonds or strip the coating.
For jacket fabrics that behave more like technical gear, how to remove oil stains from a jacket is a helpful reference, and how to remove stains from a puffer jacket covers a more delicate outerwear setup.
How to Handle Stains on Backpacks, Luggage Linings, and Other Gear
Gear fabrics are not always as washable as clothing, so treat them more like a targeted cleaning job.
For a backpack lining or luggage interior:
- Blot rather than soak
- Use a white cloth so dye transfer does not confuse the stain
- Keep water away from cardboard stiffeners, foam padding, and glued seams
- Avoid soaking near zippers, printed logos, and waterproof coatings
If the stain is inside a bag, clean only the affected section when possible. A damp cloth with a small amount of detergent is often safer than a full wash cycle. After treatment, let the area dry fully before packing the bag again.
If the lining is coated, printed, or glued, stop after one or two careful home treatments if the stain is still clearly visible. That is usually the point where further scrubbing can damage the bag more than the stain itself. Professional cleaning or repair is a better next step for valuable luggage, bonded linings, or seams that are starting to lift.
If you need a broader care process after spot treatment, the backpack drying guide above is the safer next step.
Common Mistakes That Make Post-Wash Stains Harder to Remove
The most common mistake is simple: drying too soon. Once heat hits a stain, your odds drop.
Other problems to avoid:
- Rubbing hard and spreading the stain
- Using the wrong water temperature for the fabric
- Skipping a spot test
- Mixing incompatible chemicals
- Using chlorine bleach on fabric that is not bleach-safe
- Repeating harsh treatment on delicate fabric until the fibers weaken
Clorox’s guidance for dried stains makes a useful point: if the item is otherwise unusable, increasing water temperature may be worth the risk on some fabrics. That is a trade-off decision, not a universal rule. On a cheap white cotton tee, you may accept more risk. On a coated commuter bag or favorite travel shirt, you probably should not.
Troubleshooting: What If the Stain Is Still There?
If the stain fades but does not disappear, do not panic. That usually means the treatment is working partially.
Your next move depends on what changed:
- Lighter but visible: repeat the same treatment once more
- No change at all: switch methods based on stain type
- Fabric looks stressed or faded: stop and reassess
- Stain is on a coated or delicate item: use a milder cleaner or professional help
The American Cleaning Institute’s stain guide supports repeating a prewash spray process if color remains. That is a good model for home treatment: one careful round, inspect, then repeat only if the fabric still looks sound.
When to See a Luggage Repair Specialist
Some stains are not just laundry problems. They become repair or restoration problems when they sit on:
- bonded linings
- glued edge tape
- waterproof coatings
- printed panels
- expensive or sentimental luggage
If the item is valuable, delicate, or already showing fabric damage, stop before the cleaner does more harm than the stain itself. A luggage repair specialist or professional cleaner can sometimes remove the stain more safely than repeated home treatment.
That is especially true when the stain is inside a bag structure that should not be soaked, or when the fabric has already softened, faded, or warped from previous attempts.
FAQs
Can a stain still come out after it has been washed and dried?
Often yes, especially if it has only been through one dryer cycle. The key is to stop using heat and treat it again based on the stain type and fabric.
Should I rewash or spot-treat first?
Spot-treat first for most set-in stains. Rewash after the treatment has had time to work. That gives the cleaner a chance to loosen the stain before the next rinse.
Does dryer heat make stains permanent?
It can. Heat may set some stains deeper into the fibers, which is why air-drying is the safer choice until the stain is gone.
Is oxygen bleach better than enzyme detergent?
They solve different problems. Enzyme detergent is usually better for protein and organic stains. Oxygen bleach is broader and often useful for color-safe general stain treatment, if the fabric allows it.
Can I use vinegar or hydrogen peroxide on everything?
No. Vinegar and hydrogen peroxide are useful in some cases, but not on every fabric or finish. Hydrogen peroxide can lighten color, and both should be spot tested first.
How many times should I repeat treatment?
Once or twice is a reasonable home limit for many washable items if the fabric still looks healthy. If there is little improvement after that, the stain may need a different method or professional care.
Final Takeaway
If you catch a stain after washing, the best move is to keep it out of the dryer, identify the stain, check the fabric, and choose whether to re-treat immediately or let it air-dry first based on sensitivity. Most of the time, that means a spot test, a targeted pretreat, and another wash before any heat. For backpacks, luggage linings, and other gear, the same rule applies with extra caution around coatings, seams, and adhesives. If the stain is still obvious after one or two careful home attempts, or the item is valuable, coated, or delicate, stop and consider professional cleaning.