
How to Clean a Canvas Backpack Without Ruining the Fabric

A canvas backpack can take a lot of abuse: coffee drips on the commute, dust from campus, snack crumbs from kids, and the kind of grime that builds up slowly until the bag looks tired. The good news is that canvas usually cleans up well if you use the right method for the bag’s materials and construction.
The mistake I see most often is treating every canvas backpack the same. Plain canvas, coated canvas, leather-trimmed canvas, and canvas with rigid inserts all need slightly different handling. If you clean too aggressively, the bag can lose shape, fade unevenly, or trap moisture in seams and pockets. If you clean too lightly, the smell and dirt come right back.
This guide walks through the safest way to decide what your backpack can handle, how to wash it by hand, when machine washing is risky, and how to deal with common stains without making them worse.
Before You Clean: Check the Label and the Materials
The first decision is not “How do I wash it?” It’s “What is this bag made of, and what does the maker allow?”
REI’s backpack care guidance is simple and worth following: check the manufacturer’s cleaning instructions first, because some packs can be submerged in a bathtub and others should not be submerged at all. That matters more than any generic cleaning rule. If the care label is missing or unclear, use the bag’s materials and construction to make the call.
Here’s the practical breakdown:
- Plain canvas with no trim or structure: usually the easiest to hand wash.
- Canvas with leather straps or trim: clean by hand and keep the leather as dry as possible.
- Canvas with suede panels: avoid soaking; spot clean only and keep moisture off the suede.
- Coated or waterproof canvas: often needs surface wiping rather than soaking.
- Canvas with rigid inserts, glued structure, or a frame sheet: remove detachable parts before wet cleaning; if the structure is glued in place, avoid full soaking.
- Mixed-material bags with contradictory care needs: follow the most fragile material, not the most washable one.
If the label is missing, damaged, or contradictory, use the safest option that fits the bag. When you see leather, suede, waterproof coating, or obvious glued construction, assume the bag is not a good candidate for a full soak or a machine wash unless the maker clearly says otherwise.
Spot Cleaning vs. Full Washing
Use this quick decision rule:
- Spot clean when the problem is local: a coffee drip, muddy corner, ink on one panel, or a greasy spot.
- Hand wash the whole bag when the dirt is spread out, the bag smells stale, or the inside is dirty as well.
- Avoid washing entirely when the bag has leather or suede panels, a waterproof or waxed coating that could be damaged, glued structure that may loosen, or a missing label and you are not sure the materials can handle water.
- Avoid machine washing unless the care label clearly allows it and the bag has no trim or structure that could be damaged.
If you want a deeper clean of the pockets and lining, this pairs well with backpack pocket cleaning tips and how to clean backpack lining.
Tools and Materials That Are Safe for Canvas
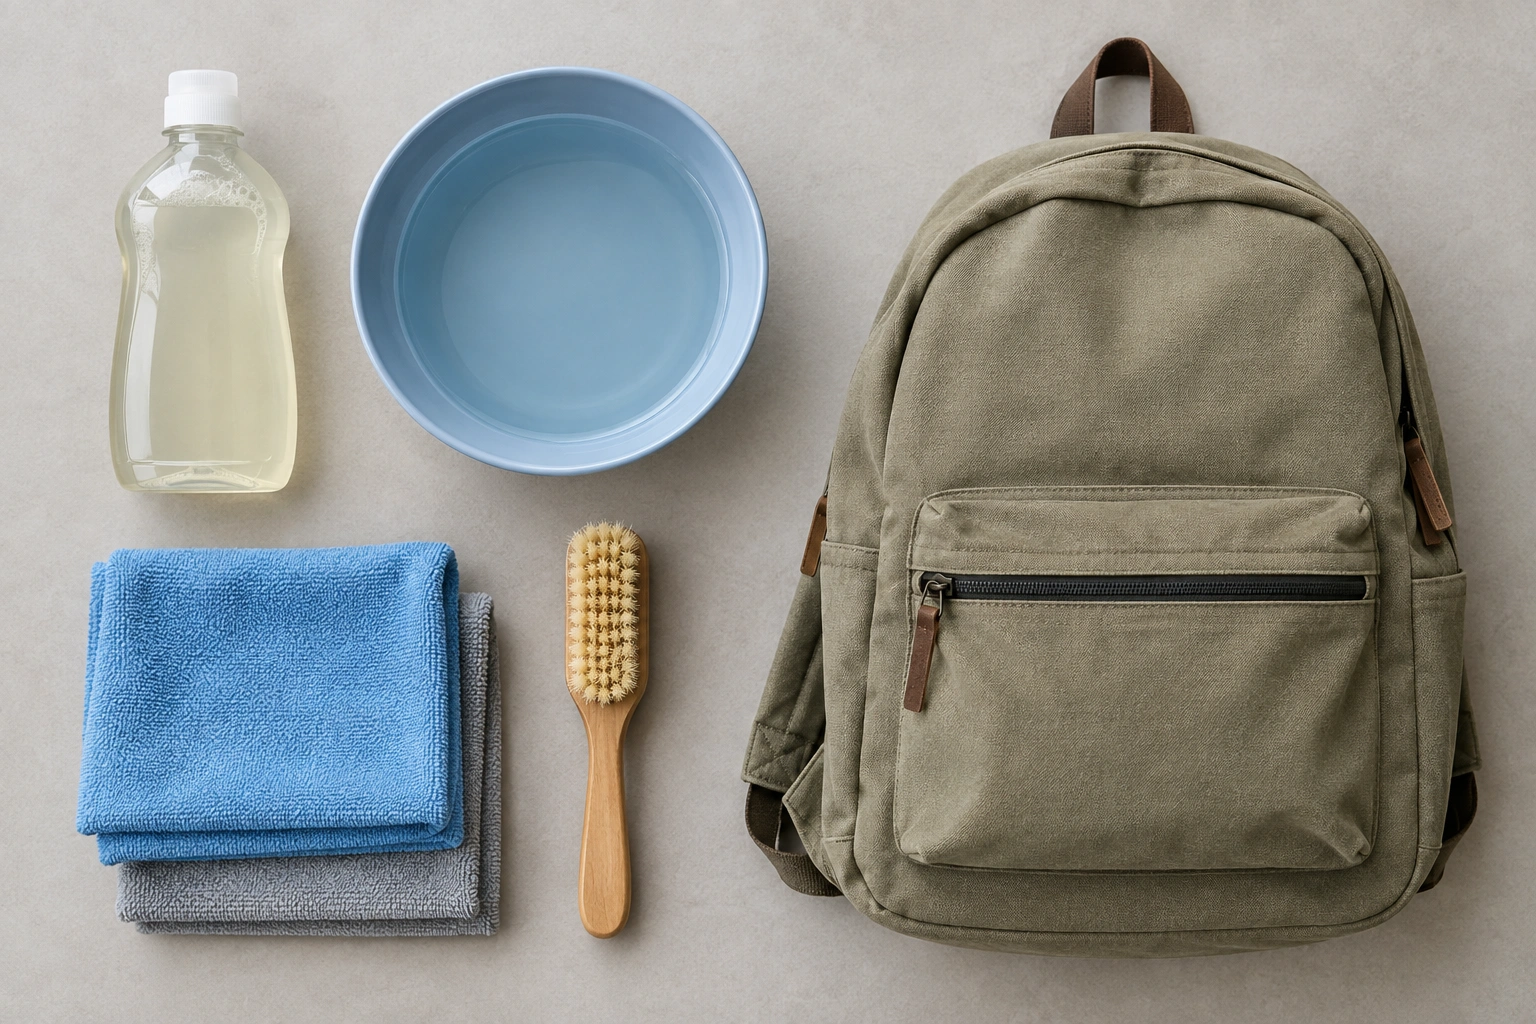
You do not need specialty cleaners to do this well. In fact, the safest setup is usually the simplest:
- Mild detergent
- Cold or cool water
- Microfiber cloths
- Soft brush or old soft toothbrush
- Vacuum with a brush attachment, if available
- Clean towel
- Mesh laundry bag, only if machine washing is truly allowed
- Bowl or tub for hand washing
I avoid bleach, strong solvents, and heavy-duty stain removers unless the manufacturer specifically approves them. Those products can fade canvas, weaken fibers, or strip coatings. A mild detergent is usually enough for everyday dirt, and a soft brush gives you control without roughing up the weave.
Prep the Backpack Before Any Wet Cleaning
Loose dirt turns into muddy streaks the moment water hits it. That’s why prep matters.
- Empty every pocket, including hidden ones.
- Shake the backpack upside down over a trash can or outside.
- Vacuum seams, corners, and the bottom panel if the fabric allows it.
- Remove detachable inserts, frames, loose key clips, and removable straps if the bag design allows it.
- Unbuckle straps and open zippers so you can clean around hardware and folds.
- If the bag has leather trim, suede, or coated panels, note where they sit so you can keep those areas dry.
This is also the moment to check for problem spots: food residue in the lining, dark grime where straps rub, or mildew in a pocket that was left damp. If the bottom of the bag is especially dirty, cleaning the bottom of a backpack first can keep that grit from spreading during the wash.
How to Clean a Canvas Backpack by Hand
For most canvas backpacks, hand washing is the safest full-clean method. It gives you control over water exposure, pressure, and contact with trim.
Step-by-Step Hand Wash
-
Fill a basin or sink with cold or cool water.
Cold water is the safer default because it lowers the risk of shrinkage, fading, and fabric distortion. -
Add a small amount of mild detergent.
You want enough to clean, not enough to leave residue. Too much soap can be hard to rinse out of seams. -
Test a hidden spot first.
Check the inside hem or a lower seam. If the color transfers or the fabric looks dull, stop and rethink the method. -
Submerge only if the backpack’s materials allow it.
If the bag has leather trim, suede, coatings, or glued parts, use a damp cloth and avoid soaking those areas. -
Work on one section at a time.
Use a microfiber cloth or soft brush to loosen dirt with gentle circular motions. Think “lift the grime,” not “scrub the stain into submission.” -
Pay attention to seams, corners, and the base.
Dirt hides where fabric folds and where the bag sits on the ground. Those spots usually need the most patience. -
Rinse with clean cool water.
Keep rinsing until the water runs clear and there’s no slippery detergent feel left in the fabric.
For a pack with dirty straps, it helps to clean them separately. Backpack strap cleaning is worth doing carefully because straps collect sweat, skin oils, and dust faster than the main body of the bag.
When and How to Machine Wash a Canvas Backpack
Machine washing is the fastest option, but it’s also the easiest way to damage a bag that wasn’t built for it. REI’s advice is the right mindset here: follow the manufacturer’s instructions, because some packs can be submerged and others should not be. If the label does not clearly allow machine washing, do not assume it’s safe.
Do not machine wash if any of these are true:
- The care label is missing or unclear
- The backpack has leather, suede, or delicate trim
- The bag has a waterproof, waxed, or coated finish
- The structure is glued, stiff, or likely to warp
- The bag contains a frame sheet, rigid insert, or built-in support that cannot be removed
- The fabric is fraying, peeling, or already separating at seams
- The manufacturer says to spot clean only
If the bag is truly machine-safe, remove everything from the bag first, including removable frames and inserts. Put the backpack in a mesh laundry bag or pillowcase, use cold water, and choose a gentle cycle. After the cycle, reshape it immediately and air dry it fully.
The trade-off is simple: the washer saves time, but it gives you less control over friction and shape. For a commuter bag with a simple build, that may be acceptable. For a mixed-material travel bag, hand washing is usually the better bet.
How to Spot Clean Stains Without Washing the Whole Bag
Spot cleaning is the best move when the rest of the backpack is still in decent shape. It uses less water, protects the bag’s structure, and avoids unnecessary fading.
Start with a dry brush or cloth to lift loose dirt. Then dampen a microfiber cloth with cool water and a little mild detergent. Blot the stain first, then work from the outside edge inward. That keeps the stain from spreading. For a little extra lift, use a soft brush with very light pressure.
A few practical rules help here:
- Blot, don’t grind. Pushing hard can rough up the weave.
- Use the smallest amount of moisture that works. Over-wetting can leave rings.
- Rinse the area with a clean damp cloth afterward. Soap residue attracts dirt.
- If the stain starts spreading or the fabric fuzzes up, stop scrubbing and let it dry before repeating. More pressure usually makes canvas look worse, not cleaner.
For canvas, a mild detergent solution is the safest first cleaner. If the stain is stubborn, repeat the treatment after the area dries instead of escalating immediately to harsher chemicals.
Spot cleaning is especially useful for light-colored canvas, which shows grime faster than dark canvas. Dark canvas may hide stains better, but it can still show water marks or faded patches if you use harsh cleaners.
How to Remove Common Stains from Canvas
Different stains behave differently. Matching the method to the stain saves time and reduces damage.
Mud
Let mud dry first. Wet mud smears deeper into the fibers. Once dry, brush off as much as you can, then spot clean the remaining mark with mild detergent and cool water. If the stain is still visible, let the area dry and repeat the treatment instead of scrubbing harder.
Food and drink
Coffee, juice, and snack stains usually respond well to a gentle detergent solution and blotting. If the stain is old, repeat the process instead of increasing scrubbing pressure. For sticky residue, lift what you can with a damp cloth before you scrub.
Ink
Ink needs a cautious approach because stronger cleaners can spread the mark or damage the fabric finish.
- Blot the fresh ink with a dry paper towel or cloth. Do not rub.
- Place a clean cloth under the stained area if possible to keep the ink from transferring.
- Dab the stain lightly with a small amount of mild detergent and cool water.
- Blot again with a clean cloth.
- Let it dry and check the result before repeating.
If the ink is still visible after a gentle repeat treatment, stop there. More aggressive scrubbing or solvent use can make the stain larger or leave a faded patch. For expensive bags or stubborn ink on mixed materials, professional help is the safer next step.
Grease or oil
Grease and oil usually need patience rather than force.
- Blot away any fresh residue with a dry cloth.
- Sprinkle a small amount of absorbent powder if you have one approved for fabrics, then let it sit briefly before brushing it off.
- Apply a small amount of mild detergent to the spot with cool water.
- Work it in gently with a soft cloth.
- Rinse with a clean damp cloth and check the area after it dries.
If the grease spot is large or still visible after one or two gentle rounds, stop scrubbing and repeat the treatment later. Heavy scrubbing can push oil deeper into the weave. For set-in grease on coated or mixed-material bags, it may be better to leave the stain alone than risk damaging the finish.
Day Owl’s canvas care guidance specifically calls out coffee spills and oil spots as common problems, which matches what I see in real use: these are the stains people notice most, and they’re usually best handled early rather than after they’ve set.
How to Clean the Inside, Straps, Zippers, and Hardware
The inside of a backpack is where odors usually start. Crumbs, sweat, and damp items settle into the lining and seams. If you want a bag to smell fresh, don’t stop at the outer shell.
Clean in this order:
- Hidden pockets and corners first. Empty and wipe them before the main lining so loose debris does not fall back into clean areas.
- Lining next. Wipe with a damp cloth and mild detergent, then follow with a clean damp cloth.
- Straps and strap hardware. Clean both sides of the straps, then wipe buckles, adjusters, and attachment points where grime collects.
- Zippers and zipper tape. Use a soft brush to lift grit from the teeth, then wipe the tape around the zipper.
- Metal or plastic hardware. Wipe with a lightly damp cloth and dry it afterward.
- Mixed-material areas. If leather, suede, coated panels, or glued sections sit next to the cleaning area, keep moisture on the canvas side only.
For a more detailed approach to these trouble spots, see how to clean backpack zippers. If the lining is the source of the smell, this lining guide can help you clean the hidden areas that hold onto odor.
How to Rinse, Reshape, and Dry It Properly
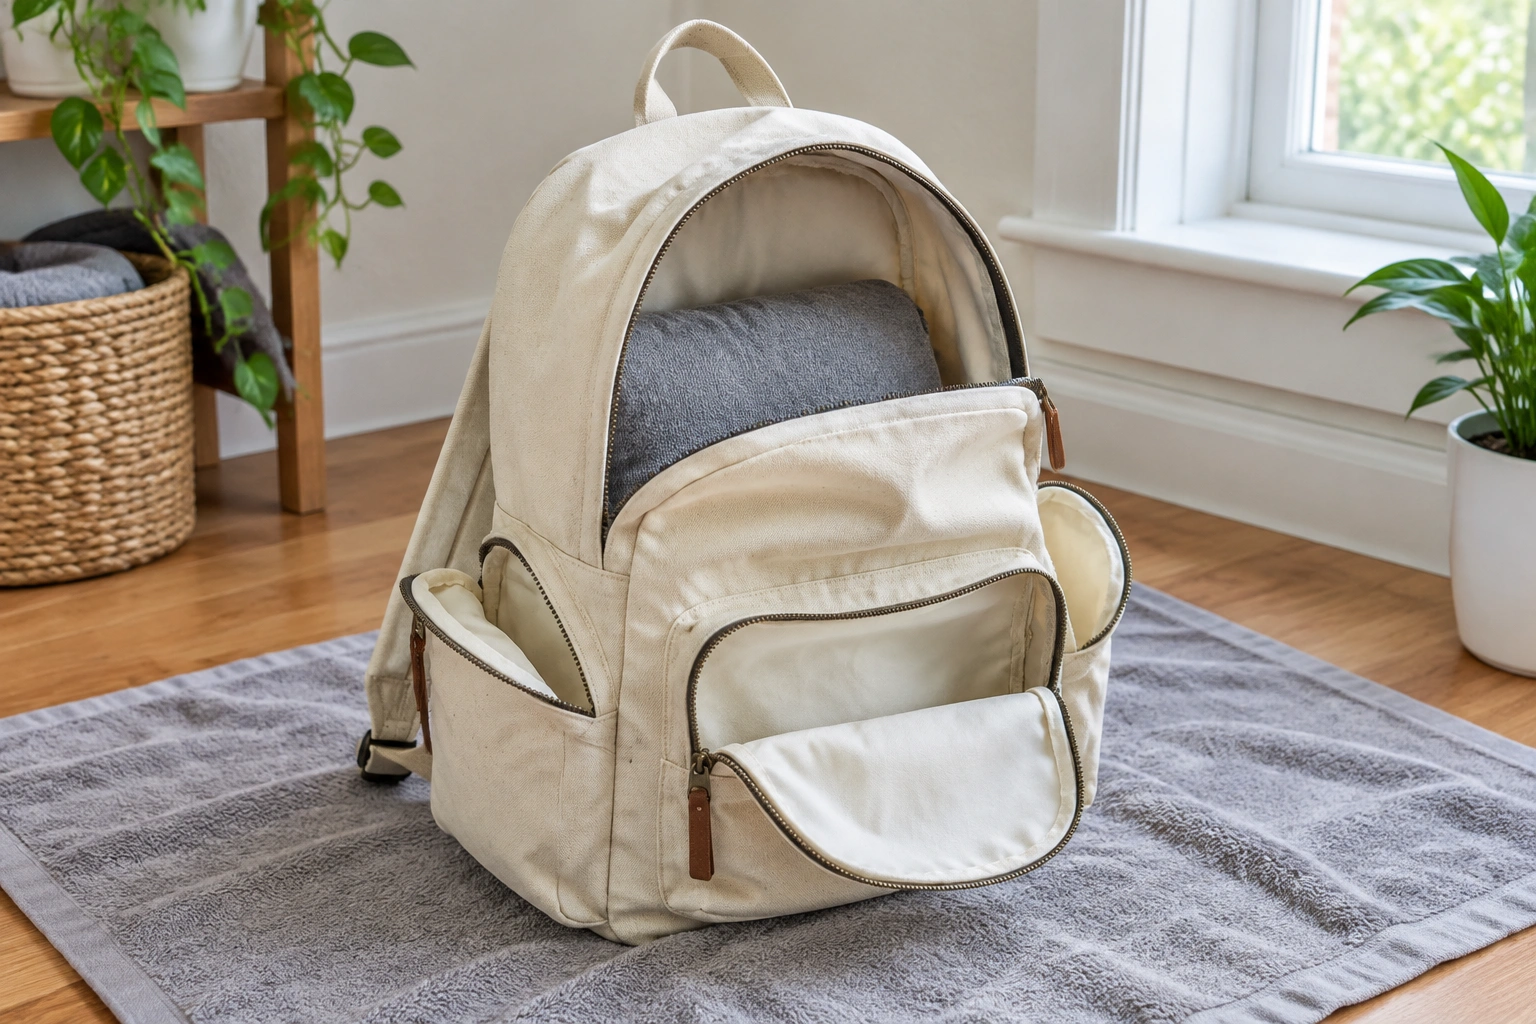
Drying is where a lot of people accidentally ruin a good cleaning job. Heat can warp shape, fade color, and damage coatings. Premature storage can trap moisture and lead to mildew.
After rinsing:
- Press out water gently with a towel. Do not wring the bag.
- Reshape the backpack while it is still damp.
- Stuff it lightly with a clean dry towel to help it hold form.
- Hang it or lay it flat in a well-ventilated area.
- Keep it away from direct heat sources and harsh sun.
Indoor drying is usually the safest choice for canvas backpacks, especially if the bag has leather trim, coatings, or glued structure. Choose a room with steady airflow, and keep pockets open so moisture can escape. Outdoor drying can be faster in dry, mild weather, but direct sun may fade lighter canvas and very humid weather can slow drying enough to encourage mildew.
If you live in a humid environment, prioritize airflow over temperature. A fan, open doorway, or dehumidified room is better than letting the bag sit in still air. The backpack needs to be completely dry before you store or use it again.
How to Deal with Odor, Mildew, and Discoloration
If the backpack smells musty, the problem is usually trapped moisture or residue in the lining and seams. Rewashing the outside alone won’t fix that.
For odor:
– Clean the inside, straps, and pockets.
– Dry the bag fully with airflow around all sides.
– Leave pockets open while drying.
For mildew:
– Treat it as a moisture problem first.
– Clean the affected area gently.
– Dry thoroughly and keep the bag out of storage until it is completely dry.
For dull-looking canvas:
– Residue from soap or dirt is often the cause.
– Rinse more carefully than you think you need to.
– Avoid strong bleach, which can create uneven light patches instead of a clean finish.
If the bag has been stored damp after a trip or rainy commute, the odor often comes back unless you clean the hidden seams too. That’s why the interior matters so much.
Common Mistakes That Damage Canvas
A few errors cause most of the trouble I see:
- Using bleach or harsh solvents
- Scrubbing too hard
- Washing without checking for leather trim, suede, or coated panels
- Using hot water
- Drying with direct heat
- Putting the bag away before it is fully dry
- Assuming every stain needs a full wash
Initibag’s canvas care guide warns against bleach, aggressive scrubbing, and machine washing, and that lines up with the safest real-world approach. Canvas is durable, but it is not indestructible. The more structure, trim, and coating a bag has, the more careful you need to be.
How to Care for a Canvas Backpack After Cleaning
Once the bag is clean, small habits help it stay that way longer:
- Empty crumbs and debris regularly
- Wipe light dirt before it sets
- Let the bag dry after rain or sweaty use
- Store it in a dry place with pockets open
- Clean stains early instead of waiting for a full wash
If you want a simple maintenance rhythm, how often to clean a backpack can help you decide when a quick refresh is enough and when the bag needs a deeper clean.
When to See a Luggage Repair Specialist
If the backpack has leather trim that is drying out, coated canvas that is peeling, stubborn mildew that keeps returning, or structural issues that make cleaning risky, a luggage repair specialist may be the safer call. That’s especially true for expensive travel bags or packs with mixed materials that need more careful handling than a standard wash.
A good rule: if cleaning might solve the dirt problem but could also damage the bag’s shape, trim, or finish, pause and assess before pushing ahead.