
How to Remove a Stain After Using the Dryer: A Practical Guide That Still Works

A stain that shows up after the dryer is frustrating because heat can turn a simple laundry problem into a much tougher one. The good news: “dryer stains” are often not new stains at all. The dryer usually either sets an existing stain, or it makes a hidden residue more visible.
That means the item may still be saveable.
The key is to slow down, identify the likely stain type, and choose a treatment that matches both the stain and the fabric. That matters whether you’re dealing with a commuter shirt, a child’s hoodie, a packing cube, or the lining of a backpack.
What to do first when you notice the stain
The first rule is simple: stop using heat until the stain is gone. Dry heat can set a stain deeper into the fibers, especially oily marks that were hard to see before drying. Re-drying too soon is one of the fastest ways to make the problem harder, and even low heat can lock in residue if the stain is still there.

If the item is already dry, don’t panic. Lay it flat in good light and inspect the mark before doing anything else. If you’re unsure whether the stain came from the dryer or was already there, treat it as if it was heat-set and work gently at first.
If the item is washable, keep it out of the dryer until you’ve tried spot treatment and confirmed the stain is actually gone. If it’s a backpack lining, packing cube, or other travel fabric, empty it completely and check seams and corners too. Residue often collects where fabric folds.
How to tell whether the dryer caused the stain or just set it
A stain that appears after drying usually falls into one of a few buckets. The color, texture, location, and fabric type give you clues.
Quick diagnostic checklist
Use this simple check before you treat the item:
- Color:
- Yellow, brown, or dark greasy tones often suggest oil, sunscreen, or lotion.
- Orange-brown specks can point to rust.
- Blue, gray, or dark shadows on light fabric often suggest dye transfer.
-
White, chalky, or cloudy marks can suggest detergent or softener residue.
-
Texture:
- Oily or slick = likely grease or body product.
- Stiff, crusty, or filmy = likely residue.
-
Dry, rough, or brittle around the mark = possible heat-set stain or coating damage.
-
Location:
- Near zippers, snaps, washer drum contact points, or metal trim = rust is more likely.
- On collars, cuffs, hems, backpack straps, or luggage corners = body oils, friction, or transfer are more likely.
-
In folds, seams, and corners of travel gear = hidden residue or trapped contamination is common.
-
Fabric type:
- Cotton often shows stains clearly and is usually more forgiving to treat.
- Synthetics can hold onto oil and detergent residue.
- Wool, silk, coated fabrics, and mixed-material gear need gentler handling.
Quick stain ID table
| What it looks like | Likely cause | Best first move | Fabric caution |
|---|---|---|---|
| Yellow, brown, or dark greasy patch | Body oil, sunscreen, lotion, food grease | Dish soap or enzyme detergent | Be careful with coated fabrics and delicates |
| Orange, reddish, or rust-colored specks | Rust from washer, dryer, or metal hardware | Rust-specific treatment if fabric allows | Test first; some fabrics discolor easily |
| Blue, gray, or dark shadow on light fabric | Dye transfer | Rewash and use bleach option only if safe | Colorfastness matters |
| Chalky, stiff, or streaky residue | Detergent or fabric softener buildup | Rewash with less detergent | Avoid over-treating with harsh chemicals |
| Patch that became more obvious after drying | Heat-set existing stain | Target the original stain type | Heat may have made it harder, not impossible |
A greasy stain that was faint when wet but obvious after drying is a classic heat-set problem. That’s common on shirts, jacket linings, and luggage fabric that picked up sunscreen or hand lotion during travel.
Rust is different. It often shows up as specks or orange-brown spots, especially near snaps, zippers, washer drums, or metal trim. Dye transfer usually looks like a color change rather than a greasy mark. Detergent residue tends to feel stiff or chalky rather than oily.
If you want a good rule of thumb: greasy = treat for oil, rusty = treat for rust, colored shadow = treat for dye transfer, stiff film = treat for residue.
For general fabric care, REI’s gear care advice is useful as a general reminder to check the care label and match the treatment to the material, especially on synthetic travel gear.
Tools and materials worth gathering
You do not need a full laundry lab. A small, careful toolkit is enough for most post-dryer stains:
- Clean white cloths or paper towels
- A dull knife or spoon for scraping
- Mild dish soap
- Liquid laundry detergent
- Enzyme stain remover
- Oxygen bleach, if the fabric is washable and color-safe
- A soft toothbrush or small brush
- Cold or lukewarm water
- Gloves if you’re using stronger stain products
For many travelers and parents, the safest first-line tools are dish soap and a clean cloth. Dish soap is useful on grease because it helps break up oily residue. Enzyme detergent is often a better choice for organic stains, but it is not a cure-all.
If the item is a backpack, packing cube, or luggage lining, avoid soaking until you know the construction. Foam padding, glued seams, waterproof coatings, and printed surfaces can react badly to long soaks.
Check the fabric care label before treating the stain
This step saves more items than any “miracle” cleaner. Maytag’s stain guidance begins with checking the care tag, and that is the right habit here too.
Use this decision rule
- Cotton and many washable synthetics: usually the easiest to treat at home.
- Wool and silk: use gentler methods and avoid aggressive bleaching.
- Coated fabrics, waterproof finishes, printed surfaces, and glued gear components: spot test first.
- Backpack linings and luggage interiors: treat as mixed-material items, not plain fabric.
- Mixed-material travel gear: assume one method may be safe for the fabric but not for the foam, adhesive, coating, or trim.
Fabric-by-fabric do/don’t notes
- Cotton
- Do: blot, pre-treat, and wash according to the label.
-
Don’t: re-dry before the stain is fully gone.
-
Synthetics
- Do: use gentle detergent or dish soap for oily stains and keep water temperature within the label limits.
-
Don’t: use high heat “just to see if it helps,” because synthetics can hold heat-set residue.
-
Wool
- Do: use cool water, minimal agitation, and wool-safe cleaner if allowed by the label.
-
Don’t: scrub hard, soak for long periods, or use chlorine bleach.
-
Silk
- Do: treat as delicate and test any cleaner in a hidden spot first.
-
Don’t: use strong stain removers, bleach, or aggressive rubbing.
-
Coated fabrics
- Do: blot gently and use a barely damp cloth or a product approved for the coating.
-
Don’t: soak, scrub, or use harsh solvents that can damage the finish.
-
Mixed-material travel gear
- Do: clean the most stain-prone surface first and keep moisture away from foam, seams, and glued areas.
- Don’t: assume the whole item can be washed like a T-shirt.
If the care label says “dry clean only,” don’t assume a wet treatment is safe just because the stain appeared after the dryer. That label usually means the construction or dye may not handle water, scrubbing, or bleach well.
For delicate items, this silk care guide is a useful internal reference if the stained piece is especially fragile. For color-sensitive clothing, stain removal on coloured clothes is also worth checking before you use any bleach-based method.
Step-by-step stain removal methods by stain type
The safest approach is to match the method to the stain instead of treating every post-dryer mark the same way.
1) Heat-set grease or oil stains
This is one of the most common “mystery stains” after drying.
Cotton
1. Place the stained area face down on a clean cloth or paper towel.
2. Apply a small amount of dish soap to the back of the stain.
3. Work it in gently with your fingers or a soft brush.
4. Let it sit briefly, then rinse with cool water.
5. Wash again using the warmest water the care label allows.
Synthetics
1. Blot any surface residue first.
2. Use a small amount of dish soap or liquid detergent.
3. Rub very gently; avoid aggressive scrubbing that can distort fibers.
4. Rinse and rewash on the label-approved setting.
Wool or silk
1. Skip heavy scrubbing.
2. Use a wool- or silk-safe cleaner if the label allows it.
3. Blot only, then rinse lightly or follow the product instructions.
4. Air-dry flat or as directed by the label.
Coated fabrics and travel gear
1. Wipe off excess oil with a dry cloth.
2. Use a cloth dampened with mild soap solution, not a soak.
3. Blot the stain and the surrounding area.
4. Wipe again with clean water and let it air-dry.
Maytag recommends removing excess material first, then blotting, and using an enzyme detergent on the stain. For a delicate piece, use mild detergent and cold water instead of scrubbing hard.
If the stain is still there after washing, repeat the treatment once or twice more if the fabric is sturdy and the label allows it. Stop sooner on delicates, wool, silk, coated items, or gear with glued seams. If the mark is not improving after a couple of careful attempts, continuing to repeat the same method can increase the risk of fabric damage without improving the result.
For a jacket or travel layer, these oil stain steps for outerwear may be more useful if the mark is on coated or insulated fabric.
2) Rust stains
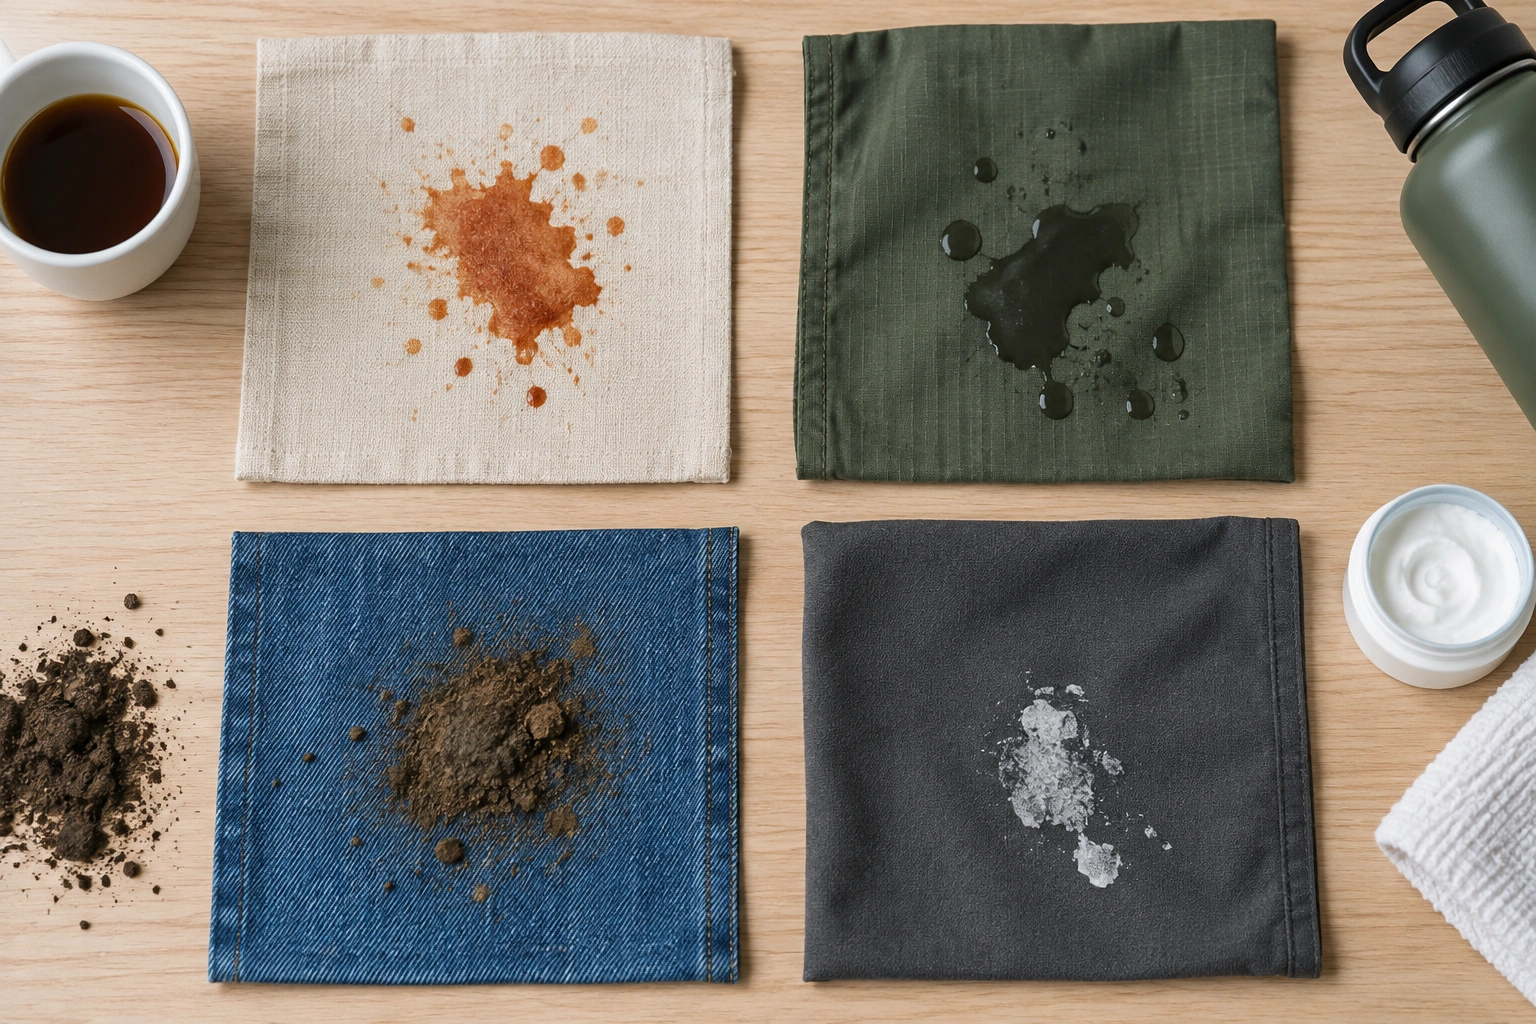
Rust usually needs a different strategy than grease. It often shows up as orange-brown spotting, not a slick patch.
Cotton and many washable synthetics
– Use a rust remover only if the product label says it is safe for the fabric.
– Spot test in an inconspicuous area first.
– Rinse thoroughly after treatment.
Wool, silk, and coated fabrics
– Avoid DIY rust removers unless the product explicitly says it is safe for that material.
– These fabrics can discolor or weaken quickly.
Mixed-material travel gear
– Check whether the mark is actually rust or just orange dye transfer before using a rust-specific product.
– Avoid treating foam, glue, printed trim, or waterproof coatings with rust remover.
Never mix rust treatment with bleach or vinegar unless the product instructions explicitly allow it.
3) Dye transfer
If a light item came out of the dryer with blue, gray, or dark smears, dye transfer is a strong possibility.
The American Cleaning Institute’s stain guide says that if dye remains, you can launder again with sodium hypochlorite bleach if it is safe for the fabric. For non-colorfast fabrics, it suggests soaking in oxygen bleach and then laundering.
That gives you a useful decision tree:
- White, bleach-safe fabric: a bleach option may be appropriate.
- Colored or non-colorfast fabric: oxygen bleach is the safer route.
- Delicates, wool, silk, coated items, or mixed-material gear: avoid bleach unless the care label clearly allows it.
Do not guess on colorfastness. If you’re not sure, skip chlorine bleach and use the gentler option.
4) Detergent or fabric softener residue
If the stain feels chalky, stiff, or streaky, the dryer may have made detergent residue more obvious rather than creating a new stain.
Cotton and washable synthetics
1. Rewash the item with less detergent than usual.
2. Use cool or lukewarm water.
3. Skip fabric softener.
4. Add an extra rinse cycle if the fabric allows it.
Wool and silk
– Do not use a heavy rewash cycle unless the label specifically allows it.
– Use a delicate, wool-safe or silk-safe approach instead.
Coated fabrics and travel gear
– Wipe with a damp cloth and a small amount of mild soap.
– Avoid repeated soaking, which can trap residue in seams or damage coatings.
Residue problems are common on synthetic travel shirts, activewear, and packing cubes because those materials can hold onto product buildup more visibly than cotton.
How to treat stubborn or heat-set stains safely
When a stain has already been through the dryer, patience matters more than force.
A good sequence is:
1. Treat the stain.
2. Rinse or rewash.
3. Air-dry and inspect.
4. Repeat if needed.
That last part matters. If the stain is still visible, it is better to repeat a safe treatment than to throw the item back into high heat and lock it in further. If you try a second round, keep it targeted and gentle rather than increasing heat or scrubbing harder.
A practical stop rule: if a stain does not improve after two careful home attempts, stop and reassess. On cotton or sturdy synthetics, one more cautious attempt may be reasonable if the stain is clearly fading. On wool, silk, coated fabrics, or mixed-material travel gear, repeated attempts are riskier and professional cleaning may be the better next step.
For stubborn oil stains on outerwear, this guide for jacket stains can help if the item is insulated or has a shell that needs gentler handling. If the item is down-filled, the down jacket version is the safer match.
What not to do after a stain has gone through the dryer
A few common mistakes cause more damage than the stain itself.
Avoid these missteps
- Do not re-dry the item before the stain is gone.
- Do not use hot water on a stain you haven’t identified.
- Do not mix bleach with vinegar or ammonia.
- Do not scrub coated fabric aggressively.
- Do not assume chlorine bleach is safe for every fabric.
- Do not soak structured gear without checking the construction.
The reason is straightforward: heat, harsh chemicals, and heavy scrubbing can damage fibers, fade dye, or weaken coatings. On luggage linings and backpack interiors, that can also loosen adhesives or distort padding.
If you’re dealing with travel gear, Samsonite’s luggage care resources are a helpful reminder that manufacturers often treat shell materials, linings, and trims differently. That same logic applies to backpacks and packing cubes.
Practical examples from real life
A white T-shirt with a yellow-brown patch
That is often body oil or sunscreen that got heat-set. Dish soap or enzyme detergent is the right first attempt. If the shirt is bleach-safe and still marked after washing, a bleach option may be appropriate.
A commuter shirt with orange specks
That points more toward rust than grease. Check nearby metal hardware, washer drum spots, or a corroded zipper pull. Use a rust-specific treatment only if the fabric can tolerate it.
A packing cube with a dark smudge
That is often dye transfer from dark clothing or a greasy mark from toiletries. If the cube is synthetic, spot test first. If the fabric is coated, keep water exposure limited.
A backpack lining with a greasy stain
This is often sunscreen, lotion, or snack oil. Blot first, then use a small amount of dish soap on a cloth. Avoid soaking the whole compartment unless the lining is fully washable and unglued.
When the stain may be permanent or needs professional cleaning
Some stains are worth one more careful attempt. Others are better handed off.
Consider professional cleaning or repair help when:
– the item is expensive or irreplaceable,
– the fabric is silk, wool, or “dry clean only,”
– the stain is on a coated or structured travel item,
– the mark is still unclear after a careful first treatment,
– the stain sits on leather trim, foam padding, or printed material,
– you have already done two careful home attempts with no real improvement.
For luggage and travel gear, a repair specialist can sometimes advise whether the issue is surface staining, dye migration, or material damage. If the stain is on a bag you rely on daily, that extra judgment can prevent a small mistake from becoming a permanent defect.
How to confirm the stain is gone before using heat again
Do not trust a quick glance while the item is still damp. Some stains look gone wet and reappear after drying, while others look darker once the fibers are dry.
The safest check is simple:
1. Air-dry the item completely.
2. Inspect it in daylight or strong white light.
3. If any mark remains, treat it again before using the dryer.
4. Only re-dry once you are confident the stain is gone.
That final air-dry step is especially useful on travel clothes and backpack linings because it protects you from locking in a faint stain that would be much harder to remove later.
FAQ
Can a stain still come out after it has gone through the dryer?
Yes, often it can. Dryer heat makes some stains harder to remove, but it does not always make them permanent.
Should I use bleach on a stain that came out of the dryer?
Only if the fabric is bleach-safe and the stain type calls for it. Chlorine bleach is not safe for every fabric, especially delicates, wool, silk, and many coated materials.
Is vinegar a good all-purpose fix?
Not really. Vinegar can help in some cleaning situations, but it is not a universal stain remover, and it should not be mixed with bleach.
What if the stain keeps coming back after washing?
That usually means the stain was not fully removed before drying, or the residue is trapped deeper in the fibers. Repeat the correct treatment once or twice if the fabric is sturdy, then air-dry before trying heat again. If it returns after drying, you may be dealing with deeper residue, dye migration, or material damage.
When should I stop treating the stain myself?
If the item is valuable, delicate, structured, or the stain remains unclear after two careful home attempts, it is worth seeing a professional cleaner or luggage repair specialist.
The main lesson is simple: a stain after the dryer is not always permanent, but it does need a more careful approach than a fresh spill. Identify the stain, match the treatment to the fabric, and keep heat out of the process until the mark is truly gone.