
How to Clean a Leather Backpack Without Damaging the Finish

A leather backpack can handle years of commuting, travel, and daily carry, but only if you clean it the right way. The goal is not to make it look brand new every time. The goal is to remove dirt, sweat, and stains without drying out the leather, dulling the finish, or soaking the seams.
I work on bags for a living, and the mistakes I see most often are simple: too much water, the wrong cleaner, and trying to rush the drying process. Leather is forgiving when you treat it gently. It gets unhappy fast when you scrub it like a kitchen counter.
What You Need to Know Before Cleaning
Before you choose any cleaning method, identify the material and check the care label. This is the first step, not an optional one. Smooth genuine leather, full-grain, and top-grain can usually be cleaned with a damp cloth or a leather cleaner made for bags. Suede and nubuck are different. They have a napped surface that can stain or darken easily, so they need special-care methods instead of the same routine you’d use on a smooth backpack.
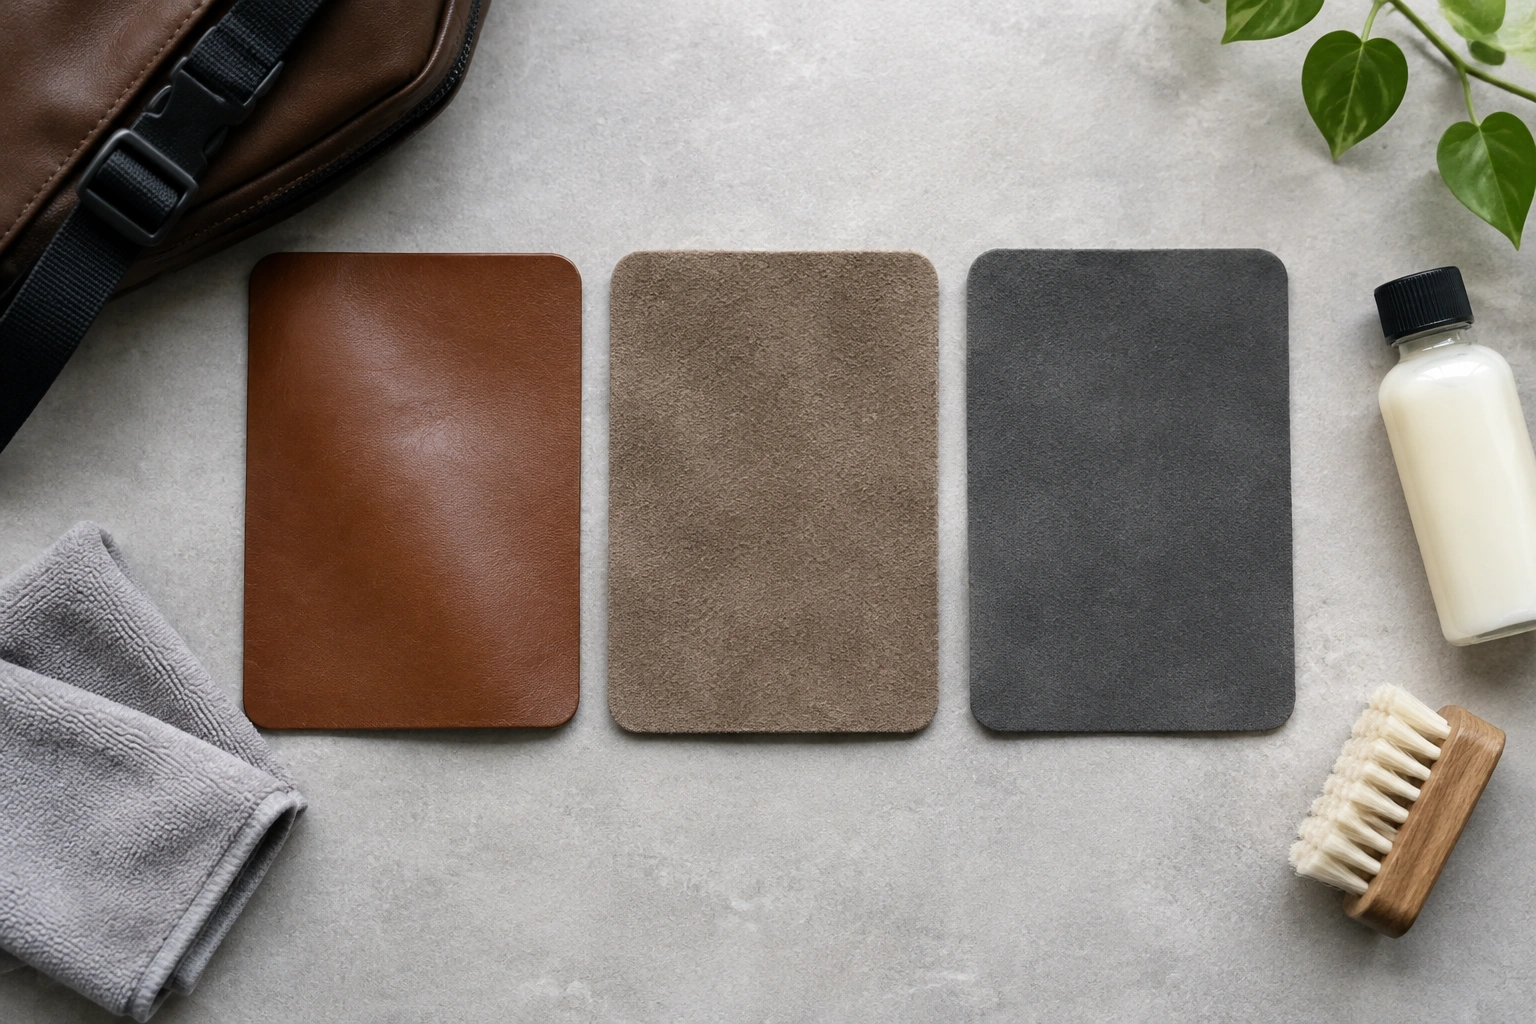
If your backpack has a care label, read it first. Brand instructions matter because finishes vary. Some leather is dyed, some is coated, and some has mixed materials like canvas or nylon panels. Those details change how much moisture the bag can handle and which products are safe.
Mandatory before you begin: patch-test any cleaner on a hidden spot. Put a small amount of cleaner on a cloth, not directly on the leather, and test an out-of-sight area such as the underside of a strap or an inner flap edge. Wait for it to dry fully before you decide whether to use it on the visible surface.
A quick decision rule helps here:
- Smooth leather: usually safe for gentle surface cleaning and leather cleaner
- Suede or nubuck: use special-care methods; do not treat like smooth leather
- Coated or finished leather: clean gently and test first, because the coating can react differently
- Mixed-material backpack: clean each section by material, not all at once
If you are unsure, treat the bag as delicate. That means less pressure, careful product choice, and a patch test before anything goes on the visible surface.
Tools and Materials for Safe Leather Cleaning
You do not need a big kit. You do need the right basics.
Gather these supplies
- Microfiber cloths
- A soft brush for dust and seams
- Distilled water
- Mild soap or a pH-balanced leather cleaner
- Leather conditioner
- A dry towel
- Cotton swabs for tight spots, if needed
A microfiber cloth is the safest everyday tool because it lifts dust without grinding it into the leather. A soft brush helps in seams, around hardware, and along stitching where grime settles. If you use soap, keep it mild and use only a small amount. Gentle cleaners are the better default for leather surfaces.
If you prefer a commercial product, a pH-balanced leather cleaner is often recommended because it is designed for leather surfaces rather than general household grime. The reason that matters is simple: leather is skin-based material, and harsh cleaners can strip oils or leave the surface stiff.
Test the Cleaner on a Hidden Spot First
This step takes a minute and can save the backpack.
Pick a hidden area, such as the underside of a strap, the back panel near the bottom, or a spot inside a pocket flap. Put a small amount of cleaner on a cloth, not directly on the leather. Wipe a small patch, then wait for it to dry fully.
You are checking for three things:
- Color change
- Texture change
- A sticky or cloudy residue
If the test spot darkens too much, looks blotchy, or feels tacky after drying, stop and switch methods. That is especially important with dyed leather and coated finishes. A cleaner that works on one backpack can still be wrong for another.
Leather Cleaner vs Mild Soap and Water
Here is the practical comparison.
Can I use soap and water on a leather backpack? Yes — but only for smooth leather, only with a very mild soap, and only with a cloth that is barely damp. It is not the best choice for suede, nubuck, or a backpack with an unknown finish.
| Method | Best for | Trade-off | Use it when |
|---|---|---|---|
| Leather cleaner | Regular cleaning, visible grime, finished leather | Costs more than soap, but is more predictable | You want the safest dedicated option |
| Mild soap and water | Light dirt when you do not have leather cleaner | Easier to over-wet or leave residue | The bag only needs a gentle surface wipe |
| Special-care suede/nubuck methods | Suede, nubuck, and brushed finishes | Requires different tools and more caution | The backpack is not smooth leather |
For smooth leather, I usually favor a leather cleaner if the bag is genuinely dirty. Mild soap and water can work for light cleaning, but only if the cloth is barely damp and the area is wiped dry afterward.
How to Clean a Leather Backpack Step by Step
This is the safest order for a smooth leather backpack.
1. Empty the backpack completely
Remove everything from the bag, including loose items in side pockets. If there are detachable ornaments or clasps you do not want cleaned, remove them first. Cleaning around forgotten items leads to missed spots and can trap moisture against hardware.
2. Dust the exterior
Use a dry microfiber cloth to wipe away loose dust and surface dirt. Work from top to bottom so you are not dragging grit across the leather. This matters more than people think. If you skip dusting, you can turn harmless particles into fine scratches.
3. Clean the surface with a lightly damp cloth
If the backpack only needs a refresh, dampen a cloth with clean water or your chosen leather cleaner. The cloth should be damp, not wet. Wipe gently in small circular motions. Do not scrub hard. Leather responds better to repeated light passes than to one aggressive wipe.
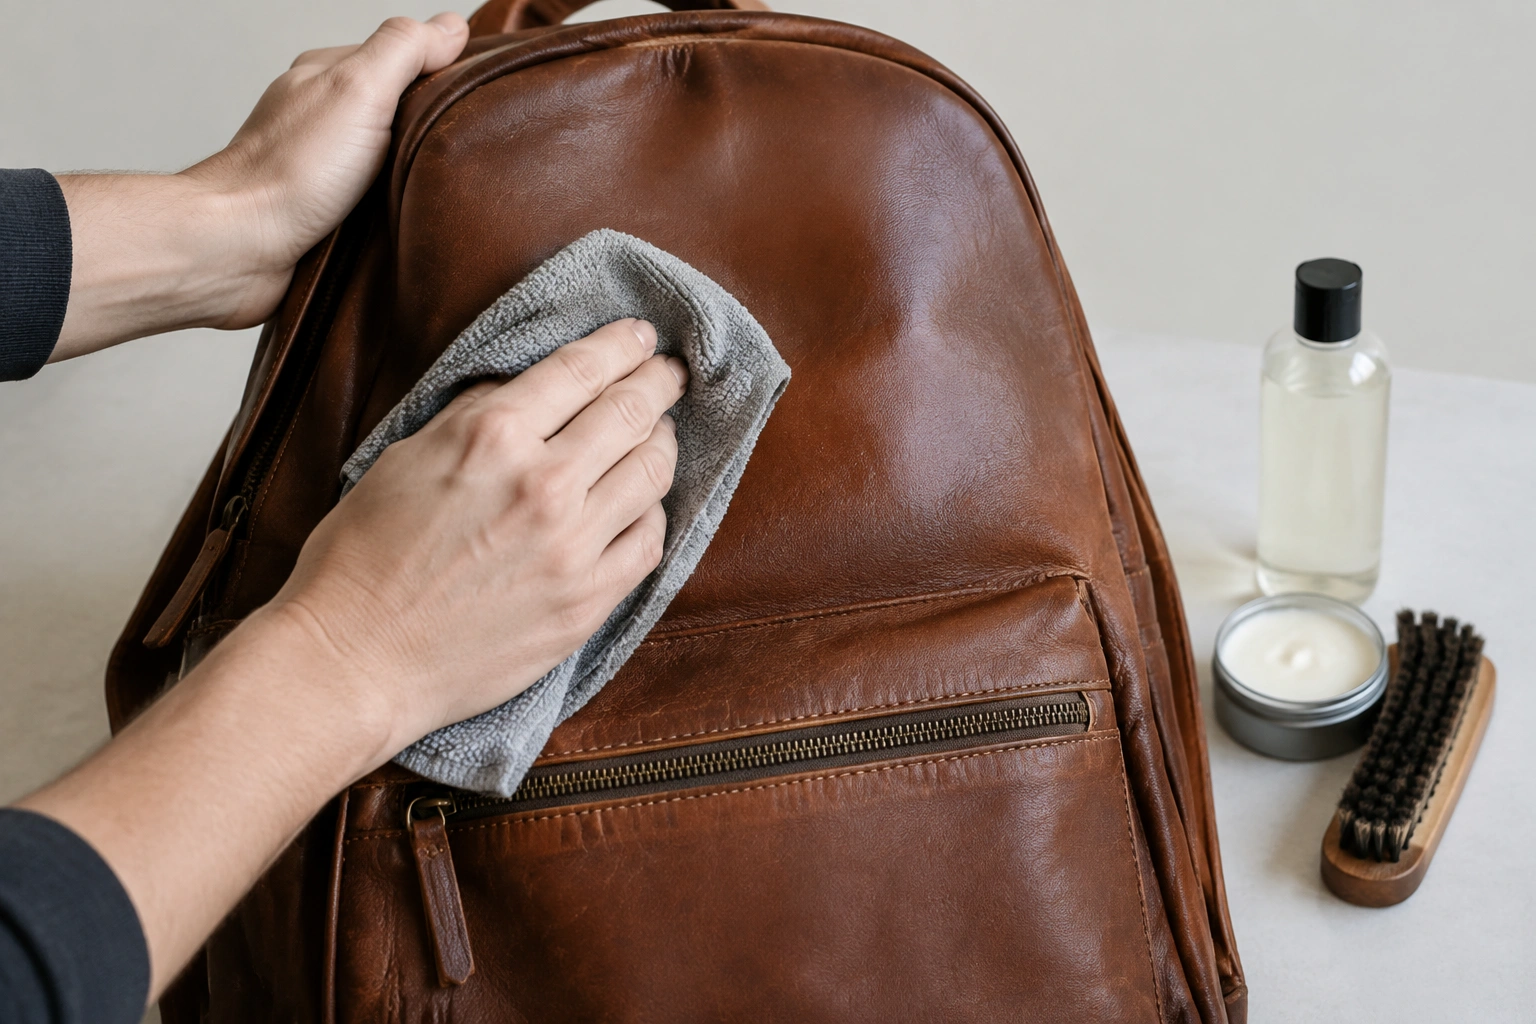
4. Work around seams, straps, and edge folds
Use the corner of the cloth or a cotton swab for stitching lines, seams, and the fold areas near the bottom. These spots collect sweat and dirt, especially on commuter backpacks. Keep the cloth just damp enough to lift grime. If liquid starts pooling in the stitching, stop and dry the area with a clean cloth.
For strap-specific buildup, our guide on how to clean backpack straps goes deeper into sweat marks, edge grime, and safe drying.
5. Wipe hardware carefully
Zippers, buckles, and rivets should be cleaned with a barely damp cloth, then dried right away. Try not to leave cleaner sitting on metal fittings, especially if the backpack has decorative hardware or plated parts. You are cleaning the leather first and only touching the hardware as needed.
6. Let the backpack air-dry
Place the bag in a shaded, ventilated area and let it dry naturally. Do not use a hair dryer, radiator, direct sun, or other heat source.
How to Clean Stains, Marks, and Odors
Not every mark needs the same treatment. A fingerprint is not a coffee stain, and a musty smell is not a grease spot.
Fingerprints and everyday smudges
For light marks, a dry microfiber cloth may be enough. If the mark remains, use a cloth lightly dampened with cleaner and wipe gently. This is usually enough for commuter grime on the front pocket or flap.
Coffee, tea, and food splashes
Spot-clean immediately if you can. Blot first if the spill is fresh. Then use a small amount of leather cleaner on a cloth and work only the stained area. Keep the cleaning zone tight so you do not spread moisture across the whole panel.
Ink, salt, mud, and sweat marks
- Ink: Do not scrub. Ink often spreads fast, so stop if a light wipe does not lift it. DIY cleaning can make a pen mark worse.
- Salt marks: Let the area dry first, then wipe lightly with a barely damp cloth. Salt often leaves a pale line after winter use or sweaty carry.
- Mud: Let mud dry completely, then brush off the loose dirt before wiping. Cleaning wet mud usually smears it deeper into the leather.
- Sweat marks: Use the lightest possible cleaning pass, especially on straps and the back panel. Sweat can discolor leather over time, so avoid repeated soaking.
Oil and grease
Oil is tricky because rubbing can spread it. Some leather-care guides suggest absorbent powders for oil and grease, but that is a case where caution matters. If you try a powder, test first and use it sparingly. If the leather is expensive, soft, or finished in a way that shows marks easily, professional help is the safer route.
Odors and musty storage smells
Open the bag fully and let it air out in a dry room. Wipe the interior with a barely damp cloth if the lining allows it, then let it dry completely. Odor often comes from trapped moisture, not just dirt. If the smell is persistent, check pockets, seams, and the base of the bag for hidden residue.
For a deeper look at interior care, see how to clean backpack lining, which covers the parts that hold onto odors longest.
When to stop DIY cleaning: If the stain is dark, old, spreading, or still visible after one gentle spot-cleaning attempt, stop there. Do not keep scrubbing or saturating the area. That is the point to switch to a specialist or a product made for that specific stain type.
How to Clean the Inside, Zippers, and Mixed-Material Panels
This is where many backpacks get overlooked.
Interior lining
First, identify the lining. A leather-lined interior should be cleaned like the exterior: dry dusting first, then a barely damp cloth only if the finish allows it. A fabric-lined interior can usually handle a more fabric-style cleanup, starting with crumbs and lint removal before any light wiping.
Vacuum crumbs first if the lining is fabric. Then wipe with a lightly damp cloth if the material allows it. Do not soak the lining. If the inside has a strong smell, leave it open for a full dry-out before using it again. A closed, slightly damp bag is how odors linger.
Zippers and pockets
Zipper tracks collect dust and grit. Use a soft brush to loosen debris, then wipe carefully with a cloth. For more detail on stuck grit and zipper-safe cleaning, our article on how to clean backpack zippers is a good companion guide.
Mixed-material backpacks
If your bag has leather plus canvas or nylon panels, treat each material separately. Use the leather method on the leather sections and a fabric-safe approach on the textile parts. Do not wet the entire backpack just because one panel needs attention. Mixed materials dry at different rates, and that can leave water marks or distortion.
How to Dry and Condition the Backpack Properly
Drying is where a lot of damage happens after the cleaning is already done.
Air-dry only
Set the backpack upright or hang it in a well-ventilated area away from direct heat and sunlight. Keep it open so air can move through the interior. If you need to speed the process, use a fan across the room, not directly blasting the leather.
Wait until it is fully dry before conditioning
Conditioner belongs on clean, dry leather. If you apply it too soon, you can trap moisture under the surface. That can leave the backpack feeling greasy or uneven.
Conditioner and cleaner do different jobs. Cleaner removes dirt. Conditioner helps replace suppleness after cleaning. They are not interchangeable. If the leather looks dull or feels dry once it is fully dry, apply a small amount of conditioner according to the product directions. Use less than you think you need. Over-conditioning can attract dirt and make the surface look cloudy.
Common Mistakes to Avoid
These are the habits that shorten a leather backpack’s life.
- Soaking the leather. Water should be controlled, not generous.
- Using alcohol, vinegar, bleach, or harsh disinfectants. These can strip finish or dry the leather.
- Scrubbing hard. Friction can leave shiny patches or roughen the surface.
- Cleaning suede or nubuck like smooth leather. That usually makes the problem worse.
- Skipping the patch test. A small hidden test can prevent a visible mistake.
- Applying conditioner to dirty leather. Conditioner on top of grime can seal in the mess.
- Using heat to dry faster. Heat is one of the quickest ways to stiffen or warp leather.
If you want a simple rule to remember: gentle cleaner, gentle pressure, gentle drying.
Troubleshooting: Dry, Cracked, or Water-Damaged Leather
If the leather already feels dry before cleaning, do not flood it with moisture. Clean it lightly, let it dry, then condition it. That gives the material a better chance to recover without becoming limp or blotchy.
If you see small surface cracks, cleaning will not erase them. At that point, the goal is to stop further drying and avoid pushing dirt into the cracks. Use a conditioner sparingly after the bag is clean and dry. If the surface is cracked but still intact, you can usually stop cleaning and focus on conditioning only.
If the backpack has water rings, warped panels, or a stiff, chalky feel after drying, pause. Those are signs the leather may need professional attention rather than another home treatment.
When to See a Luggage Repair Specialist
Bring the backpack to a specialist if:
- The leather is severely cracked or peeling
- A stain is unknown, dark, or deeply set
- The bag was soaked for a long time
- The finish changed after your patch test
- Hardware or seams were damaged during cleaning
- The backpack is suede, nubuck, or otherwise delicate and you are unsure how to proceed
A repair specialist can often tell you whether the issue is cosmetic, structural, or both. That matters because cleaning the wrong problem can make it harder to fix later.
How Often to Clean and How to Store It
Light maintenance beats occasional rescue cleaning.
For everyday use, wipe the backpack with a dry or slightly damp microfiber cloth whenever you notice dust, fingerprints, or surface grime. A more thorough clean makes sense when the bag starts looking dull or after a stretch of heavy use. The right rhythm depends on how often you carry it, where you use it, and how dirty it gets.
Storage matters too. Keep the backpack in a dust bag, pillowcase, or breathable cover if you are not using it for a while. Store it in a cool, dry place and avoid stuffing it with damp items. If the bag sits unused for months, open it occasionally so moisture does not build up inside.
For more on keeping the interior fresh between cleanings, how to clean backpack pockets helps with the small spaces where crumbs, lint, and odor usually start.
Quick Examples for Real-Life Cleaning
Commuter dust and fingerprints
Wipe the bag with a dry microfiber cloth first. If marks remain, use a lightly damp cloth with leather cleaner and go over the front panel in small circles.
Coffee splash on the front pocket
Blot the spill. Clean only the affected area with a cloth dampened with leather cleaner. Let it dry fully before deciding whether it needs a second pass.
Musty smell after storage
Open the backpack, empty all pockets, and air it out in a dry room. Wipe the interior lightly if needed, then let it dry completely before conditioning the outside.
Grime around zippers and seams
Use a soft brush first, then a barely damp cloth. Do not flood the stitching. Those areas hold moisture longer than the flat leather panels.
A leather backpack can stay in good shape for a long time if you clean it with restraint. The best results usually come from the simplest routine: dust, spot-clean gently, dry slowly, condition only when needed, and store it properly.