
How to Remove Stains from Luggage Without Damaging the Finish

Luggage picks up stains in the real world: coffee at the gate, sunscreen in a side pocket, road grime from a trunk, or scuffs from baggage handling. The trick is not to attack the mark first. It’s to identify what the bag is made of, what kind of stain you’re dealing with, and how much cleaning the surface can tolerate.
That order matters because the wrong cleaner can do more damage than the stain. A hard-shell suitcase can lose its sheen if you scrub it with something abrasive. A fabric bag can wick a stain deeper if you soak it. Leather can darken, dry out, or spot if you use a generic household cleaner. If you want the cleanest result with the least risk, choose the gentlest method that still matches the material and stain.
A useful rule: if you can remove loose dirt with a dry wipe, do that before adding any liquid. Then work in small sections, test first, and stop as soon as the mark lifts. Cleaning luggage is usually about controlled patience, not force.
What You Need to Know Before You Clean
Before you reach for a cleaner, check three things:
- Material
- Hard-shell luggage: usually polycarbonate or ABS plastic
- Soft-sided luggage: often polyester, nylon, or canvas
- Leather or faux leather: needs more caution than fabric
-
Coated or glossy finishes: can scratch or dull easily
-
Stain type
- Dirt and grime
- Scuffs or transfer marks
- Grease or oil
- Ink
- Food or drink spills
-
Water spots or rings
-
Care instructions
- If the tag or manufacturer guide says “spot clean only,” treat that as a limit.
- If a surface has a special coating or printed finish, avoid anything harsh unless the brand explicitly approves it.
If you’re unsure, treat the stain as if the surface is delicate. That usually means mild soap, warm water, a microfiber cloth, and a spot test first.
Choose your method
Use the safest first cleaner below, then move to the next step only if the mark remains.
| Material | Stain type | Safest first cleaner | Next step if needed |
|---|---|---|---|
| Hard-shell (polycarbonate / ABS) | Scuffs, grime, fingerprints | Microfiber cloth with mild dish soap and warm water | Soft brush for texture; magic eraser only on a test spot and with very light pressure |
| Soft-sided fabric (polyester / nylon) | Dirt, food, light spills | Blot, then mild soap diluted in warm water | Fabric-safe spot cleaner after a spot test |
| Canvas | Water marks, dirt, food stains | Gentle spot clean with mild soap and a damp cloth | Clean a wider area if a ring forms; use a fabric-safe cleaner only if allowed |
| Genuine leather | Oil, surface dirt, light marks | Leather-safe cleaner after a spot test | Leather conditioner after cleaning if the manufacturer recommends it |
| Faux leather / coated synthetic | Smudges, light stains | Mild soap and a damp microfiber cloth | Stop if the finish dulls or lifts; use a faux-leather-safe cleaner only if the care label allows it |
For deeper cleaning guidance on the rest of the bag, it can help to pair stain removal with related maintenance like cleaning luggage zippers or cleaning luggage wheels. Dirt around those areas often migrates back onto the shell or fabric.
Tools and Materials for Safe Stain Removal
You do not need a big kit. For most luggage stains, these basics cover the job:
- Microfiber cloths: best for wiping without scratching
- Mild dish soap or mild detergent: good first-choice cleaner for many surfaces
- Warm water: helps loosen grime without the risk of hot-water damage
- Soft-bristled brush or old toothbrush: useful on fabric, seams, and textured areas
- Clean dry towel: for blotting and drying
- Cotton swabs: helpful for tight corners and small marks
Optional items, used carefully:
- Magic eraser: can help with scuffs on hard-shell luggage, but use lightly and test first because it can dull glossy or printed finishes
- Vinegar and water mix: sometimes used for stubborn stains on some luggage surfaces, but it should be tested first and kept away from materials that may not tolerate acidity
- Baking soda paste: sometimes useful on stubborn marks, but it should be used cautiously and never scrubbed aggressively
- Leather cleaner: the safer choice for genuine leather
- Fabric cleaner: useful when soap and water do not lift a stain from soft-sided luggage
- Foaming carpet cleaner: a spot-treatment option for stubborn grease or mystery stains on some fabric luggage, but only if the label and material allow it
If you use a commercial cleaner, read the label before applying it. Product chemistry matters more than brand names. A cleaner that works on polyester may be too harsh for leather or a glossy shell.
Step 1: Spot Test and Prep the Surface
A spot test is the simplest way to avoid a bad surprise. Pick a hidden area: inside a pocket flap, near a seam, or on the bottom edge. Apply a tiny amount of the cleaner, wait briefly, then wipe it away and check for color change, clouding, tackiness, or finish damage.
If the test area looks worse, stop and choose a gentler method.
Once the cleaner is approved, remove loose dirt first. Dry dust, sand, and grit can scratch hard-shell luggage and grind into fabric. Use a dry microfiber cloth or a soft brush to lift it away before any wet cleaning.
Work from the outside of the stain toward the center when possible. That keeps the mark from spreading into a larger halo. On fabric, blotting is usually safer than rubbing. On hard-shell luggage, light wiping is usually enough unless the mark is stuck on.
Step 2: Remove Stains from Hard-Shell Luggage
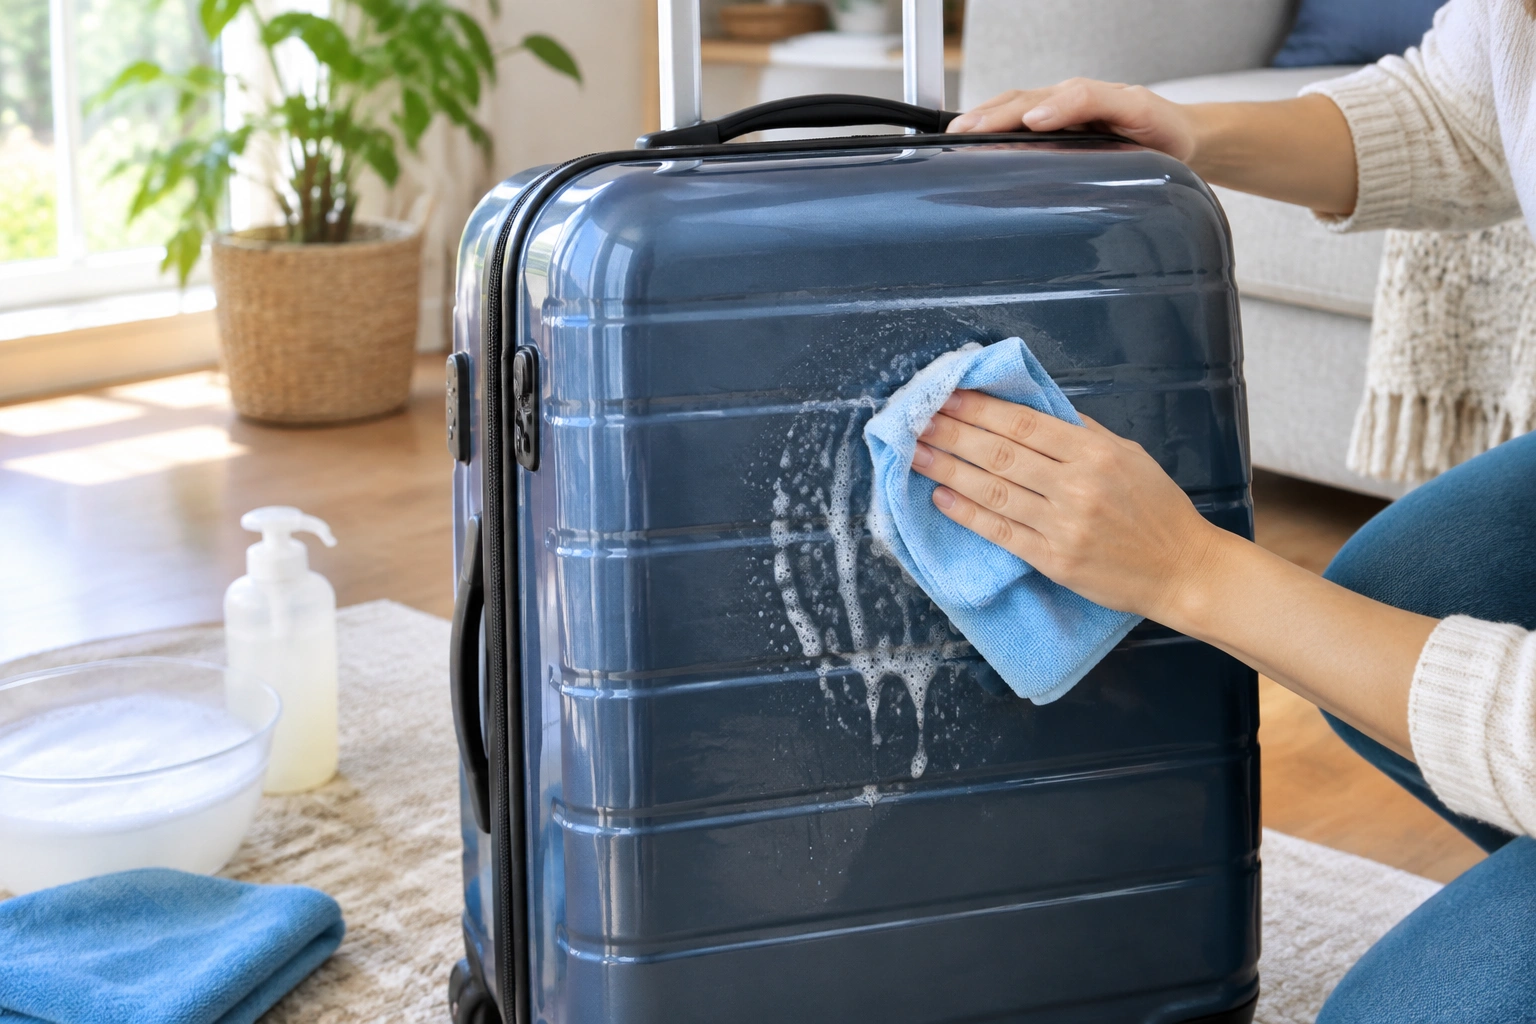
Hard-shell luggage is often easier to wipe clean than fabric, but it shows scuffs and dull patches quickly if you use the wrong tool. Polycarbonate and ABS can both be cleaned gently, but glossy surfaces need extra care.
For light dirt, fingerprints, and smudges
- Dampen a microfiber cloth with warm water.
- Add a small amount of mild dish soap.
- Wipe the stained area gently.
- Rinse the cloth with clean water and wipe again to remove soap residue.
- Dry with a clean towel.
This is usually enough for airport grime, hand oils, and light travel dirt. Eagle Creek recommends mild detergent or dish soap mixed with warm water, applied with a soft cloth or sponge, with a soft-bristled brush reserved for tougher spots and followed by rinsing and towel drying. That approach is a good model for hard-shell exteriors because it keeps abrasion low while still loosening residue (Eagle Creek’s suitcase cleaning guide).
For scuffs and transfer marks
If the mark looks like a black streak from another bag or a rubber transfer mark, try the soap-and-water method first. If that fails, a lightly dampened magic eraser can help on some hard-shell surfaces, but use it sparingly. Test first, and use the lightest pressure possible. Too much friction can leave a dull patch that is more visible than the original scuff.
For stubborn grime
A soft-bristled brush can help on textured hard-shell luggage, but only after a spot test. Use short, gentle strokes. Do not scrub in circles with force. If the finish starts to haze, stop immediately and switch back to a microfiber cloth.
Hard-shell decision rule
- Use microfiber and soap first for nearly everything
- Use a soft brush only for texture or stuck-on dirt
- Use a magic eraser only as a last resort on a test spot
If your suitcase has a very glossy or printed finish, be conservative. The cleaner may remove the mark but leave a visible dull spot behind.
!
Step 3: Remove Stains from Fabric and Soft-Sided Luggage
Fabric luggage absorbs stains more deeply than hard-shell luggage, so the goal is to lift the mark without soaking the bag. That means blotting, not flooding.
For polyester and nylon
- Shake or brush off loose dirt.
- Mix a small amount of mild dish soap with warm water.
- Dip a microfiber cloth or sponge into the solution and wring it out well.
- Blot the stain, working from the outside edge inward.
- If needed, use a soft-bristled brush on the stained area with very light pressure.
- Wipe with a clean damp cloth to remove residue.
- Let the section dry fully before deciding whether to repeat.
Eagle Creek’s guidance for fabric luggage follows this same pattern: mild detergent or laundry soap with warm water, gentle scrubbing, and a rinse with clean water before drying. That method is practical because polyester and nylon usually tolerate light moisture better than more delicate materials, but they still dislike soaking.
For canvas
Canvas can be more absorbent, so a stain may leave a watermark if you clean only the center. If the stain is broad, clean a slightly larger area so the fabric dries more evenly. That reduces the chance of a visible ring.
Use the same mild soap approach, but keep the cloth just damp, not wet. If the stain is old, repeat the process in short rounds rather than drenching the panel.
For soft-sided luggage with seams and linings
Be careful around zippers, piping, and stitched corners. Water can collect there and leave odor or mildew if it stays trapped. Use a cloth instead of pouring cleaner directly onto the bag.
A commuter with a coffee spill on a nylon briefcase, for example, usually gets the best result by blotting the spill first, then cleaning the panel around it with a damp cloth and letting it dry open. That approach is slower than scrubbing, but it protects the shape and lining.
Step 4: Treat Grease, Food, Ink, and Water Stains
Different stains need different tactics. The cleaner that lifts a dirt mark may do almost nothing for oil, and the method that works for ink can spread grease.
Grease and oil
For oil stains, blot first with a dry cloth to absorb as much as possible. Then apply a small amount of mild soap with warm water and dab gently. Carl Friedrik recommends this kind of approach for suitcase oil stains and warns against soaking the material (Carl Friedrik’s suitcase care guide).
If the stain is on fabric and still visible after soap and water, a fabric-safe spot cleaner may help. On leather, use a leather cleaner instead of a kitchen cleaner.
Food and drink stains
For fresh food stains, remove solids first with a dull edge or cloth. Then blot with mild soap and water. If the stain is sugary or sticky, repeat until the residue is gone. Letting sticky spills dry usually makes them harder to remove later.
Ink
Ink is the stain most likely to frustrate a DIY cleanup. Start by blotting gently with a clean dry cloth so you do not spread it. Do not rub, because rubbing usually pushes ink deeper into fabric or across coated surfaces.
What to try first:
– On fabric: a fabric-safe stain remover after a spot test, applied only to the stain
– On hard-shell luggage: mild soap and water first, then stop if the ink has already set
– On genuine leather: a leather-safe cleaner only if the product label allows it
What to avoid:
– Acetone, bleach, and strong solvents unless the manufacturer explicitly approves them
– Scrubbing with a magic eraser on leather or faux leather
– Repeated rubbing if the stain starts to spread
When to stop:
– If the ink has already dried into a large patch
– If the finish starts to dull, smear, or lift
– If the stain is on a premium leather or coated surface and the first gentle pass does nothing
At that point, a specialty cleaner or repair professional is safer than trying multiple home fixes.
Water stains and rings
Water marks can appear on canvas, fabric, or leather-like surfaces after uneven drying. The first step is not more cleaner. It is to prevent a hard edge.
What to try first:
– On fabric or canvas: lightly dampen a wider area around the ring with clean water and mild soap, then blend the whole section so it dries more evenly
– On leather: use a leather-safe product and keep moisture minimal
– On faux leather: wipe with a barely damp microfiber cloth and dry immediately
What to avoid:
– Soaking the spot
– Scrubbing the center only
– Using vinegar or baking soda on leather-like finishes unless the care instructions specifically allow it
When to stop:
– If the mark looks like finish damage rather than a water ring
– If the surface darkens unevenly after the first gentle attempt
– If the stain is on a glossy or coated shell and the area starts to haze
Traveler’s Choice notes that interior stains can come from leaked toiletries and recommends keeping liquids contained before travel, but that is best read as a prevention tip rather than a universal cause for every stain (Traveler’s Choice cleaning guide). Packing liquids carefully can reduce the odds of future marks, especially in the main compartment.
Step 5: Clean Leather and Faux Leather Luggage Safely
Leather is where caution matters most. It can stain, darken, or dry out if you treat it like nylon. Faux leather is more forgiving, but it can still crack or discolor if you use strong chemicals. These materials need separate handling.
Genuine leather
- Dust the surface with a dry microfiber cloth.
- Spot test a leather cleaner in a hidden area.
- Apply a small amount of cleaner to a cloth, not directly to the bag.
- Wipe gently in small sections.
- Dry with a clean cloth.
- If the manufacturer recommends conditioning, use a leather conditioner after the surface is clean and fully dry.
Avoid vinegar, baking soda paste, bleach, and soaking. Those may be fine on some hard surfaces, but leather is not one of them.
Faux leather
Use a lightly damp microfiber cloth with a little mild soap for surface marks. Dry it promptly. If the stain remains, check whether the manufacturer allows a faux-leather-safe cleaner. Some coated materials react badly to strong solvents and abrasive pads.
Safer household options for faux leather are limited to the gentlest ones:
– mild soap and water
– a damp microfiber cloth
– immediate drying with a clean towel
Avoid treating faux leather like genuine leather. Leather conditioners, vinegar mixes, baking soda paste, and magic erasers can damage coated synthetics or leave them looking patchy. If the finish starts to peel, haze, or feel tacky, stop and use a specialty cleaner made for that exact material.
Decision rule for leather-like surfaces
If you can’t confidently tell whether the material is real leather or a coated synthetic, stay conservative. Use the gentlest cleaner that the label allows and avoid anything that strips finish or color.
For brand-specific care guidance, it’s worth checking the maker’s own instructions before testing a stronger product. Samsonite and TUMI both publish material-care information on their sites, and that’s often the safest place to confirm what a particular shell or trim can handle (Samsonite care information, TUMI luggage care resources).
Step 6: Handle Stubborn or Set-In Stains
If mild soap and water do not move the stain, escalate carefully.
A practical order is:
- Repeat the gentle method once more.
- Try a material-appropriate specialty cleaner.
- Use a soft brush only if the material can handle it.
- Stop if the surface starts to change color, haze, or roughen.
Delsey notes that stubborn stains may be treated with a vinegar-and-water mix or a baking soda paste. That can be useful on some surfaces, but it is not a universal fix, so test first and avoid it on leather or finishes that may react badly (Delsey’s luggage cleaning guide).
Traveler’s Choice also suggests foaming carpet cleaner for stubborn grease or mystery stains on some luggage surfaces, left for 2 to 3 minutes, then blotted rather than rubbed and rinsed with a damp cloth. That kind of product can help on durable fabric, but the dwell time and chemistry are exactly why a spot test matters.
When a stain may be permanent
A mark may not be removable if:
– the color has changed from UV exposure or chemical damage
– the coating has been stripped
– the material has etched or dulled
– the stain has soaked so deeply that the fibers are discolored
If the stain does not respond after a careful spot clean, forcing it usually makes the surrounding area look worse.
How to Dry and Finish Luggage After Cleaning
Drying is part of stain removal, not an afterthought. Leftover moisture can create water spots, odors, or mildew, especially in seams and padded sections.
- Open the bag and prop it wide
- Wipe away visible moisture with a dry towel
- Let it air dry fully before storing
- Check corners, pockets, and zipper tracks for trapped dampness

Traveler’s Choice recommends hanging or propping the bag open and air drying fully before storage. That’s a sensible guideline because thick fabric, linings, and seams dry slower than the outer surface, but the exact time will vary by material, room temperature, and airflow.
Do not speed the process with high heat unless the manufacturer says it is safe. Heat can warp some plastics, damage coatings, or dry out leather.
Common Mistakes That Make Stains Worse
Most luggage-cleaning damage comes from trying to hurry the job.
Avoid these errors:
- Scrubbing too hard: can scratch hard-shell finishes or fuzz fabric
- Soaking the bag: can spread stains into seams and linings
- Skipping the spot test: can lead to discoloration or finish damage
- Using bleach or strong solvents: risky for color, coatings, and leather
- Rubbing ink or grease aggressively: often spreads the stain
- Storing the bag while damp: invites odor and mildew
- Using an abrasive sponge on glossy shells: can leave permanent dull spots
If you are cleaning a white or light-colored suitcase, be especially careful with anything that can yellow or cloud the finish. A gentle method that takes two rounds is usually better than a harsh one that leaves a visible patch.
When to See a Luggage Repair Specialist
Some stains are beyond safe home cleaning. A repair specialist or professional cleaner is worth considering when:
- the stain sits on leather or a delicate coated finish
- the material has already changed color
- the surface feels sticky, cracked, or rough after cleaning
- the stain is large, old, or layered with dye transfer
- you are dealing with a premium bag and want to avoid lowering its appearance value
If the bag is otherwise in good shape, a specialist may be able to advise whether the mark is cleanable or whether it has become coating damage. That distinction matters more than the stain itself.
For readers who maintain travel gear regularly, it can also help to keep the rest of the bag in good condition. A clean shell looks better when the wheels and zipper tracks are also maintained, which is why related upkeep like removing hair from luggage wheels and the luggage care category can be useful follow-up reading.
FAQs
Can I use bleach on luggage stains?
Usually no. Bleach can discolor fabric, damage coatings, and weaken materials. If a manufacturer explicitly approves it for a specific surface, follow that guidance exactly. Otherwise, skip it.
Is vinegar safe for luggage?
Sometimes on some fabric surfaces, but not universally. Delsey mentions vinegar-and-water as an option for stubborn stains, yet leather, faux leather, and coated finishes may react badly. Spot test first.
Does baking soda work on luggage stains?
It can help with some stubborn marks, especially on certain fabric surfaces, but it should be used carefully and not scrubbed aggressively. Avoid it on leather unless the manufacturer says it is safe.
Can dish soap damage luggage?
Mild dish soap is often one of the safest starting points when diluted with warm water. The risk comes from over-wetting, using too much soap, or applying it to materials that need specialty care.
How do I clean a white suitcase without yellowing it?
Use the gentlest safe method for the material, test first, and avoid bleach or harsh solvents. Clean the whole affected panel if needed so the finish dries evenly and doesn’t leave a ring.
What if the stain won’t come out?
If mild cleaning does not work after a careful second attempt, the mark may be set-in or the surface may be damaged rather than dirty. At that point, a professional cleaner or repair specialist is the safer next step.
Should I clean the whole bag or just the stain?
Spot clean when the stain is small and isolated. If the stain is on canvas or has left a visible ring, cleaning a broader section can help the surface dry more evenly and look less patchy.
How long should luggage dry after cleaning?
Until it is fully dry inside and out. Air-drying time varies by material, thickness, and airflow, so use the bag’s condition—not a fixed clock alone—as the best guide.