
How to Clean Soft Shell Luggage Without Damaging the Fabric

Soft shell luggage is forgiving in day-to-day travel, but it can be easy to overclean. The goal is not to make it showroom-perfect with aggressive scrubbing. The goal is to remove dirt, stains, and odors while protecting the fabric, stitching, padding, and zippers that give the bag its shape.
Quick answer: soft shell luggage should usually not be machine washed unless the care tag or manufacturer specifically says it is washable. Disinfectant wipes are generally not the best choice for the fabric shell because they can leave residue or affect finishes; a mild soap-and-water wipe is safer. Vinegar is best reserved for specific odor or stain situations on colorfast fabric after a spot test, and it should be avoided on sensitive coatings, trims, or any bag whose care instructions rule it out.
I work on luggage for a living, and the mistake I see most often is simple: people use too much water. Soft-sided bags usually have fabric shells, seams, and padded panels that hold moisture longer than they look. That means a careful hand-cleaning approach is usually safer than soaking, machine washing, or blasting the bag with strong chemicals.
If you want a quick rule of thumb, use the least aggressive method that solves the problem. Light dust and airport grime often need only a vacuum and damp cloth. Set-in stains may need mild soap. Odors may call for deodorizing, but only after the bag is clean.
For care guidance beyond the suitcase body itself, these related guides can help with the parts that collect the most grime: how to clean luggage zippers, how to clean luggage wheels, and how to remove scratches from luggage.
What You Need to Know Before Cleaning Soft Shell Luggage
Before you touch a cleaner, check what kind of bag you have. Most soft shell luggage is made from polyester, nylon, or a canvas-like fabric blend. Those materials usually tolerate gentle soap-and-water cleaning better than harsh solvents, but the exact finish and coating still matter.
A simple material guide helps:
- Polyester: common, fairly durable, and usually the most forgiving for light soap-and-water cleaning. Still avoid soaking if the bag has foam backing or a water-resistant finish.
- Nylon: also durable, but it can be more sensitive to heavy scrubbing and prolonged moisture around seams and padded sections.
- Canvas-like blends: often tougher-looking, but blends may include coatings, prints, or trims that react poorly to vinegar, alcohol, or abrasive cleaners. Treat these as spot-clean only unless the care tag says otherwise.
Read the care tag or manufacturer guide if you can find it. Some bags have water-resistant coatings, laminated panels, or decorative trims that can react badly to vinegar, alcohol, or strong stain removers. If the label says “spot clean only,” treat that as a real limit, not a suggestion.
Hand cleaning is usually the safer choice for soft-sided bags. Machine washing can be tempting because it feels easier, but the agitation and water load can stress seams, warp inserts, and trap moisture in the padding. If your bag is only dusty, lightly marked, or dirty in one area, spot cleaning is the right first move. If the whole exterior has a dull film from travel, a gentle all-over wipe may be better. Save stronger cleaners for stains that remain after the basic pass.
Tools and Cleaning Supplies for Soft Shell Luggage
Gather your supplies before you start so you are not improvising with a too-wet towel or harsh bathroom cleaner.
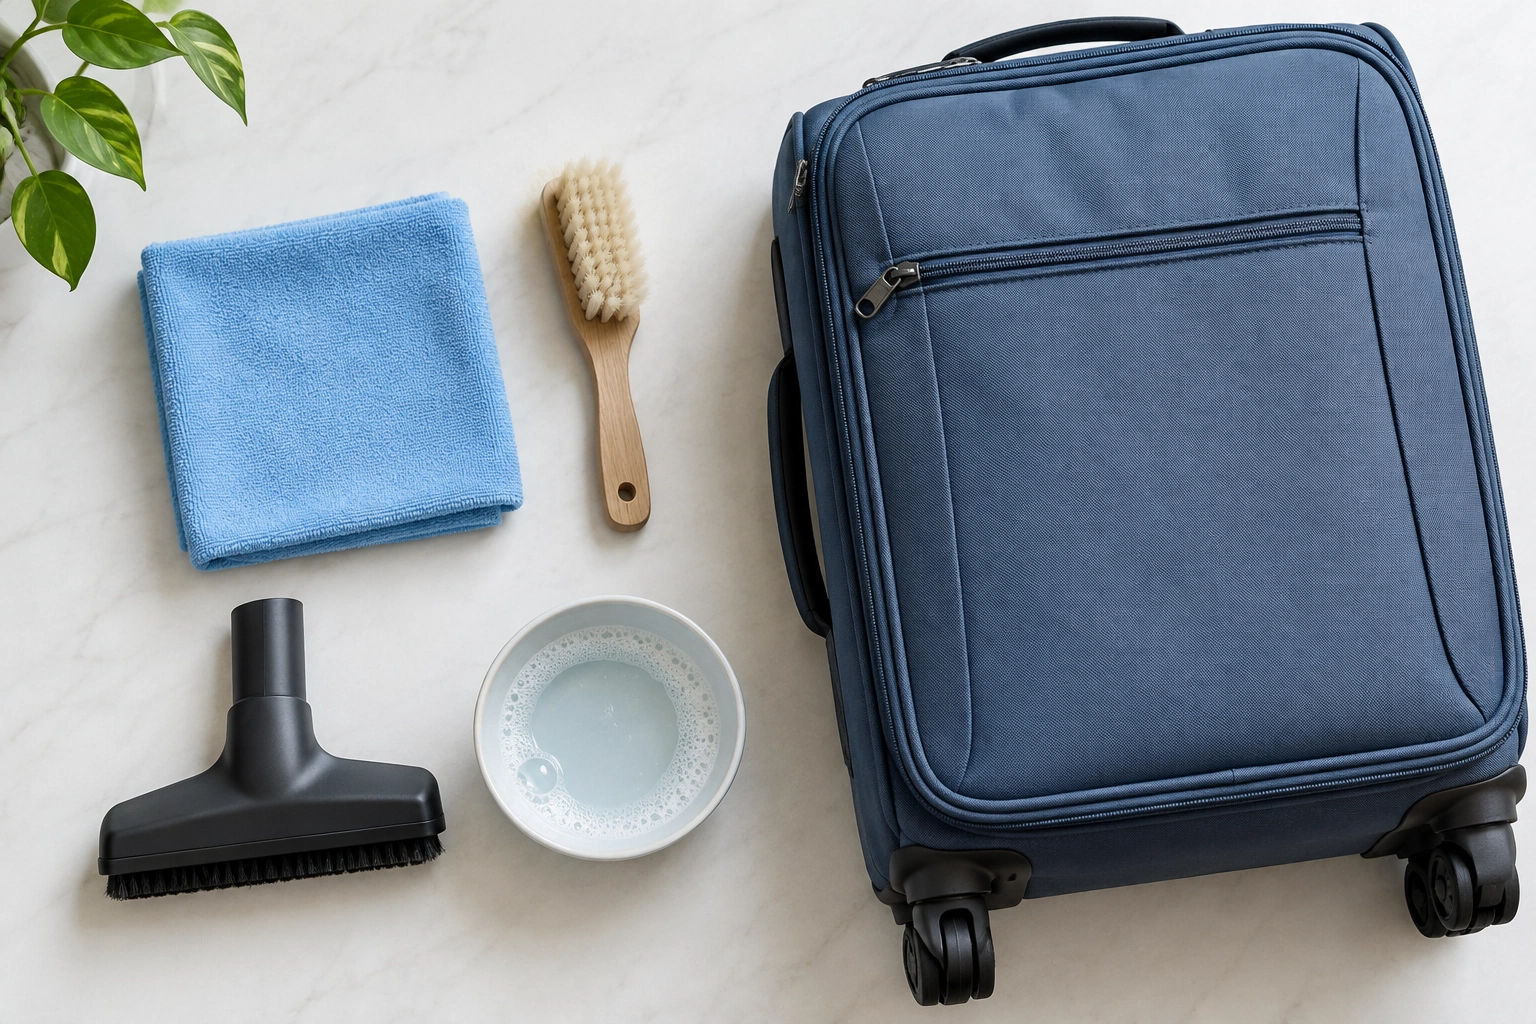
You will usually need:
- A vacuum with a brush or upholstery attachment
- Microfiber cloths or a clean washcloth
- A soft-bristled brush or old toothbrush
- Warm water
- Mild dish soap or mild laundry detergent
- A small bowl for mixing
- Dry towels
- Optional: white vinegar for odor or stubborn marks, if the care label allows it
Avoid anything abrasive. Scouring pads, stiff scrub brushes, bleach, and heavy solvent cleaners can fade color or wear through the fabric surface. If a cleaner is strong enough to strip a kitchen stain in one pass, it is usually too strong for a travel bag.
A small comparison: which cleaner to choose
| Situation | Safest first choice | When to move up | Main trade-off |
|---|---|---|---|
| Light dirt, dust, travel film | Mild soap + warm water | If grime stays after a gentle wipe | Safest for fabric, but may need repeat passes |
| Isolated stain | Spot cleaning with soft brush | If stain is oily or set-in | More targeted, but takes patience |
| Musty odor | Clean first, then deodorize | If smell remains after drying | Odor treatment works best on a clean bag |
| Stubborn marks | Specialty fabric cleaner | If soap does not lift the mark | Stronger cleaning, more need for spot testing |
Spot Test the Cleaner on an Inconspicuous Area
Before cleaning a visible panel, test the solution somewhere hidden, such as the bottom edge, interior hem, or a back corner. Apply a small amount with a cloth, wait a few minutes, then blot it dry.
You are checking for three things: color change, fabric roughening, and any change in the coating or finish. If the test area darkens permanently, looks fuzzy, or feels sticky after drying, stop and choose a milder method.
This step matters more on darker luggage, coated fabrics, and bags with printed logos or contrast trim. A cleaner that works fine on one suitcase can leave another looking blotchy. That is why “spot test first” is not just cautious advice; it is the difference between a cleanup and a cosmetic problem.
How to Clean the Exterior of Soft Shell Luggage
The safest exterior method is vacuum first, then wipe, then spot clean only where needed.
1. Empty the bag completely
Remove everything from every pocket. Check the front compartment, side pockets, and hidden sleeve areas. Loose receipts, crumbs, and dust will get in the way of cleaning if they stay inside.
2. Vacuum the shell and seams
Use a brush attachment or upholstery tool to lift dirt from the fabric surface, stitching, piping, zipper tracks, and corners.
3. Mix a mild cleaning solution
A small amount of mild dish soap or mild laundry detergent in warm water is enough for most bags. The solution should be lightly sudsy, not foamy.
4. Dampen, don’t soak
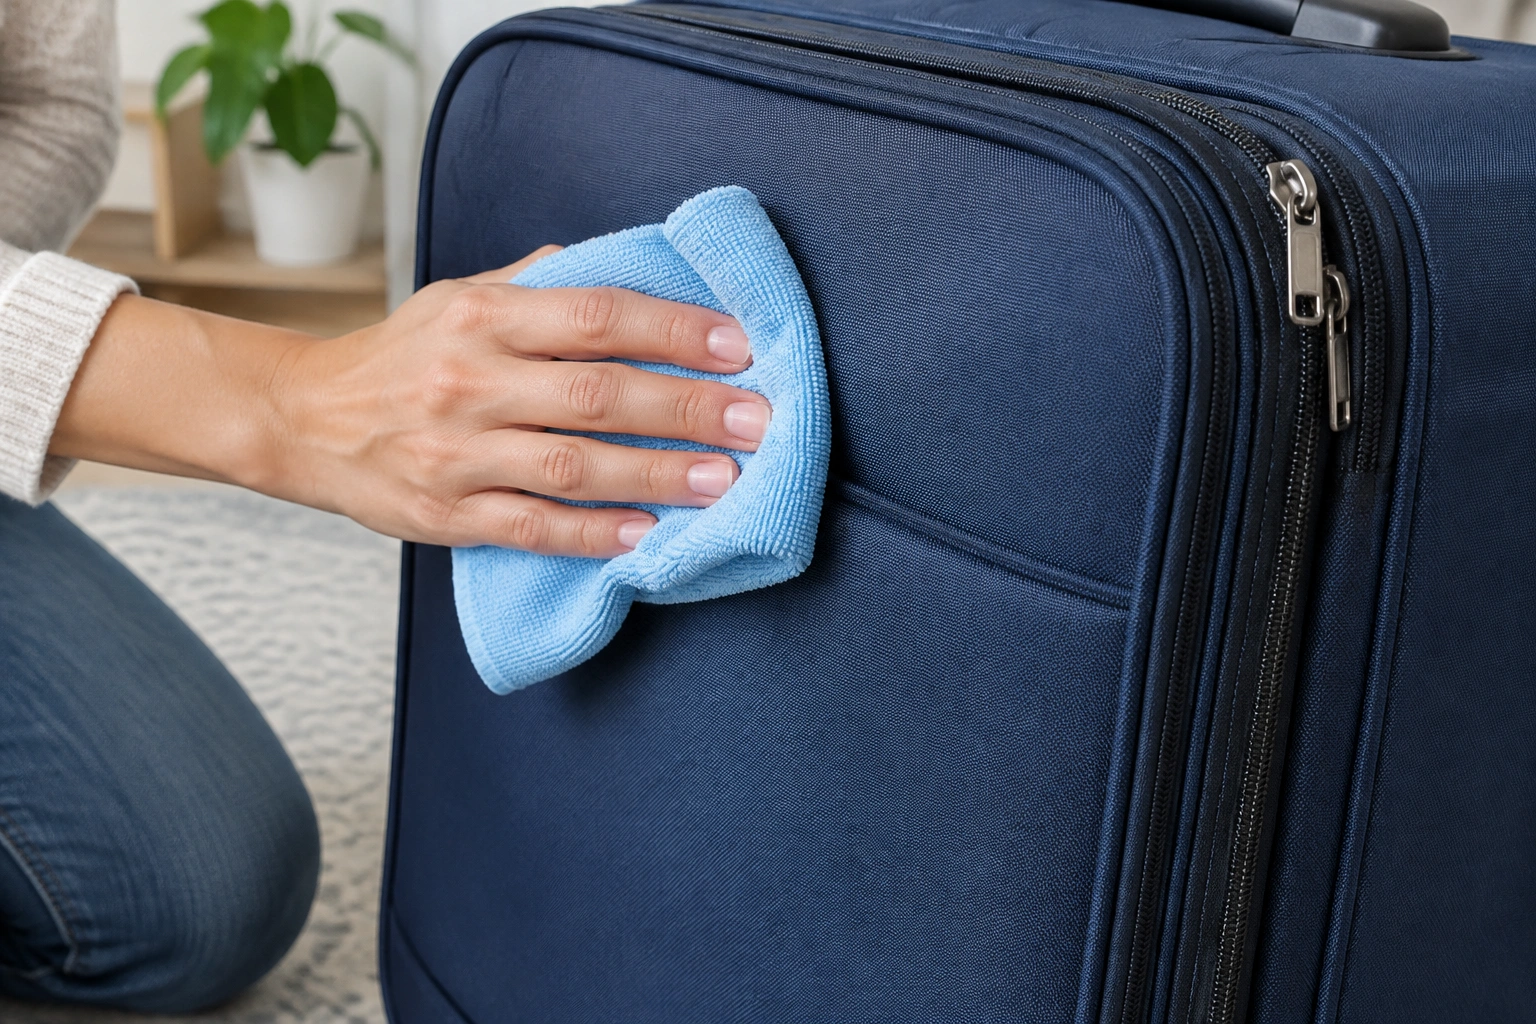
Dip a microfiber cloth or soft brush into the solution, then wring it out well. The cloth should feel damp, not dripping. Wipe the fabric in small sections, following the grain of the weave when possible.
5. Lift dirt with gentle passes
For general grime, use light pressure and short strokes. If the cloth picks up dirt, rinse it and continue with a clean section. For soft shell luggage, less water is usually better than more water. You are cleaning the surface, not washing a blanket.
6. Wipe away soap residue
Use a second cloth dampened with plain water to remove leftover soap. This helps prevent streaks and keeps the fabric from feeling stiff.
7. Blot dry
Press a dry towel into the fabric to pull out surface moisture. Do not rub hard. Rubbing can fuzz the material and spread dampness deeper into the weave.
If your bag has a water-resistant finish, gentle cleaning helps preserve it better than heavy scrubbing, but it does not restore a worn coating. Follow the manufacturer’s instructions if they recommend a product for reapplying water resistance.
How to Clean the Interior Lining and Compartments
Interior cleaning is mostly about removing loose debris before any liquid touches the lining.
Vacuum the inside first, including corners, side pockets, and the seams around internal dividers. A soft brush attachment works well here because it can pull up crumbs without snagging lining fabric. If the bag has removable organizers or liners, check the care tag before washing them separately.
For sticky spills or stains inside, use the same mild soap solution, but apply it sparingly. Dab the mark with a cloth rather than flooding the area. If you over-wet the lining, moisture can migrate into the padding or structure beneath it.
For odors, clean the lining first. Deodorizing a dirty interior is usually a waste of effort because smells cling to residue. Once the lining is dry, you can use a small amount of baking soda in a breathable pouch or leave the bag open in fresh air to help with stale smells.
How to Remove Stains, Scuffs, and Set-In Dirt
Different marks call for different levels of pressure. The key is to match the method to the stain, not to attack every mark the same way.
For fresh dirt or mud
Let mud dry first, then brush off as much as possible. Wet mud tends to smear into the weave and spread the stain. After the dry debris is removed, use mild soap and warm water.
For food, drink, or everyday grime
Soap and water usually come first. Apply the solution with a soft brush or cloth and work in small circles. If the stain lightens but does not disappear, repeat once rather than escalating immediately to a stronger cleaner.
For specific vinegar-safe situations
Vinegar is best reserved for odor-related marks or a stubborn stain on colorfast fabric when soap has already done most of the work. Use it only if the care instructions do not warn against it, and avoid it on sensitive coatings, trims, or printed finishes. If you try vinegar, spot test first and keep the solution mild.
For set-in dirt on durable fabric
A fabric cleaner may help when mild soap is not enough. The label matters here because “fabric cleaner” is not a magic category. Some products are designed for upholstery, some for carpets, and some for general textiles. Spot test first and use the least aggressive formula that still makes progress.
For scuffs around trim and corners
Soft fabric can show gray marks where it rubs against curbs, car trunks, and baggage belts. These are often surface transfers, not true damage. A damp microfiber cloth may lift them. If the mark is on a hard trim piece rather than the cloth shell, use a different method for that material instead of scrubbing the fabric harder.
How to Clean Zippers, Seams, Handles, and Wheels
These high-contact areas collect the most dirt and also fail the fastest if you force water into them.
For zippers, use a dry brush or vacuum first to clear grit from the teeth and track. Then wipe the area with a barely damp cloth. If a zipper feels sticky, clean the track before reaching for lubricant. For a deeper zipper-specific approach, see how to clean luggage zippers.
Seams and piping need extra attention because they trap dust and grime in the folds. Use a soft brush to loosen dirt, then wipe gently. Do not jab water into the stitching.
Handles should be cleaned according to their material. Fabric-wrapped handles can usually handle the same mild soap solution as the shell. Rubberized or plastic grips often need only a damp cloth.
Wheels are a separate job. If the bag is wheeled, clean the wheel housings and nearby fabric carefully so grit does not get pushed back onto the shell. For wheel-specific care, how to clean luggage wheels covers that part in more detail.
How to Remove Odors from Soft Shell Luggage
Odor control works best in this order: clean first, dry fully, then deodorize. If you try to cover up a smell before removing dirt, the odor usually comes back.
For mild stale smells, leave the bag open in a dry, ventilated space. Fresh air does more than people expect, especially after the lining has been wiped and vacuumed.
For stronger odors, baking soda can help absorb lingering smells. Use it in a breathable pouch or sprinkle a small amount inside only if you can vacuum it out later. I would not dump baking soda deep into seams or padding.
White vinegar can help with certain odors, but it is not a universal fix. It may be useful when the smell is sour, musty, or tied to a light stain, yet it can also be too aggressive for some finishes. If the manufacturer does not mention vinegar, use it cautiously or skip it.
If the bag smells smoky or damp even after cleaning, the problem may be trapped moisture rather than surface odor. In that case, drying time matters more than another round of cleaner.
How to Dry Soft Shell Luggage Properly
Drying is not the final step. It is part of the cleaning process.
After wiping and blotting, open every zipper, pocket, and compartment. Stand the bag in a well-ventilated area with good airflow. An open-air spot is better than a closed closet, and a fan can help move air through the lining and seams.
Do not use high heat unless the manufacturer specifically allows it. Heat can distort synthetic fabric, weaken adhesives, or affect coatings. Sunlight can help with drying, but prolonged direct sun may fade color on some bags, so use it carefully.
Before storing the bag, check the seams, bottom panel, and hidden corners. Those are the places where moisture lingers longest. If the bag feels cool or slightly damp anywhere, give it more time.
The core lesson is simple: do not close a soft-sided bag until it is fully dry.
Common Mistakes to Avoid
The biggest errors are the ones that seem efficient in the moment.
- Do not soak the bag in a tub or sink unless the manufacturer explicitly says it is washable.
- Do not use bleach or harsh solvents on fabric luggage.
- Do not scrub with abrasive pads or stiff brushes.
- Do not clean one small stain with a dripping towel and expect the padding underneath to stay dry.
- Do not close the suitcase or store it while it still feels damp.
- Do not assume a “fabric safe” cleaner is safe for every luggage finish.
If you are unsure, return to the basic rule: gentle cleaning, minimal moisture, and a spot test before anything stronger.
Troubleshooting: What to Do If Stains, Odors, or Dirt Remain
If the first pass does not fully work, pause before escalating.
For a stain that is lighter but still visible, repeat the mild soap cleaning once more. Many travel marks come off gradually rather than all at once. The trade-off is time versus fabric wear, and a second gentle pass is usually safer than one aggressive pass.
If the mark remains after two careful attempts, move to a more targeted cleaner only after a spot test. That could mean a fabric cleaner, a vinegar solution for a specific stain, or a different tool for a trim piece. If the cleaner changes the look of the fabric in the test area, stop.
If the odor remains, inspect the bag for hidden moisture in the base, seams, or padding. A bag that smells musty after cleaning often needs more drying time, not more deodorizer.
If dirt keeps reappearing in the same area, the problem may be a seam, pocket edge, or wheel housing that still holds debris. Clean those areas separately instead of reworking the whole exterior.
Routine Maintenance to Keep Soft Shell Luggage Clean Longer
A little upkeep between trips saves a lot of work later.
Wipe the bag down after travel if it picked up airport dust, rain spots, or transit grime. Vacuum the seams and pockets every so often, especially after long trips or family travel. Store the bag in a dry place with some airflow rather than sealing it in a damp closet corner.
Packing accessories can also help keep the inside cleaner by reducing loose debris and spills during travel. They also make interior cleanup easier because crumbs and toiletries stay contained.
When the bag starts looking tired, clean it before the grime becomes embedded. That is the whole maintenance strategy in one line: light, regular cleaning is easier on the fabric than emergency cleaning after a long neglect cycle.
When to See a Luggage Repair Specialist
If the fabric is separating, the seams are opening, the lining is torn, or the bag still smells damp after thorough drying, it may need more than home cleaning. A repair specialist can tell you whether the issue is surface grime, trapped moisture, or hidden damage in the padding or structure.