
How to Remove Sweat Stains from Clothes Without Damaging the Fabric

Sweat stains are one of those laundry problems that look simple until they’ve been through a dryer cycle and turned stubborn. The good news: a lot of shirts, uniforms, and everyday layers can still be saved if you treat them the right way for the fabric and the stain age.
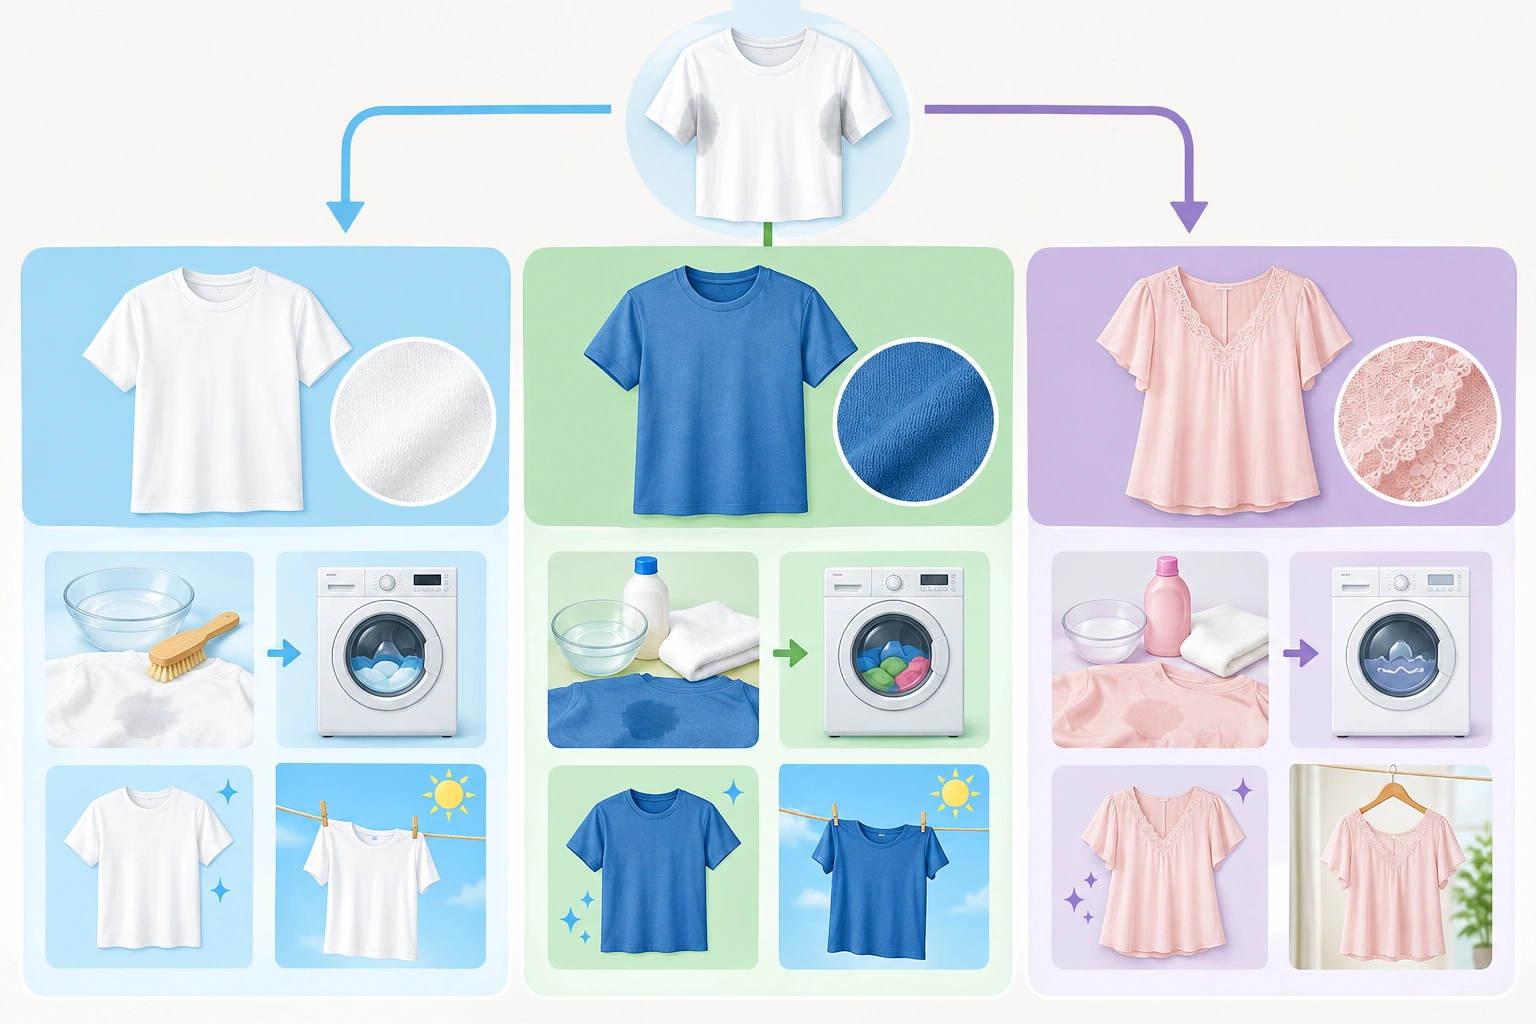
If you wear the same work shirt through a commute, pack clothes for travel, or deal with kids’ uniforms that get worn hard, the goal is the same: remove the yellowing, clear the odor, and avoid weakening the fabric in the process. That means choosing a method based on what you’re actually seeing, not just grabbing the strongest cleaner in the house.
What Causes Sweat Stains and Why They Turn Yellow
Sweat itself is usually not the whole stain. The discoloration often comes from a mix of sweat, body oils, and deodorant residue sitting in the fibers. Over time, that buildup can oxidize and show up as yellow underarm marks, especially on light shirts.
Odor is a separate problem, but it’s related. If the residue stays in the fabric, it can hold onto smell even after a normal wash. That’s why a shirt can look “clean” but still smell off when it warms up again.
For travelers and commuters, the practical takeaway is simple: the longer a sweaty shirt sits, the more time those residues have to bond with the fabric. Vanish advises rinsing the underarm area if you’ve been sweating and not letting sweaty shirts sit too long before washing. A quick rinse or pre-treatment step is usually the best first move.
Quick Treatment Flow
If you want the fastest practical path, use this sequence:
-
Identify the fabric.
Check the care label first. White cotton, colored washable fabric, delicates, and dry-clean-only garments all need different handling. -
Pre-treat the stain.
Choose the mildest effective option for the fabric: vinegar, baking soda paste, hydrogen peroxide for whites, oxygen bleach, or an enzyme cleaner. -
Soak or spot-treat.
Soak sturdy washable items when the label allows it. Spot-treat delicates or color-sensitive items instead of soaking them. -
Wash.
Use the warmest water the care label allows and normal detergent. -
Inspect before drying.
Air-dry or hang the item until you confirm the stain is gone or clearly fading. -
Repeat if needed.
If the stain remains, treat it again before using the dryer.
Before You Start: Check the Fabric Care Label and Gather Your Supplies
Before using any stain treatment, check the care label. That label tells you whether the garment can handle warm water, soaking, or stronger cleaners. Maytag recommends checking the clothing’s care label before treating, including for dry-clean-only items.
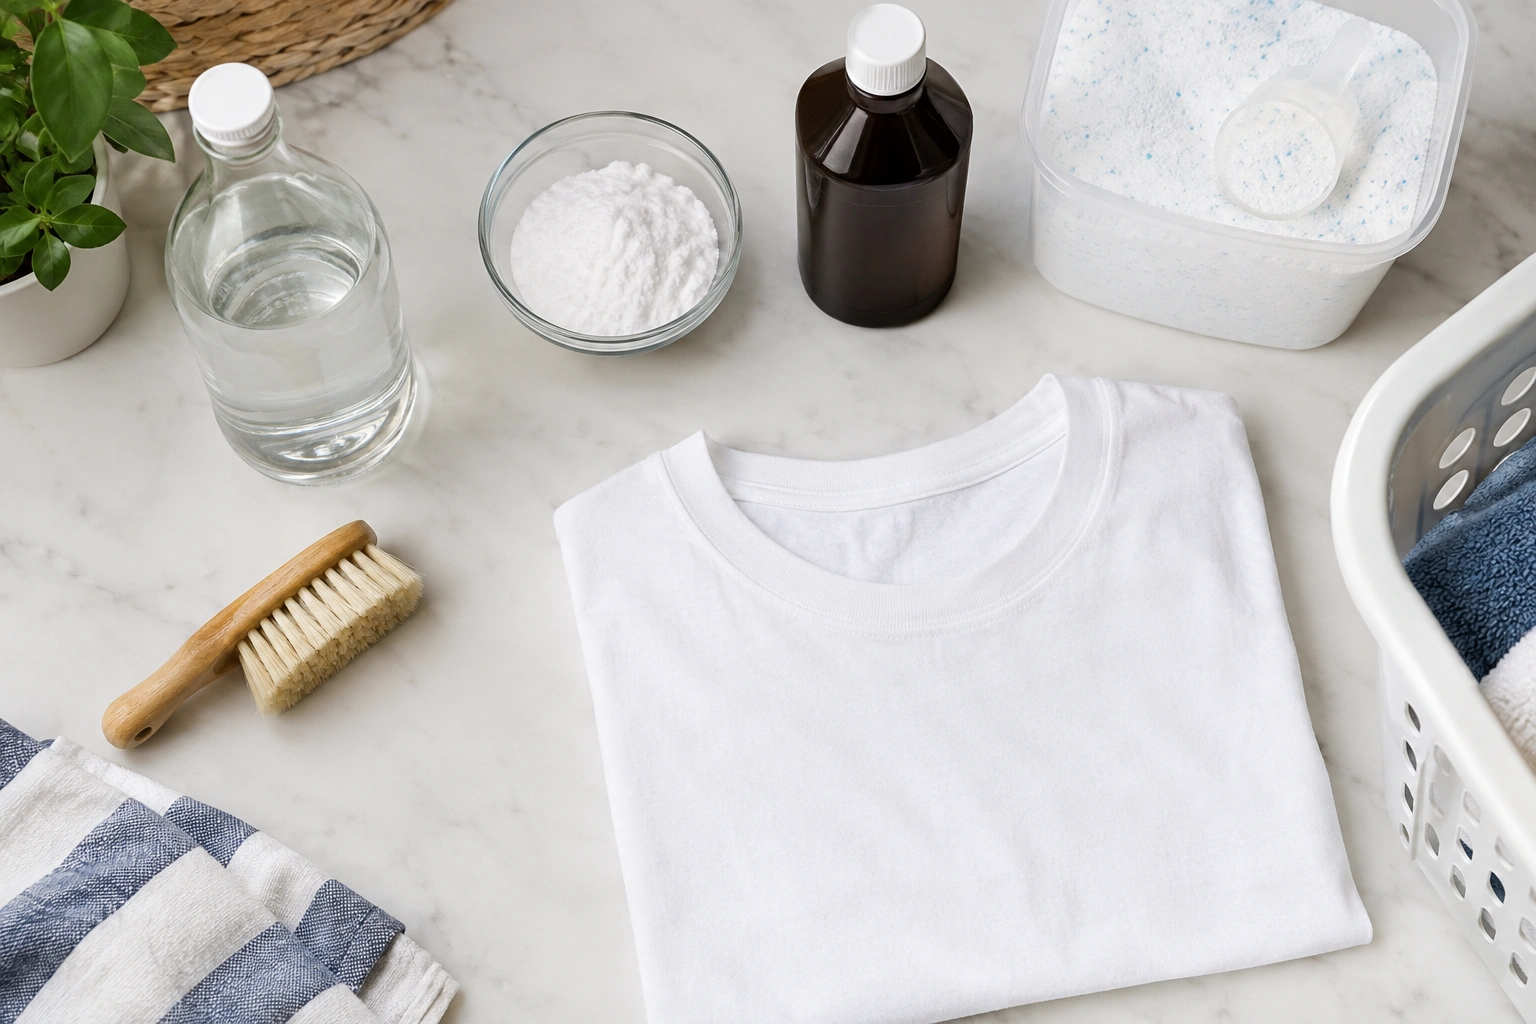
You’ll also want a few basic supplies ready:
- White vinegar
- Baking soda
- Hydrogen peroxide
- Oxygen bleach
- Laundry detergent
- A soft brush or old toothbrush
- Clean white cloths or towels
- A bowl or basin for soaking
If the item is delicate, skip aggressive scrubbing. For silk, wool, or anything labeled “dry clean only,” spot-test only if the care label and fabric type make that reasonable; otherwise, professional cleaning is the safer choice.
A useful rule: if the fabric is expensive, dyed in a way you’re unsure about, or already weakened, choose the gentlest method first and test in a hidden spot.
Choose the Right Treatment for Your Fabric and Stain Type
Use this decision rule:
- Fresh stain on washable fabric: pre-treat quickly, then wash.
- Yellow underarm stain on white cotton or similar white washable fabric: use a stronger whitening approach, usually oxygen bleach or a peroxide-based treatment if the care label allows it.
- Colored clothing: use gentler methods first and avoid anything that risks fading.
- Delicates: spot-test only, then stop if the fabric shows any color change, texture change, or water spotting.
- Old or heat-set stain: expect to repeat treatment more than once, and know that complete removal may not happen.
Here’s the practical trade-off: stronger methods can work faster on white, sturdy fabrics, but they also carry more risk. Gentler methods are safer for color and delicate fibers, but they may need more patience.
Quick Comparison of Common Sweat-Stain Treatments
| Method | Best for | Safe for | Main trade-off | Safety notes |
|---|---|---|---|---|
| White vinegar | Fresh stains, light odor, many washable fabrics | Many cotton, polyester, and other washable fabrics; spot-test on color-sensitive items | Mild; may need repeat treatment | Use diluted, and test first on colorfast items |
| Baking soda | Odor and surface residue | Many washable fabrics when used gently | Slower on deep yellowing | Best as a paste or booster, not a miracle fix |
| Hydrogen peroxide | White fabrics, visible yellowing | White cotton and other bleach-safe whites | Can affect some dyes and finishes | Test on hidden area first; avoid on silk, wool, and many colored fabrics |
| Oxygen bleach | White clothes and many washable fabrics | Many white cottons and some colorfast washable fabrics, if the label allows | Usually slower than chlorine bleach | Follow label instructions carefully |
| Chlorine bleach | Some white cottons only | Limited to bleach-safe white fabrics | Highest risk of fabric damage and dye loss | Avoid on many fabrics, blends, and colors |
| Enzyme cleaner | Sweat residue and odor on washable clothes | Many washable fabrics | Product quality varies | Good option when smell is the main problem |
Cleaner-by-Cleaner Guidance
White vinegar
Vinegar is useful for breaking down residue and deodorizing. Red Kap says that for particularly difficult sweat stains, you can soak the garment in a mixture of one part vinegar to two parts water for 20 minutes, then use the same air-dry method. That’s a solid option for sturdy washable items.
Baking soda
Baking soda can help lift residue and tame odor. It’s often used as a paste or as part of a wash boost. It is most useful for surface residue and smell, not as a stand-alone fix for deep yellowing.
Hydrogen peroxide
Hydrogen peroxide can be effective on white fabrics because it helps break down discoloration. It is a better fit for white cotton and other bleach-safe whites than for colored garments or delicate fibers.
Oxygen bleach
Oxygen bleach is a strong option for many washable whites and some colorfast items. It’s usually less aggressive than chlorine bleach and is often the better first whitening choice when the label allows it.
Chlorine bleach
Chlorine bleach is the most aggressive option, but it’s also the riskiest for fabric strength and dye. Use it only when the care label clearly allows it and the garment is truly bleach-safe.
Enzyme cleaners
Enzyme cleaners are designed to break down organic residue, which makes them useful when odor is part of the problem. They can be a good choice for washable clothes when the stain is not deeply yellowed but still smells.
One safety rule matters here: don’t mix cleaning agents unless the product label specifically says you can. In particular, avoid combining bleach with vinegar or other cleaners in the same treatment.
Fastest Method for Fresh Sweat Stains
If the stain is recent and the garment is washable, act before it dries in. That usually gives you the best chance of removing both the visible mark and the odor-causing residue.
-
Rinse the underarm area with cool water.
This helps flush out loose residue before it settles deeper. -
Apply a simple pre-treatment.
A diluted white vinegar solution is a common option. Whirlpool recommends soaking in a white vinegar and water solution, then scrubbing with a stain-removal paste before washing. Their guidance is to follow the care label and air-dry afterward. -
Let it sit briefly.
For fresh stains, a short soak or dwell time is usually enough. You don’t need to leave it overnight unless the stain is older. -
Wash using the warmest water the label allows.
Wirecutter notes that warm water helps break down body oils better than cold water, but the fabric’s care label should still decide the temperature. Check the garment material and wash instructions first. -
Inspect before drying.
Air-dry until you know the stain is gone. If you can still see yellowing after washing, do not send it to the dryer yet.
For a white tee worn on a hot commute, this routine may be enough if you catch it quickly. For a school shirt or undershirt with repeated buildup, you may need a longer soak or a stronger method.
How to Remove Yellow Underarm Stains from White Shirts
White shirts are the easiest place to see sweat buildup, but they’re also the most forgiving if the fabric is sturdy and washable.
A stronger approach for white cotton or similar bleach-safe fabrics is oxygen bleach. OxiClean says to soak sweat-stained whites for 1 to 6 hours, checking the armpits and other yellow stains, then wash as usual. It also recommends using the warmest water temperature allowed by the garment’s washing instructions and adding OxiClean White Revive according to label directions for an extra boost. See the full method here.
Here’s a practical workflow:
- Check the care label.
- Pre-soak the shirt in an oxygen-bleach solution, following the product label.
- Focus on the underarm area when checking progress.
- Wash in the warmest safe water.
- Air-dry and inspect before using heat.
Hydrogen peroxide can also be appropriate for white shirts when the fabric is bleach-safe and the care label does not prohibit it. It is best used as a spot treatment or part of a pre-treatment on white cotton and similar whites. It is not a good choice for many colored fabrics, silk, wool, or items that may be damaged by oxidizers.
If oxygen bleach does not fully remove the stain, repeat the soak before moving to a harsher option. Chlorine bleach should not be the automatic next step; it is only appropriate when the garment label clearly allows it and the fabric is truly bleach-safe.
How to Treat Sweat Stains on Colored Clothes and Delicates
Colored clothes need more caution because the same treatment that lifts yellowing can also pull dye. Delicates need caution because friction, soak time, and strong oxidizers can weaken fibers.
For colored washable clothes, start with a mild vinegar solution or a detergent-based pre-treatment. The Tie Bar recommends equal parts distilled white vinegar and cool water, dabbed onto the stain, left for a few minutes, then rinsed and washed according to the care tag. That’s a reasonable low-risk first step for dress shirts. An enzyme cleaner is also a good option when odor is part of the problem.
For delicate fabrics such as silk, wool, lace, or embellished garments, do not assume a soak is safe. Spot-test a hidden area first if the care label suggests home treatment may be possible. If the fabric changes color, texture, or sheen, stop and use professional cleaning instead.
A good practical rule:
– Colorfast cotton or polyester: mild vinegar or enzyme cleaner first.
– Delicates that are not dry-clean-only: spot-test only, then use the gentlest possible treatment.
– Dry-clean-only items: do not use DIY soaking; professional cleaning is the better choice.
– Anything with uncertain dye stability: avoid soaking until you know how it reacts.
How to Handle Old, Set-In, or Heat-Set Sweat Stains
Old stains are harder because the residue has had time to bond with the fabric. Heat-set stains, especially those that have already gone through a dryer, are harder still.
That doesn’t mean the shirt is hopeless. It does mean you should expect improvement, not instant perfection. Heat-set stains may still improve with repeated treatment, but they may not disappear completely.
For set-in stains:
– Pre-soak longer, using the product label as your guide.
– Wash, then inspect before drying.
– Repeat the treatment if the stain has faded but not disappeared.
– Switch methods if one pass does nothing.
OxiClean’s guidance for sweat-stained whites allows soaking for 1 to 6 hours, which gives you a practical range for older buildup on suitable fabrics. That kind of longer soak is often more realistic than a quick wash.
If the shirt has already been dried and the stain is still there, don’t scrub harder right away. Re-treating is usually safer than rough abrasion, which can thin the fabric or create a lighter patch around the stain.
How to Wash and Dry the Garment After Treatment
After pre-treatment, wash the garment according to the care label and the fabric’s limits. Use enough detergent to clean the residue, not just the visible mark.
Then inspect before drying:
– If the stain is gone or greatly reduced, air-dry or dry as directed.
– If any yellowing remains, repeat treatment.
– If the odor is gone but the stain remains, the cleaner handled the smell but not all the discoloration.
Air-drying is the safer call until you’re sure the stain is out. Whirlpool specifically recommends air-drying after its vinegar-and-paste method, and that advice is worth following because dryer heat can make a stubborn stain harder to remove later. Use the dryer only after you’ve checked the result.
Common Mistakes to Avoid
A few laundry mistakes cause most sweat-stain failures:
- Drying too early. Heat can lock in discoloration.
- Using the wrong method for the fabric. White cotton and silk are not treated the same way.
- Mixing cleaners. This can create unsafe reactions or damage fabric.
- Scrubbing too hard. That can fuzz fibers or leave a worn patch.
- Ignoring odor. If the smell remains, residue is still in the cloth.
- Treating only the visible yellowing. The buildup often extends beyond the obvious spot.
If you’re unsure, test on a hidden seam before treating the whole underarm area.
Troubleshooting Stubborn Stains and Lingering Odor
If the stain is still there after one treatment, use the result to guide the next step:
- Faded but not gone: repeat the same method once more.
- Odor gone, stain remains: switch to a whitening or oxidizing treatment.
- Stain gone, odor remains: use an enzyme cleaner or longer wash cycle.
- No improvement at all: the fabric may need a different approach, or the stain may be too set for home treatment.
For a travel shirt that’s been worn multiple days, odor often lingers because the residue is deeper than the visible stain. In that case, a detergent wash alone may not be enough; you need a pre-treatment that targets the buildup.
How to Prevent Sweat Stains from Coming Back
Prevention is mostly about reducing buildup before it hardens.
A few practical habits help:
– Rinse or pre-treat sweaty underarms as soon as you can.
– Don’t leave worn shirts balled up in a gym bag or suitcase.
– Wash sweat-prone items before the residue has days to set.
– Consider an undershirt for shirts you want to keep looking sharp. Whirlpool also suggests wearing a sweat-proof undershirt and changing deodorant if stains keep returning. That can reduce direct contact with the outer shirt.
If you’re dealing with white shirts often, our guide on how to remove stains from white clothes can help you keep bright fabrics from slowly turning dull.
When to Use a Professional Cleaner
Use a professional cleaner when the garment is dry-clean-only, the fabric is silk, wool, or another delicate fiber you don’t want to risk, or the stain is on a valuable item where a failed DIY attempt would matter.
Professional cleaning is also worth considering if you’ve already tried careful home treatment twice and the stain has barely changed. At that point, more home scrubbing may do more damage than good. A cleaner may still not guarantee complete removal, but they can use methods better suited to the fabric and stain.
FAQs
Do sweat stains come out after they’ve been washed and dried?
Sometimes, yes. But once heat has set the stain, it usually takes more than a normal wash. Re-treatment and air-drying between attempts give you the best chance.
What removes yellow underarm stains best on white shirts?
For sturdy white washable fabrics, oxygen bleach is often the most practical stronger option. OxiClean recommends soaking whites for 1 to 6 hours, then washing as usual.
Can I use vinegar, baking soda, hydrogen peroxide, or bleach?
Yes, but not interchangeably. Vinegar is a mild pre-treatment, baking soda helps with odor and residue, hydrogen peroxide can help whites, oxygen bleach is often safer than chlorine bleach, and chlorine bleach should be used only when the care label allows it.
How do I treat colored clothes without fading them?
Use the mildest workable method first, such as diluted vinegar or an enzyme cleaner, and test in a hidden spot. Avoid strong oxidizers unless the label and fabric are clearly compatible.
What if the stain smells but doesn’t look very bad?
That usually means residue is still in the fabric. An enzyme cleaner or a longer pre-treatment often helps more than another plain wash.