
How to Clean Fabric Luggage Without Damaging the Material

Fabric luggage takes a beating in ways hard-shell bags usually don’t. It picks up airport grime, commuter dust, food spills, pet hair, and the occasional mystery stain from a hotel floor or car trunk. The good news: most soft-sided bags can be cleaned safely at home if you use the right amount of moisture and avoid the usual mistakes.
This guide focuses on soft-sided luggage made from common fabrics like polyester, nylon, canvas, and blended materials. The goal is not to make the bag look factory-new. The goal is to remove dirt, stains, and odors while protecting seams, zippers, labels, foam, and any water-resistant coating.
If you also want a deeper clean for related gear, these guides can help later: how to clean luggage zippers, how to clean luggage wheels, and how to clean a travel backpack.
What You Need to Know Before Cleaning Fabric Luggage
Before you touch a cleaner, check the care label. That one tag tells you whether the manufacturer expects spot cleaning, hand cleaning, or something more limited. If the label is missing or unreadable, assume the safest route: gentle hand cleaning with minimal water.
Quick decision tree:
1. Check the care label.
2. Identify the fabric and any coating or padding.
3. If the bag only needs light dirt removal, spot clean first.
4. If the label allows hand cleaning and the bag is not machine-washable, use a damp cloth or soft brush with minimal water.
5. Only machine wash if the care label explicitly says the bag or a removable component can be machine washed.
[IMAGE]
Fabric luggage is usually made from polyester, nylon, canvas, or a blend. Polyester and nylon generally tolerate light cleaning better than you might expect, but canvas often holds moisture longer and can take more time to dry. That matters because the more water a bag absorbs, the longer seams, padding, and glued areas stay damp.
A simple rule helps here: spot clean when the issue is small and localized, hand clean when the bag needs a broader refresh, and avoid wet cleaning altogether if the care label warns against it or if the bag has delicate backing, foam, or specialty trim that could be damaged by moisture.
Hand cleaning is usually safer than machine washing for soft-sided luggage. Brands that publish cleaning guidance often recommend vacuuming first, then spot-cleaning with mild detergent, warm water, or a fabric cleaner, and letting the bag dry completely before storage. Traveler’s Choice also warns that bleach or harsh chemical cleaners can discolor fabric and weaken fibers, and that storing luggage before it is fully dry can allow mold to grow in a dark space.
Machine washing can be tempting if the bag is badly dirty, but it comes with trade-offs. A washer can be too rough for foam panels, stiffeners, glued trim, labels, and zippers. It may also leave the bag misshapen or keep moisture trapped inside the lining. If the care label explicitly allows machine washing for a removable liner or component, that is a different case. The whole bag is usually a hand-cleaning job.
Tools and Materials for Safe Luggage Cleaning
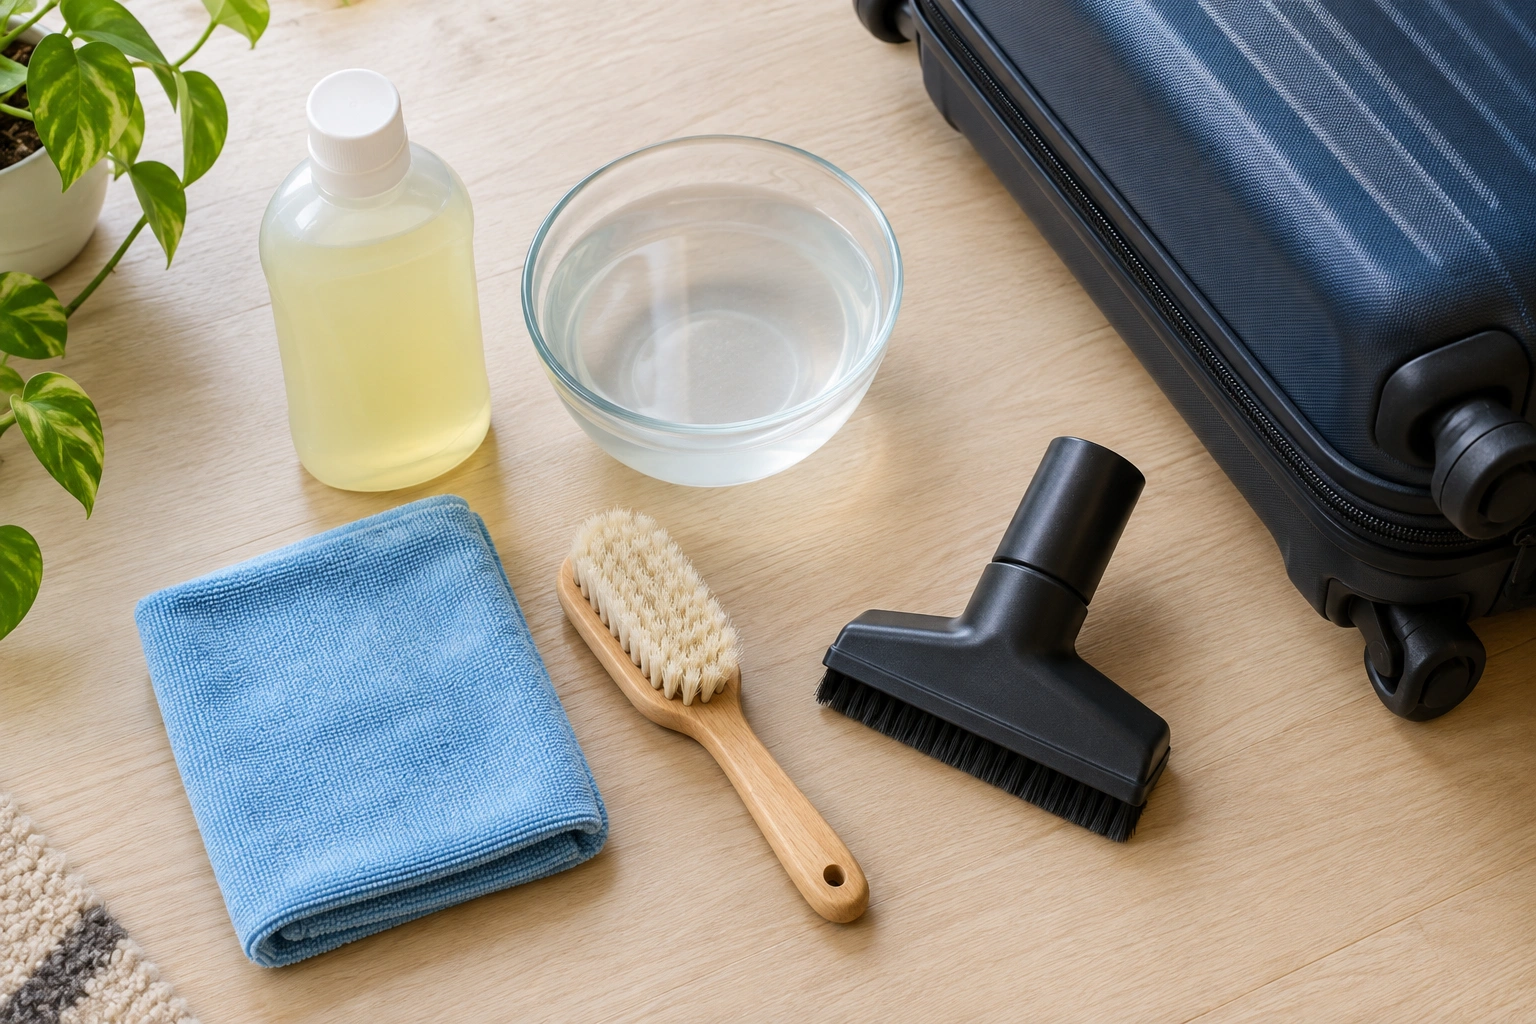
Keep the kit simple. You only need a few tools:
- Vacuum cleaner with a brush or crevice attachment
- Microfiber cloths
- Soft-bristle brush
- Mild detergent or gentle laundry soap
- Small bowl or bucket of warm water
- Clean towel for drying
- Optional: baking soda for odor control
- Optional: white vinegar for certain stubborn residues, if the fabric and care label allow it
- Optional: fabric-safe stain remover for localized marks
The default cleaner should usually be a mild detergent mixed with water. Use that first for general grime, light stains, and routine maintenance. Move to a fabric-safe stain remover only for localized marks that do not lift with mild detergent. Use a foaming upholstery or fabric cleaner only when you need a more targeted treatment for heavier buildup or grease, and test it first on a hidden area.
That escalation path matters: start mild, then step up only if the stain or residue needs more help. Stronger cleaners can remove more grime, but they can also be harder on finishes and coatings.
Avoid bleach, abrasive scrubbers, and strong solvents unless the care label specifically allows them. Those products may clean fast, but they are also the easiest way to fade color, rough up fibers, or damage water-resistant treatments.
Step 1: Empty, Inspect, and Dry Brush the Luggage
Empty every pocket. Pull out packing cubes, laundry bags, receipts, loose pens, and anything else hiding in corners. Then inspect the bag under good light.
Look for:
– sticky spots
– mud on the bottom panel
– black scuffs near handles
– crumbs in seams
– damp areas or old spill marks
– loose threads, weak stitching, or peeling coating
If you see damage, clean around it gently. Don’t scrub a frayed seam as if it were a flat panel.
Next, vacuum the exterior and interior. For softside luggage, vacuuming first is one of the safest ways to lift dust and loose dirt before moisture turns it into paste. Use a brush attachment on the fabric and a crevice tool for seams, corners, and pockets.
If the outside has lint, pet hair, or fine dust, a lint roller can help before you move to wet cleaning.
Step 2: Spot Test the Cleaner on a Hidden Area
Before you clean the visible surface, test your cleaner on a hidden area: inside a pocket flap, under a strap, or on a lower corner.
Dampen a cloth with your chosen solution and press it on the test spot. Wait a few minutes. Then check for:
– color transfer onto the cloth
– fading
– texture change
– stiffness after drying
– any sticky residue
If the fabric darkens in a way that does not fade back, or if the color comes off on the cloth, stop and switch to a milder cleaner or a more cautious method. This is especially useful on dyed canvas and on older bags whose coatings may already be wearing down.
Step 3: Clean the Exterior by Hand
For most fabric luggage, hand cleaning is the core method.
Mix a small amount of mild detergent with warm water. You want a lightly soapy solution, not a bucket of suds. Dip a microfiber cloth into the mix, then wring it out until it is damp, not dripping.
Work one section at a time:
1. Wipe the fabric with the damp cloth.
2. For dirt that stays put, use a soft-bristle brush with light pressure.
3. Keep the brush strokes short and controlled.
4. Wipe the area again with a clean damp cloth to remove soap.
5. Move to the next section.
The main rule is simple: do not soak the bag. Excess moisture can linger in seams, padding, and backing materials even after the surface looks dry. That matters more than people realize. A bag can feel dry on the surface while the interior foam or backing still holds water.
For general grime on polyester or nylon, a mild detergent solution is usually enough. For canvas, use even less water and give yourself more drying time. Canvas can clean up well, but it is less forgiving if you rush the drying stage.
How to Treat Common Stains on Fabric Luggage
Different stains call for different pressure.
Mud
Let mud dry first. Brushing wet mud only spreads it deeper into the weave. Once dry, vacuum or brush off the loose dirt, then clean the remaining shadow with mild detergent and a cloth.
Food or drink
Blot first if the stain is fresh. Don’t rub, because rubbing pushes the spill outward. Use a damp cloth with mild detergent, then wipe with clean water to lift residue.
Grease
Grease usually needs pre-treatment. A foaming fabric cleaner or a small amount of stain remover may help more than plain soap. Work carefully and keep the treatment localized. If the stain is old or set in, repeated heavy scrubbing is usually worse than stopping and trying a second gentle pass after drying.
Scuffs and black marks
Some surface marks are transfer stains rather than true fabric damage. A damp microfiber cloth or a soft brush may remove them. Be cautious with melamine sponges or “magic erasers.” They can work on some marks, but they are abrasive enough to dull fabric or finish if used aggressively. If you try one, use the smallest possible touch and test first.
For a suitcase with stubborn cosmetic marks, this guide on removing scratches from luggage can help you decide whether a mark is removable or just surface transfer.
How to Clean Zippers, Handles, Seams, and High-Touch Areas
These areas collect the most grime because hands, friction, and travel residue all concentrate there.
Wipe zippers, pulls, handles, and grab points with a lightly damp cloth. For zipper teeth, use a cotton swab or the corner of a cloth so you can clean along the track without flooding the area. Do not let water run into zipper tracks, seam lines, or label stitching. If the zipper is gritty, clean it separately from the fabric rather than scrubbing everything together.
Seams deserve special care. Dirt loves to sit in the stitching, but seams also hold the structure together. Use a soft brush or cloth with just enough moisture to lift grime. Avoid soaking glued sections, foam edges, labels, and any areas where the fabric meets plastic trim.
After wiping these high-touch areas, dry them carefully with a clean towel or dry cloth. Pay extra attention to zipper tracks, seam intersections, and stitched labels so moisture does not linger in the threads.
If your bag has wheels or a trolley system, clean those parts separately so you do not drag wheel grime back onto the fabric. That’s a good place to pair this article with how to clean luggage wheels.
How to Clean the Interior Lining and Remove Odors
The inside of a bag often needs less water than the outside, not more.
Vacuum out crumbs, dust, and lint first. Then wipe the lining with a cloth dampened with warm water and a small amount of mild detergent. If a spill left a sticky patch, work slowly and blot rather than scrub. Many linings are thinner than the outer shell, so they can show wear quickly if you overwork one spot.
Be especially careful around pockets, foam panels, padded sections, and any backing material. Use only a lightly damp cloth, not a wet one, because liquid can seep behind the lining or into stitched pocket walls. If a pocket has cardboard-like backing, structured foam, or glued layers, clean the surface only and avoid pushing moisture into the edges. Open pockets and let them dry separately so trapped dampness does not sit inside the folds.
It also helps to separate odor control from stain removal. Odor treatment is for stale smells, mustiness, or gym-bag odor. Stain removal is for visible marks or spills. A bag can smell fine and still have a stain, or it can smell stale without any visible mark. Treat each problem on its own.
For odors, baking soda is the simplest low-risk option. Delsey recommends placing a small container or bag of baking soda inside overnight to absorb odor. That works best for stale travel smells, gym bag odor, or the faint mustiness that builds when luggage sits closed for too long.
If you use vinegar, keep it light and localized. A little white vinegar can help with some residues and odors, but it is not a universal fix and may behave differently on colored or coated fabrics. Use it only after a spot test.
Rinse, Wipe, and Remove Cleaner Residue
Any cleaner left behind can attract new dirt or leave the fabric feeling stiff.
Once you have treated a section, wipe it again with a clean cloth dampened in plain water. This is especially useful after detergent, vinegar, or foam cleaner. You are not trying to rinse the whole bag under running water. You are just removing what is sitting on the surface.
If the cloth picks up suds, wipe again with a fresh damp cloth. The goal is a clean finish without residue.
Dry the Luggage Completely Without Causing Mildew or Warping
Drying is not the last step; it is part of the cleaning.
Pat the exterior with a dry towel to remove surface moisture. Then open every compartment, unzip pockets, and let the bag air-dry in a warm, well-ventilated spot. A fan aimed nearby can help move air through seams and pockets.
Do not use high heat. A radiator, hair dryer on hot, clothes dryer, or direct scorching sun can warp fabric, damage coatings, and stress glued areas. Heat can also make some stains harder to remove if they were not fully lifted before drying.
The bag should feel genuinely dry, not just “mostly dry,” before you store it. Traveler’s Choice warns that even a bag that seems almost dry can still hold enough moisture for mold to grow in a dark storage space. If the luggage has thick padding or a canvas exterior, give it extra time.

Restore Shape and Maintain Water Resistance After Cleaning
Once the bag is dry, reshape it by hand. Smooth the panels, reopen pockets, and make sure the lining is not bunched up inside. If the bag has a structured front panel or foam sides, let it sit open for a while so any hidden moisture can escape.
If the luggage originally had a water-resistant finish, check the care label before applying any reproofing spray. Cleaning can reduce performance over time, but not every bag should be treated the same way. The safest rule is to preserve the original finish first and only add a fabric-safe treatment if the manufacturer allows it.
Common Mistakes to Avoid When Cleaning Fabric Luggage
A few mistakes cause most damage:
- Skipping the care label
- Soaking the bag instead of spot cleaning
- Scrubbing hard enough to fuzz the fabric
- Using bleach or harsh chemicals
- Cleaning the whole bag before testing a hidden area
- Leaving soap residue behind
- Storing the bag while it is still damp
- Forgetting seams, zippers, and handles
The biggest one is over-wetting. Water is useful, but too much of it gets trapped in padding, stitching, and backing materials. That leads to longer drying time, odor, and sometimes seam trouble.
Troubleshooting Stubborn Stains, Odors, and Residue
If a stain is still visible after one careful pass, stop and reassess.
- If it is a grease stain, try a targeted fabric cleaner rather than more water.
- If it is a dark transfer mark, a second light cleaning pass may help more than scrubbing harder.
- If the area feels tacky, you probably left cleaner behind; wipe it again with plain water.
- If the bag still smells musty after drying, air it out longer and use baking soda overnight.
- If the fabric looks faded or rough, the cleaner may have been too strong for that section.
When a stain does not budge after gentle treatment, that is usually the sign to stop rather than escalate. More pressure can remove the finish before it removes the stain. If the problem is inside a pocket, foam layer, or backing material, avoid repeated wet passes and let the area dry fully before deciding whether to try again.
Cleaning Examples for Polyester, Nylon, and Canvas Luggage
A polyester carry-on with airport grime usually responds well to vacuuming, then a mild detergent wipe-down, then a clean water wipe to remove residue. Polyester is often the easiest of the three to manage because it dries relatively quickly and usually tolerates light brushing without much fuss.
A nylon backpack or soft-sided duffel with food stains may need a soft-bristle brush and a little more attention on the stain itself, but still not a soaking. Nylon tends to handle careful cleaning well, and it usually dries fairly quickly compared with heavier fabrics. That makes it a good candidate for spot cleaning and hand cleaning when the care label allows it.
A canvas bag with gym odor or general dullness needs the most patience. Clean it with less water, let it dry longer, and rely more on airing out and odor absorption than on repeated wet treatment. Canvas can look great after cleaning, but it is the most moisture-sensitive of these three in practice because it holds water longer and can take the longest to dry. If you brush canvas, use a lighter touch than you would on polyester or nylon.
In short: polyester is usually the most forgiving for quick wipe-downs, nylon is also manageable and often dries fairly fast, and canvas is the slowest to dry and the easiest to over-wet. That makes canvas the fabric where a conservative cleaning approach matters most.
When to See a Luggage Repair Specialist
If the fabric is peeling, the seams are separating, the lining is delaminating, or the bag has a stubborn stain on a coated or specialty finish you do not want to risk, a repair specialist or manufacturer service center may be the safer call. The same goes for bags with valuable branding, sentimental value, or a warranty you do not want to jeopardize.
For most everyday travelers, commuters, students, and parents, though, a careful hand-cleaning routine is enough to bring fabric luggage back into regular use.
Quick FAQ
Can I machine wash fabric luggage?
Usually not the whole bag. Hand cleaning is safer for seams, foam, zippers, and coatings. Only machine wash if the care label clearly says the bag or a removable component can be machine washed.
Is dish soap okay for luggage fabric?
A small amount can work if it is mild and well diluted, but a gentle detergent is usually the safer default. Use the least aggressive cleaner that gets the job done.
Can I use baking soda on luggage?
Yes, baking soda is commonly used for odor control and can help with some light stain treatment. Use it gently and avoid grinding it into the fabric.
What about vinegar?
White vinegar can help with some odors and residue, but results vary by fabric and finish. Spot test first, especially on dyed or coated material.
How often should I clean fabric luggage?
After a messy trip, clean it right away. For regular commuting, student use, or frequent travel, a quick vacuum and exterior wipe every few trips is usually enough, with deeper cleaning only when dirt, odor, or visible stains build up.
How long should luggage dry before storage?
Until it is fully dry inside and out. If the bag still feels cool, damp, or heavy in the seams, give it more time.
Will cleaning remove water resistance?
It can reduce performance over time, especially if you use strong cleaners or too much scrubbing. Check the care label before applying any reproofing treatment.
What’s the safest first step if I’m unsure?
Vacuum the bag, spot test a mild detergent solution on a hidden area, and clean only the visibly dirty sections first.