
How to Dry a Backpack Quickly Without Ruining It

A wet backpack is annoying when you need it tomorrow, but the fastest safe fix is usually simple: empty it, blot out as much water as you can, open every compartment, and move air through it. In most cases, airflow beats heat. A fan in a dry room is safer than a hot dryer, and it often gets the job done faster than just hanging the pack in still air. Maytag notes that a freshly washed backpack may take a day or longer to air dry depending on the fabric and environment, and it specifically advises against using a dryer because of shrinkage and damage risk to fabric and zipper parts. Maytag’s backpack care guide
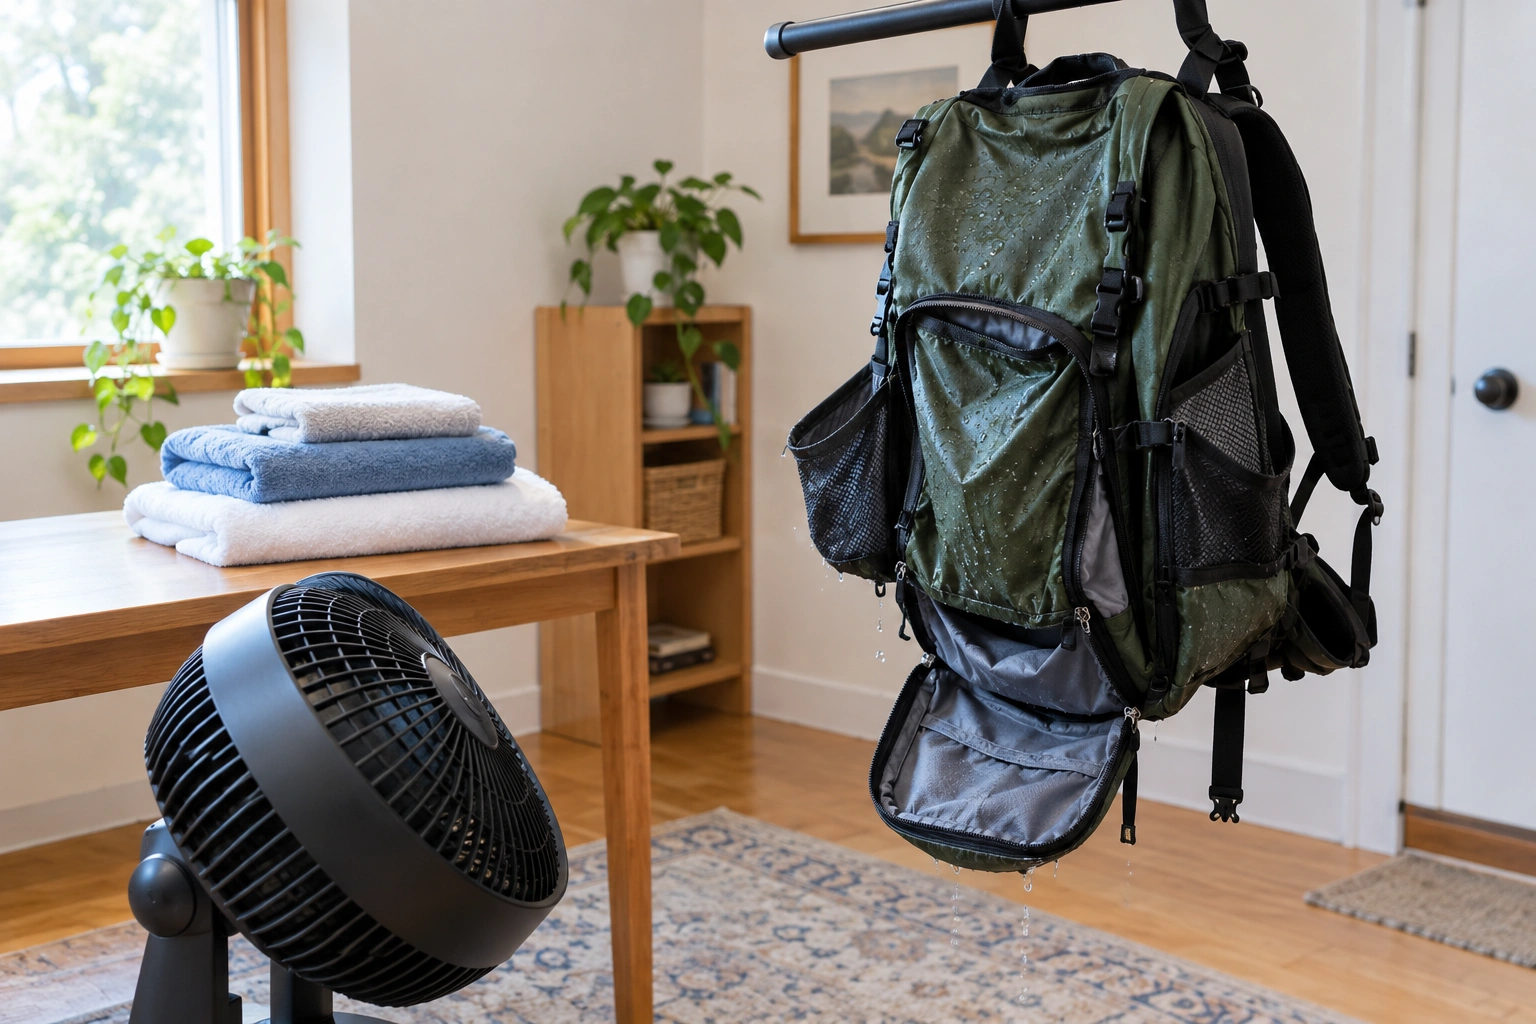
If the bag is only damp from rain, you can often have it usable by the next day with the right setup. If it is soaked through, expect the inside, seams, and padding to take longer than the outer fabric. The goal is not just “dry to the touch.” It is dry enough that hidden moisture will not turn into odor, mildew, or warped padding later.
Do This First
Before anything else:
- Empty the backpack
- Remove any detachable parts
- Shake out excess water
- Blot seams and hardware with a dry towel
What You Need Before You Start
You do not need special gear, but a few basics make a big difference:
- 2 to 4 clean, dry towels
- A fan
- A dry indoor space with airflow
- A hanger, hook, or clothesline
- Optional: a dehumidifier
- Optional: a clean, dry microfiber cloth for zippers and hardware
If the backpack has a removable frame sheet, padding panel, or laptop insert, set those aside to dry separately. That small step often shortens drying time because thick pieces trap water longer than the shell fabric.
First, Empty the Backpack and Protect the Contents
Take everything out immediately. That includes notebooks, chargers, snacks, pens, gym clothes, and especially electronics. Moisture trapped around a power bank, tablet, or laptop sleeve can spread into seams and foam before you notice it.
If the backpack has removable pieces, pull them out now:
- Frame sheet
- Detachable hip belt
- Removable laptop sleeve
- Any padded inserts
- Loose organizer panels
If the bag was exposed to dirty water, spilled drinks, or mud, clean the affected areas before drying. Sugary liquid and grime can leave behind odor even after the fabric looks dry. If you want a deeper cleaning step later, use this guide alongside how to clean a backpack and, when the bag needs a full wash, how to wash a backpack.
Special note for electronics and lined compartments
A backpack with a built-in charging pocket or electronics sleeve deserves extra caution. Keep any power bank, cord, or device out of the bag until both the compartment and the item are fully dry. If the compartment has a synthetic liner, open it wide so trapped moisture does not stay hidden in the folds.
Blot Out as Much Water as Possible
Use a towel to press, not rub. Lay the backpack flat on a dry towel, then press another towel against the wet areas. Work from the outside in. That removes surface water before you hang the bag, which shortens the rest of the process.
Do not twist or wring the backpack. That can distort seams, crush foam padding, and stress zippers. If the bag is heavily soaked, swap in a second dry towel once the first one becomes damp.
Open Every Pocket, Zipper, and Compartment
This is where many people lose time. A backpack can feel dry on the outside while the inside stays damp for hours.
Open:
- Main compartment
- Front pocket
- Side pockets
- Laptop sleeve
- Water bottle pockets
- Hidden organizer pockets
- Zippers on mesh or padded sections
If a pocket lining can be gently turned outward, do it. The point is to expose every damp surface to air. Alpinetrek recommends leaving pockets open and compartments unzipped so water can escape, and says hanging the backpack upside down helps drainage. Alpinetrek’s drying advice
If the bag has thick shoulder straps or a padded back panel, loosen any compression straps so the foam can breathe. Tight straps trap moisture in folds.
Choose the Fastest Safe Drying Method
Here is the short version: fan drying with open compartments is usually the fastest safe method for most backpacks. Passive air drying is the slowest. Shade is the safer outdoor choice for some durable fabrics, while direct sun should be avoided for leather, coated fabrics, and dark or fading-prone materials.
| Method | Speed | Best for | Main risk |
|---|---|---|---|
| Fan drying | Fast | Most nylon, polyester, canvas, and everyday packs | Minimal, if heat is not used |
| Passive air drying | Slowest | Lightly damp bags or delicate materials | Hidden damp spots, odor |
| Dehumidifier + airflow | Fast to moderate | Humid rooms, padded bags, overnight drying | Requires indoor space |
| Sun drying | Moderate | Some durable fabrics in dry conditions, with caution | Fading, coating damage, leather stress |
| Tumble dryer | Not recommended | Only if the manufacturer explicitly allows it | Shrinkage, melted adhesives, broken trim |
Topo Designs warns that a tumble dryer can melt adhesives, cause significant shrinkage, and damage materials, and it recommends hanging the backpack upside down in a well-ventilated area away from direct heat and sunlight. Topo Designs backpack care guide
DB Journey gives the same basic warning and adds that direct sunlight can compromise materials and fade colors. DB Journey’s backpack washing guide
Fan drying vs. air drying
A fan moves moist air away from the fabric, which speeds evaporation. Plain air drying still works, but it depends on room circulation. If you need the bag by morning, use the fan. If you have time and the weather is dry, passive drying can be enough for a lightly damp pack.
Sun drying vs. shade drying
Sun can speed drying, but it is a trade-off. Strong direct sun may fade colors, stiffen leather trim, or stress waterproof coatings. Shade with good airflow is the safer default. Use sun only when the material can handle it and you are not worried about fading.
Overnight Drying Plan
If you need the backpack ready by morning, set it up this way:
- Empty it and remove detachable parts
- Open every zipper and compartment
- Hang it upside down
- Aim a fan into the main compartment and across the straps
- Keep it in a dry room
- Add a dehumidifier if the room feels humid
That setup gives the best chance of drying the shell, lining, and padding overnight without using heat.
Dry the Backpack Step by Step
- Empty every pocket and remove detachable parts.
- Blot the shell, straps, and bottom panel with dry towels.
- Open all zippers and flaps.
- Hang the backpack upside down if possible.
- Place a fan so air blows into the main compartment and across the back panel.
- Leave the bag in a dry, ventilated room.
- After a few hours, check the straps, seams, and corners.
- Reposition the bag if one area is still holding moisture.
- Keep drying until the hidden areas feel fully dry, not just the outer fabric.
Hanging upside down helps because gravity lets water move out of pockets and seams instead of pooling at the bottom. That is especially useful for laptop sleeves, side pockets, and padded bases.
How to Dry the Inside, Padding, and Seams Faster
The inside dries slower than the outside because foam, lining, and stitching hold water. Focus on three trouble spots:
Padded back panels
Stand the bag so air can reach the full panel, not just one edge. If the panel is thick, rotate the backpack occasionally so the same spot is not pressed against a wall or chair.
Shoulder straps

Lay the straps flat or let them hang free. If they are bunched together, moisture lingers in the stitching and webbing. A fan aimed across the straps helps more than heat.
Seams and corners
These areas trap water even when the fabric feels dry. Run a dry cloth along the seam lines, then reopen the compartments. If you close zippers too early, the last bit of moisture stays locked inside.
For a backpack with mesh lining, airflow matters even more because mesh can hold water in its texture. Keep the compartment open and avoid stacking anything against it.
Drying Backpacks by Material
Nylon and polyester
These are usually the easiest to dry. They respond well to towel blotting and fan drying. They also dry faster than heavier materials, but do not assume the padding is dry just because the shell is.
Canvas
Canvas can take longer because it absorbs more water. Dry it in shade with strong airflow. Sun may speed the process, but it can also fade dye or stress finishes. If the canvas is structured, keep the bag supported so it does not sag and dry unevenly.
Leather or leather trim
Leather needs the most caution. Do not use direct sun or heat, which can crack, stiffen, or discolor it. Let the non-leather sections dry with airflow, then condition the leather later if the manufacturer recommends it. If the backpack is mostly fabric with leather accents, protect the leather while the rest of the bag dries. If the leather-trimmed pack is heavily soaked, it may need professional assessment rather than home drying.
Waterproof or coated fabrics
Coated fabrics and waterproof coatings can be sensitive to heat. Dry them in shade with airflow. A hot dryer or heater can damage the coating or adhesive layers. If the bag has a water-resistant finish, aggressive heat is the wrong tool even if it seems faster.
Can You Put a Backpack in the Dryer?
Usually, no. Unless the manufacturer clearly says it is safe, skip the dryer. The risk is not just shrinkage. Heat can damage zipper pulls, melt adhesives, weaken coatings, and warp foam padding. That is why several major care guides recommend air drying instead.
If a care label specifically allows tumble drying, follow that label exactly. Otherwise, treat the dryer as off-limits.
Common Mistakes That Slow Drying or Damage the Bag
These are the habits that cause most drying problems:
- Leaving wet items inside the backpack
- Closing pockets before the interior is dry
- Hanging the bag where air cannot move through it
- Wringing or twisting the fabric
- Using a heater, radiator, or hair dryer on high heat
- Putting coated fabric or leather in direct sun for too long
- Storing the bag in a closet while it still feels cool or damp
If you want the bag dry overnight, the biggest improvement usually comes from airflow, not warmth. A fan plus open compartments beats a closed room every time.
How to Tell When the Backpack Is Fully Dry
Check more than the outside fabric. A backpack is ready only when these areas are dry too:
- Inside corners
- Seams
- Bottom panel
- Shoulder straps
- Back padding
- Laptop sleeve
- Pocket linings
- Zipper tape and fabric around the zipper
- Padding thickness
- Underside of the straps
Press a clean hand towel into the deepest pocket. If it comes away damp, keep drying. Also smell the inside. A stale or cool, slightly damp odor usually means moisture is still trapped somewhere.
Troubleshooting: What to Do If It Still Smells Damp or Feels Wet
If the backpack still feels damp after several hours, do not pack it up and hope for the best. Reopen every compartment and move the fan closer to the problem area. If the room is humid, add a dehumidifier.
For stubborn moisture in padding:
- Lay the bag flat for a while, then hang it again
- Rotate it so the damp side faces airflow
- Press a dry towel into the thickest sections
- Keep zippers open wider than you think you need to
If odor remains after the bag is dry, the issue may be residue from the spill or wash rather than water alone. In that case, clean the affected area before drying again.
Practical Examples for Common Situations
A commuter backpack soaked by rain
Empty it immediately, towel-blot the shell, open the laptop sleeve, and hang it upside down in front of a fan overnight. This is the most reliable route when the bag needs to be ready for work or school the next day.
A student backpack with a wet laptop compartment
Remove the laptop and charger first, then open the sleeve fully. Put a dry towel inside the compartment and replace it once it becomes damp. The sleeve often dries slower than the outer shell because of padding and lining.
A canvas backpack after a spill
Blot the spill, then dry the bag in shade with airflow. Avoid direct sun if the dye is dark or the canvas has a finish you want to preserve.
A leather-trimmed travel pack
Keep the leather away from heat and direct sun. Let the fabric body dry with a fan, and only condition the leather if the manufacturer’s care instructions recommend it. If the pack is heavily soaked, consider professional assessment before trying to dry it at home.
How to Prevent Mold and Mildew After Drying
Mold and mildew usually come from hidden moisture, not from a bag that looked mostly dry. The prevention steps are straightforward:
- Dry the bag completely before storing it
- Leave zippers slightly open when putting it away
- Store it in a dry, ventilated space
- Never seal a damp backpack in a closet, duffel, or plastic bin
- Check the bottom, seams, and padding one more time before use
If the backpack got wet from dirty water or food spills, cleaning before drying matters as much as airflow. That is what keeps the bag from smelling fine on day one and musty on day three.
When to See a Luggage Repair Specialist
If the backpack has warped padding, a damaged waterproof coating, a leather section that stiffened badly, or a zipper that no longer tracks smoothly after drying, a repair specialist can often tell you whether the problem is cosmetic or structural. That is especially worth considering for expensive travel packs, bags with internal frames, or backpacks with built-in electronics pockets.
For most everyday packs, though, the fix is simple: remove the water fast, open everything up, and let moving air do the rest.