
How to Wash a Backpack Without Ruining the Fabric, Zippers, or Shape

A backpack collects more than dirt. It picks up sweat on the straps, crumbs in the seams, grime on the bottom panel, and the occasional mystery smell from a locker, car floor, or airport seat. The trick is cleaning it without flattening the padding, stripping the coating, or wrecking the zippers.
The first rule is simple: check the care label before you do anything else. If the label says machine washable, hand wash, or spot clean only, that instruction wins. If there’s no label, look at the material and construction. A basic nylon or polyester daypack is usually easier to clean than a pack with leather trim, foam structure, or a waterproof coating. When in doubt, use the gentlest method that will actually solve the problem.
For a quick reference, this is the decision I use when a bag comes across my bench:
| Backpack type / condition | Best cleaning method | Why |
|---|---|---|
| Light dirt, crumbs, or one stain | Spot clean | Least wear on fabric and coating |
| Nylon or polyester everyday pack, label allows washing | Hand wash or gentle machine wash | Good balance of cleaning power and safety |
| Canvas pack with surface dirt | Hand wash | Safer for shape and dye than a rough wash |
| Leather trim, foam padding, or waterproof coating | Spot clean or very careful hand wash | Heat and agitation can damage finishes |
| Built-in frame, heavy structure, or delicate hardware | Hand wash after removing parts, if allowed | Reduces bending and seam stress |
| Mold, mildew, or strong odor | Full hand wash plus thorough drying | Needs deeper cleaning and complete moisture removal |
Quick decision tree:
1. Check the care label.
2. Identify the main material and any trim or coating.
3. Remove detachable parts that are meant to come out.
4. If the problem is minor, spot clean. If the bag is washable but delicate, hand wash. If the label allows it and the pack is simple, machine wash gently.
If you want a broader care routine for travel gear, I also keep a few related guides on Queryoro’s home page and our sample page as placeholders for future backpack and luggage care content.
What You Need to Know Before Washing a Backpack
Before you fill a sink or turn on a washer, make three decisions.
1. Can it be washed at all?
Some packs are built for washing, others are not. General brand guidance can vary, so the care label matters more than broad advice. If the label is missing, assume the bag is more delicate than it looks and start with spot cleaning or hand washing.
2. What parts can be removed?
Take out inserts, loose organizers, removable laptop sleeves, detachable hip belts, and any removable padding or frames if the manufacturer says they can come out. If a frame, stiffener, or support panel is built in, leave it in place. Do not force out internal structure that is sewn in or clearly fixed to the bag.
3. How dirty is it, really?
If the problem is one coffee splash or a greasy lunch stain, spot cleaning may be enough. If the whole bag smells stale, the bottom is muddy, and the straps are dark with body oil, a full wash makes more sense. Spot cleaning preserves the bag longer, but it won’t fix dirt that has worked into seams and padding.
A useful rule: the more structure, coating, or trim a backpack has, the more you should lean toward hand washing or spot cleaning.
Tools and Materials for Cleaning a Backpack
You do not need a laundry room full of products. In most cases, keep it simple:
- Mild detergent
- Cool or lukewarm water
- Soft brush or soft sponge
- Clean cloths or towels
- Mesh laundry bag or pillowcase, if the care label allows machine washing
- Small basin, sink, or bathtub
- Old towel for blotting and drying
- Optional spot cleaner that is safe for the fabric
- A dry, shaded place for air drying
Choose a detergent that is gentle and fragrance-free if possible. Use only a small amount so residue does not build up in seams or pockets.
If you’re cleaning a travel pack with lots of pockets or a school bag that has seen a full term of use, a soft brush is worth having. It reaches strap stitching, corners, and zipper garages better than a cloth alone.
Prep the Backpack: Empty, Shake Out, and Remove Detachable Parts
A backpack cleans best when you remove everything that can trap dirt or get damaged.
-
Empty every pocket.
Check the main compartment, front pocket, side sleeves, hidden slots, and any tiny internal organizer pockets. Coins, pens, crumbs, and paper clips love to hide in corners. -
Shake out loose debris.
Turn the bag upside down over a trash can and tap the base and side panels. This keeps grit from turning into muddy paste once water hits it. -
Remove detachable parts.
Take out laptop sleeves, packing cubes, removable hip belts, inserts, and frames if the design allows it. If a frame is built in and not meant to come out, leave it alone. -
Cut loose threads carefully.
If you see snag-prone threads, trim them carefully so they do not catch during cleaning. -
Close zippers and fasteners.
This protects zipper teeth and keeps straps from tangling.
If the backpack has a waterproof coating, treat the prep stage as part of the cleaning job. Coatings are easier to preserve when you avoid unnecessary soaking and rough handling from the start.
How to Spot Clean Stains, Odors, and Dirty High-Touch Areas
Spot cleaning is often the best first move, even if you plan to wash the whole bag later.
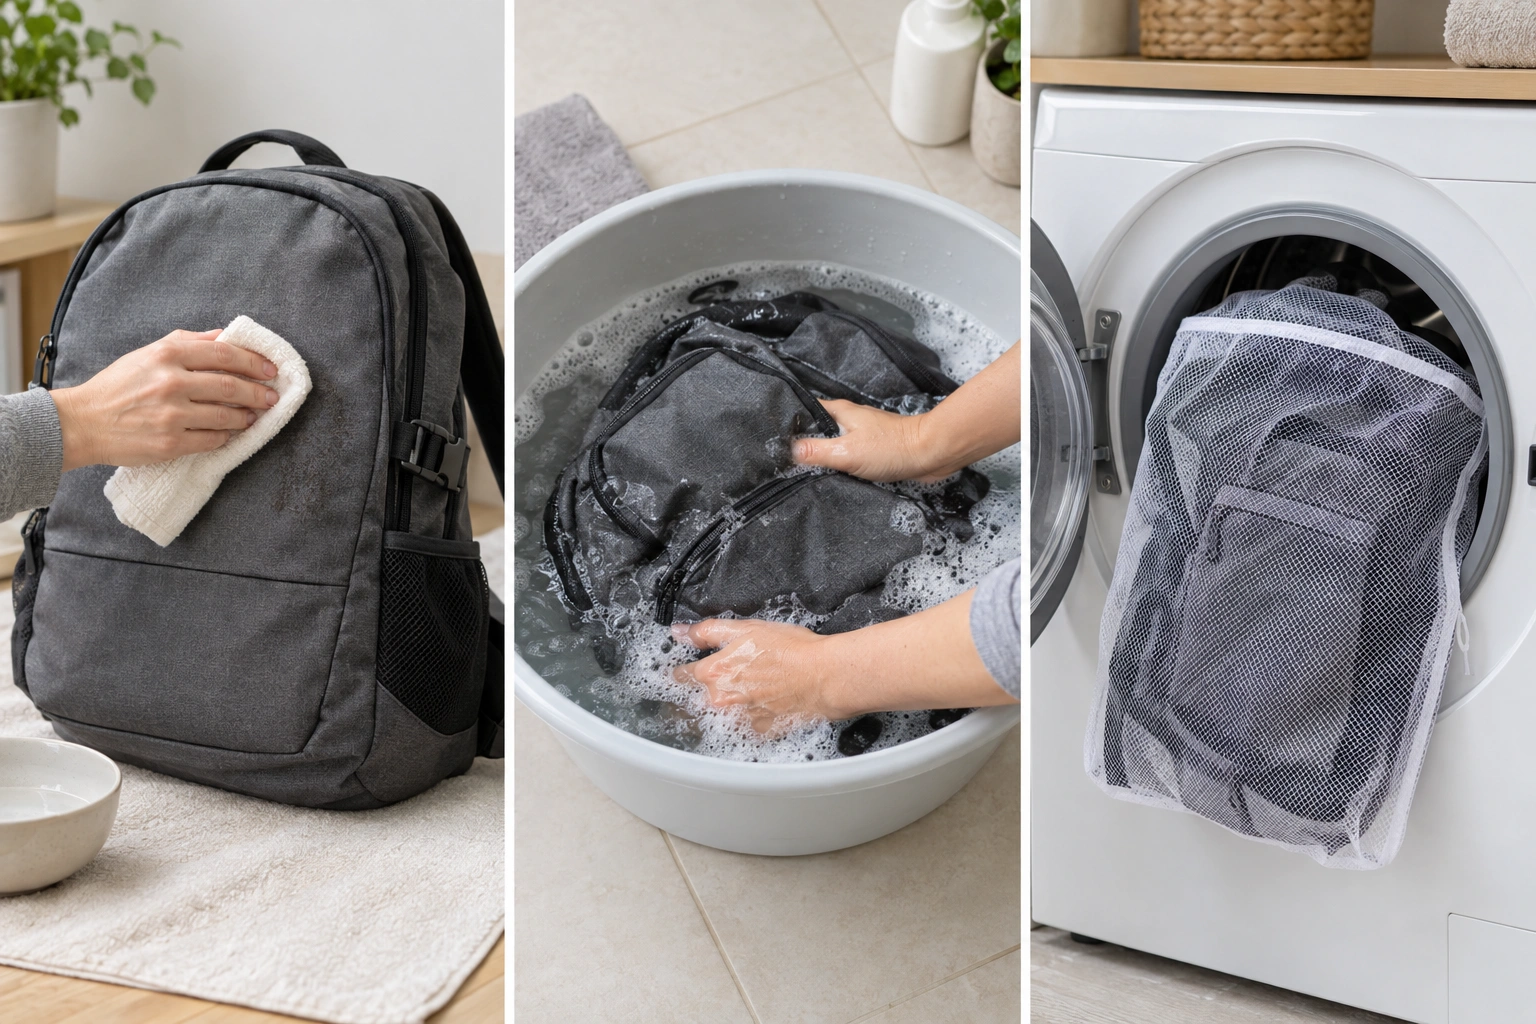
Mix a small amount of mild detergent with water. Use a brush or sponge to gently scrub visible stains. Keep the water lukewarm rather than hot, especially if the bag has bright dye or synthetic coating.
Focus on these areas first:
- Bottom panel and corners
- Shoulder straps
- Back panel where sweat builds up
- Zipper tape and zipper garages
- Pen marks in organizer pockets
- Food stains around the front pocket
- Seams where grime gets packed in
Use just enough solution to dampen the stain. Scrub lightly in small circles. The goal is to lift dirt, not grind it deeper. For sticky food or oily spots, let the solution sit for a few minutes before wiping, then rinse the area with a clean damp cloth.
For odor, wipe the interior lining and the straps, then let the bag air out fully before deciding whether it needs a full wash. For a stronger odor treatment, sprinkle a light layer of baking soda inside the dry bag, close it loosely, and let it sit overnight, then shake it out thoroughly. If the backpack is damp, skip the baking soda until after it has dried, because powder can clump in wet fabric.
How to Hand Wash a Backpack Safely
Hand washing gives you the most control, which is why it’s my default recommendation for anything with padding, trim, or mixed materials.
Step 1: Fill a basin with lukewarm or cool water
Use water that is not hot. Cooler water is usually safer for dyes, coatings, and synthetic fabrics.
Step 2: Add a small amount of mild detergent
Use less than you would for clothes. Too much soap is hard to rinse out and can leave residue that attracts dirt later. If the water turns heavily sudsy, you’ve probably used too much.
Step 3: Submerge only if the label and materials allow it
Some backpacks can be soaked; others should be cleaned more selectively. If the bag has leather trim, foam-heavy padding, or a special coating, keep the soak brief or skip full submersion and clean it section by section.
Step 4: Gently scrub with a soft brush or sponge
Work on the outer fabric, straps, seams, and pocket edges. Use a light touch. A soft sponge or brush with lukewarm water is usually enough.
Step 5: Rinse thoroughly
Drain the soapy water and refill with clean cool water, or wipe the bag with a cloth soaked in clean water if you only spot cleaned. Replace the soapy water with clean water after soaking, or use a clean sponge to remove detergent if you didn’t submerge the bag.
Step 6: Press out water, don’t wring
Press the backpack gently between clean towels. Twisting the bag can stress seams, distort foam, and bend hardware.
Hand washing takes longer than a machine cycle, but it gives you the best chance of protecting shape and finish.
How to Machine Wash a Backpack Without Damaging It
Only machine wash a backpack if the care label and the construction both make it reasonable. Some brands allow a gentle cycle; others strongly advise against it. If machine washing is allowed, use the safest setup available:
-
Put the backpack in a pillowcase or mesh laundry bag.
This reduces abrasion from zippers, buckles, and straps. -
Use a front-loading washer if possible.
A front-loader is usually gentler than a top-loader with an agitator, which can yank straps and stress seams. -
Choose a gentle cycle and cool water.
Skip hot water unless the manufacturer specifically allows it. Heat can fade color, weaken coatings, and warp some synthetic components. -
Use a small amount of mild detergent.
Avoid bleach and fabric softener. Heavy residue can damage the material or leave the bag feeling stiff.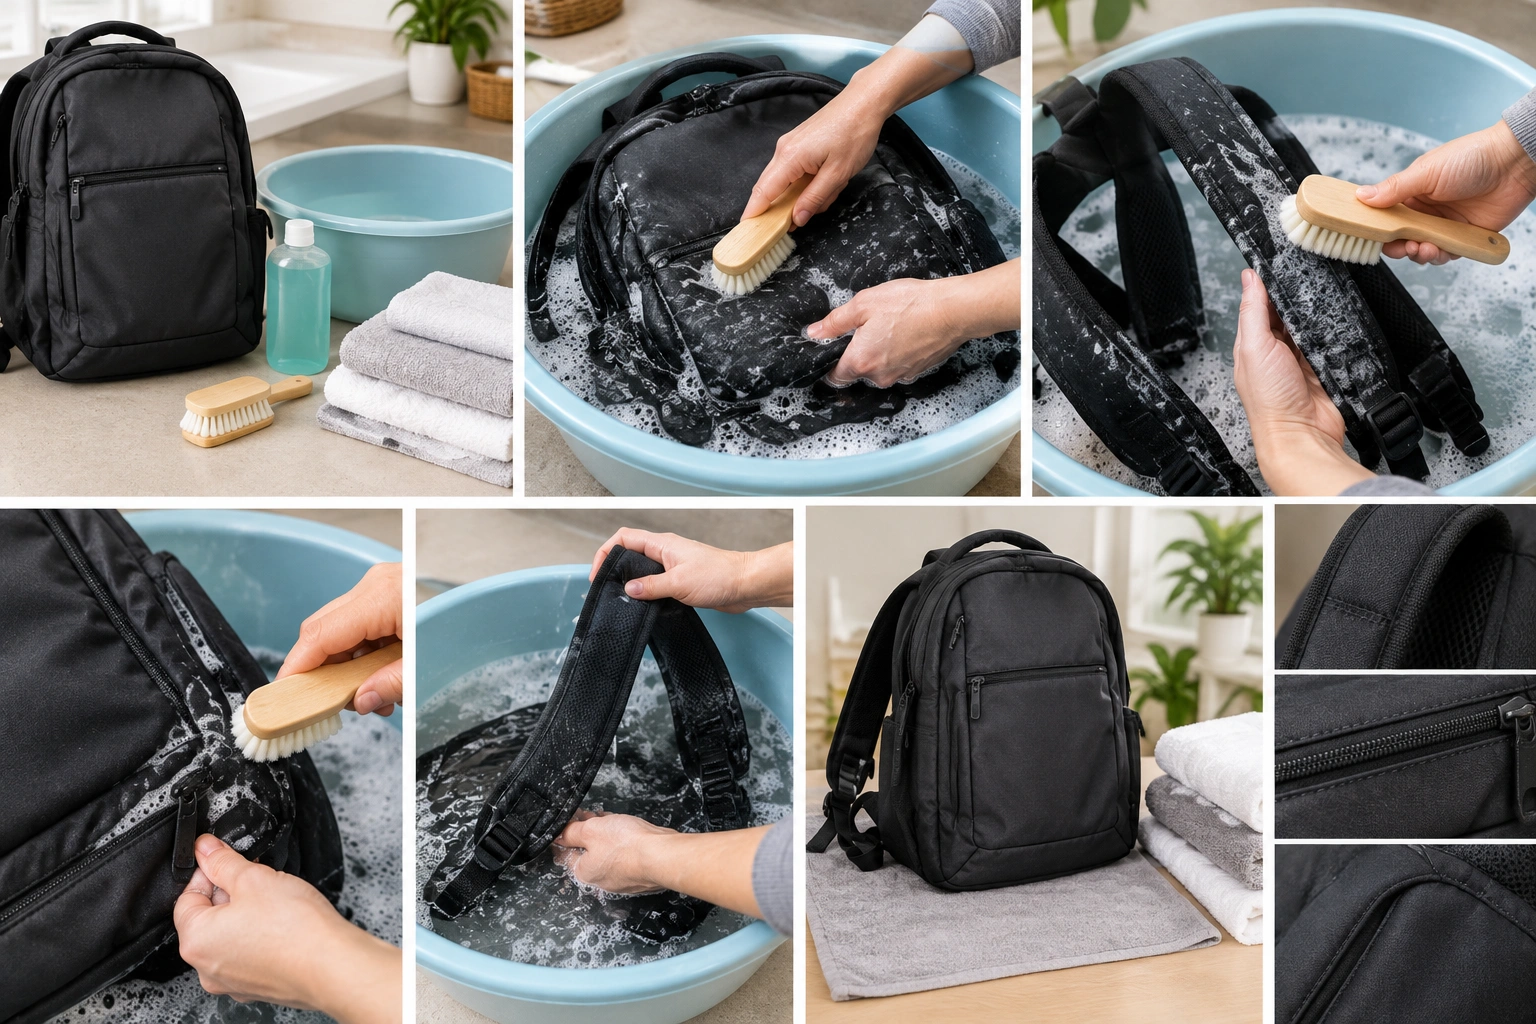
Hand washing protects shape and finish -
Do not wash with heavy items.
A backpack banging against jeans, towels, or shoes gets more abrasion than it needs.
This method is faster than hand washing, but it carries more risk. If the bag has leather trim, a structured frame, or a waterproof coating, hand washing is usually the safer choice.
Backpack Material Guide: Nylon, Polyester, Canvas, Leather Trim, and Waterproof Coatings
Nylon and polyester
These are the easiest everyday materials to clean. They usually tolerate gentle hand washing well, and some are machine washable if the label says so. Still, cool or lukewarm water is safer than hot water because it reduces the chance of color fade and coating damage.
Canvas
Canvas often handles dirt well, but it can hold odor and dry slowly. Hand washing is usually the better call because it gives you more control over soaking and scrubbing. Be especially careful with dyed canvas, since hot water can encourage color bleeding.
Leather trim
Leather trim changes the rules. Keep water use minimal and avoid soaking the leather section. Clean the fabric around it, then wipe the trim separately with a barely damp cloth if the manufacturer allows it. Never machine wash a bag that depends on leather accents for structure or appearance.
Waterproof coatings
A waterproof coating can be damaged by harsh detergents, heat, and aggressive scrubbing. Clean it gently and rinse well. If the coating is part of the bag’s performance, avoid anything that leaves residue behind, because residue can interfere with how the surface sheds water.
Foam padding and structured backs
Padding traps water. That makes drying more important and machine washing riskier. If the pack has thick shoulder straps or a padded back panel, use minimal water and give the bag extra drying time.
For brand-specific technical packs, check the manufacturer’s care page before doing anything beyond basic spot cleaning.
How to Dry a Backpack Properly
Drying is where a lot of good cleaning work gets ruined. If a backpack stays damp in a pile, mildew can set in fast.
-
Blot out excess water with a towel.
Pat away moisture first so the bag keeps its shape and dries faster. -
Dry removable parts separately.
Take out removable straps, inserts, hip belts, and organizers if you removed them for washing. Lay them flat or hang them so air can reach both sides. If a part was built in, leave it attached and dry it in place. -
Hang or prop the bag open.
Leave zippers open and pockets unfastened so air can move through the lining and corners. -
Air dry only unless the care label says otherwise.
Do not put a backpack in the dryer unless the manufacturer specifically allows it. -
Dry in a shaded, ventilated place.
Direct sun can fade fabric and overheat coatings. A breezy room or covered outdoor area is better. -
Wait until every layer is dry.
The outside may feel dry while the straps, seams, and padding still hold moisture. Do not store or use the bag again until the inside, seams, and removable parts are fully dry.
If you need the bag back in service quickly, a fan helps more than heat. Air movement speeds evaporation without the damage risk of a dryer.
Common Mistakes That Can Ruin a Backpack
These are the mistakes I see most often:
- Using bleach on colored fabric
- Washing in hot water without checking the label
- Throwing a structured bag into a top-loader with an agitator
- Leaving pens, coins, or crumbs inside
- Using too much detergent
- Scrubbing waterproof fabric too aggressively
- Tumble drying
- Folding the bag up while it’s still damp
- Ignoring leather trim or metal frames
- Forgetting to rinse soap out of seams and pockets
The biggest hidden problem is residue. Soap left in the fabric attracts new dirt and can make the backpack feel stiff. That’s why a thorough rinse matters as much as the wash itself.
How to Handle Mold, Mildew, and Persistent Odors
If the backpack smells musty, do not just mask it with fragrance. Find the moisture source and clean the affected areas directly.
- Empty the bag and brush out loose debris.
- Check seams, pockets, and padding for visible mildew.
If you see mildew, clean it right away instead of only airing the bag out. - Spot treat the affected areas first.
Wipe the mildew spots with a cloth dampened with mild detergent and water. For hardier synthetic fabrics such as nylon or polyester, you can use a diluted white vinegar solution on the affected area if the care label does not forbid it. Avoid vinegar on leather trim and test any cleaner on a hidden spot first. - Rinse or wipe the area with clean water.
- Wash the bag by hand if the material allows it.
This helps remove odor from seams, linings, and high-touch areas. - Dry with strong airflow until every layer is fully dry.
Keep pockets open and padding exposed to air.
If the smell returns after drying, moisture is still trapped somewhere in the padding or seams. A backpack that has been left damp in a locker or trunk may need another cleaning pass, especially around the base, back panel, or hidden pockets.
How Often to Wash a Backpack
There is no universal schedule, but this guideline works well:
- Spot clean as needed for spills, grime, and stains
- Full wash every few months for daily commuter or student use, if the material supports it
- Wash sooner after sweat-heavy travel, food spills, or mildew exposure
- Freshen and air out between washes if the bag only has light odor
A backpack used for school or commuting usually needs attention more often than a weekend travel pack. The more it touches floors, food, rain, and body heat, the more often it needs a real cleaning.
Practical Examples: How to Clean Different Types of Backpacks
Student backpack with pencil marks and snack crumbs
Empty every pocket, shake out debris, then spot clean the front pocket and straps first. If the label allows it, hand wash the whole bag in cool or lukewarm water with mild detergent. Air dry overnight.
Commuter backpack with a sweaty back panel
Focus on the back panel, shoulder straps, and inner lining. These areas usually need more cleaning than the outside shell. Hand washing gives better control than machine washing if the bag has a structured back or laptop sleeve.
Canvas backpack with mild odor
Use a gentle hand wash and pay attention to seams and corners. Canvas can hold smell if it stays damp, so drying time matters more than scrubbing force.
Waterproof travel backpack
Spot clean first. If the label allows a wash, keep detergent mild, avoid hot water, and rinse carefully so residue does not interfere with the coating. Dry fully with airflow, not heat.
When to See a Luggage Repair Specialist
If the backpack has torn seams, broken zippers, delaminating waterproof coating, or badly damaged padding, cleaning won’t solve the real problem. That’s when a repair specialist can tell you whether the bag is worth saving and what can be fixed without making the damage worse.
For gear care beyond backpacks, you may also find it useful to browse TSA packing guidance and Samsonite’s luggage care resources when you’re maintaining travel bags and accessories.
The short version: check the label, choose the gentlest method that fits the material, rinse thoroughly, and dry completely. If you do those four things well, most backpacks will come out cleaner, smell better, and last longer.