
How to Fix a Backpack Strap: A Practical Repair Guide That Holds Up

A backpack strap usually fails for one of several common reasons: the stitching loosens, the webbing frays, the fabric tears near the buckle, the anchor point gives way, or the buckle itself breaks. Once you know which one you’re dealing with, the repair gets much simpler. The wrong fix is usually the one that treats every problem like a simple sewing job.
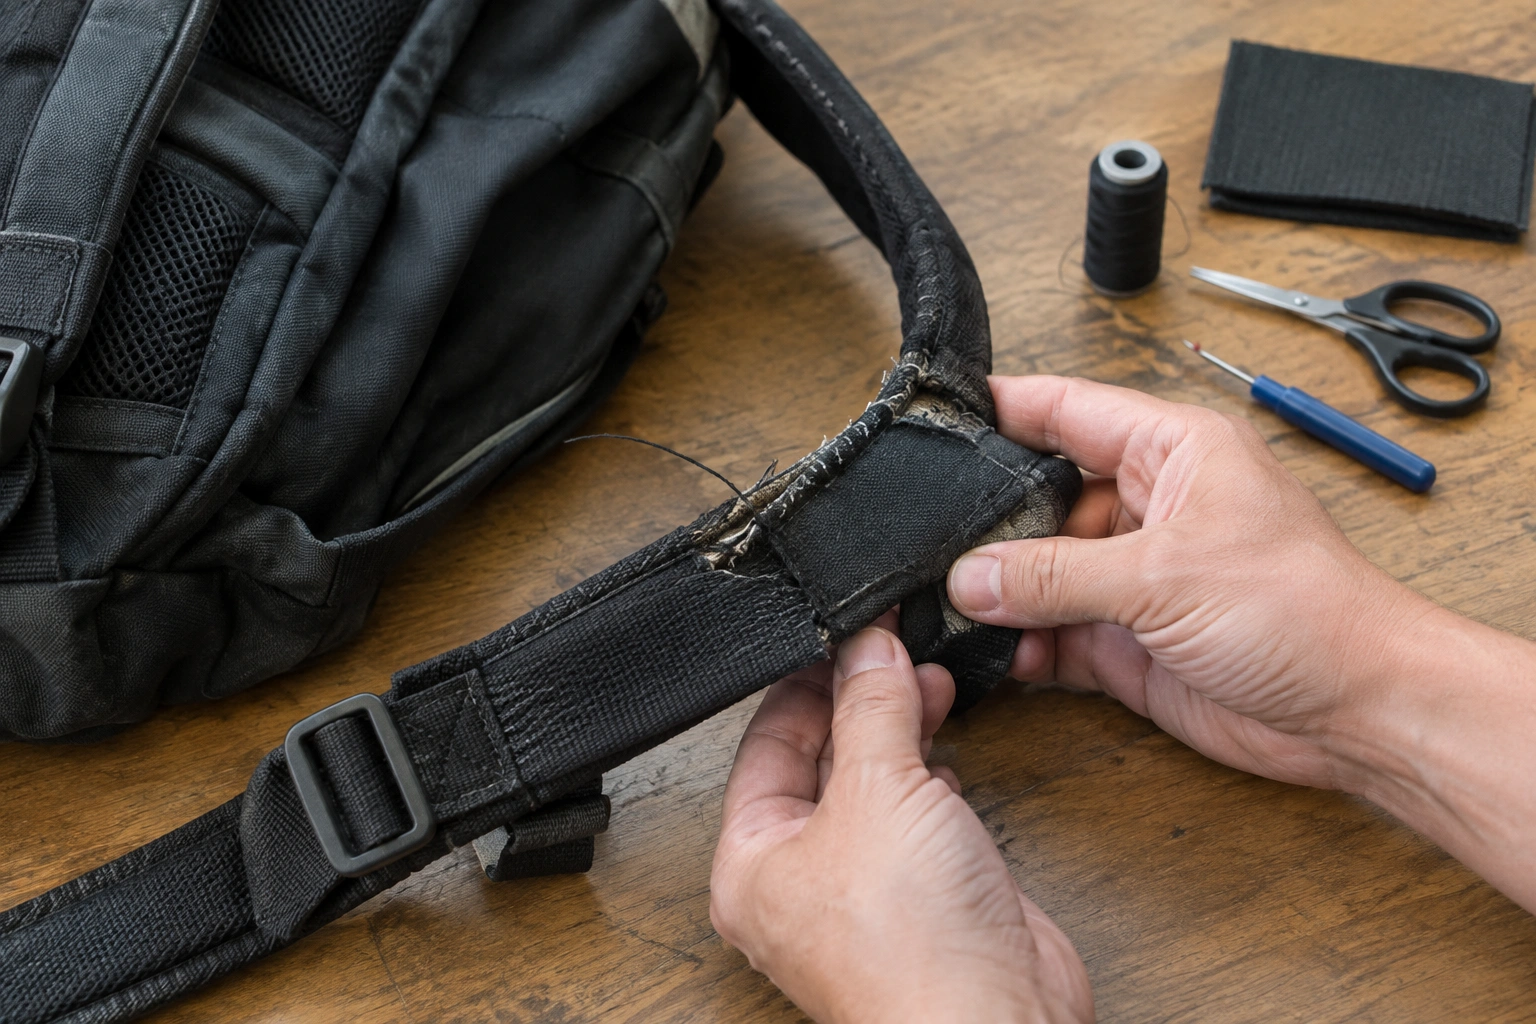
I repair bags for a living and travel with my own gear often enough to know this: a strap failure is never just annoying. If the strap carries books, a laptop, or a child’s spare clothes, the repair has to be strong enough to trust again. That means matching the fix to the damage, not just covering the damage up.
What Causes a Backpack Strap to Fail?
The first step is figuring out whether the problem is cosmetic or structural.
Loose stitching
If the strap is still attached but the seam is opening, the thread has likely worn out before the fabric did. This is the easiest repair if the surrounding material is still intact. You can usually resew it through the original stitch line and reinforce it.
Frayed webbing
Webbing straps often begin by fuzzing at the edges. That fraying can stay minor for a while, but once the fibers start thinning through the middle, the strap loses strength quickly. A little edge fray is repairable; a deeply worn section often needs replacement or a patch.
Torn fabric near the buckle or shoulder mount
This is more serious. If the tear is in the fabric that holds the strap hardware or joins the strap to the bag body, you’re dealing with a load-bearing area. That repair needs reinforcement, not just a quick stitch across the tear.
Broken buckle or adjuster
Sometimes the strap itself is fine, but the plastic hardware has cracked. In that case, the fix may be a replacement buckle rather than sewing. If the buckle is part of the tension path, don’t rely on a cracked one for long.
Failed anchor point
This is the most important failure to judge carefully. If the strap has torn away from the bag body, the repair may have to carry real weight every day. A weak patch here can fail suddenly when the bag is full.
For a quick reference on what kind of repair fits which damage, this backpack repair guide from iFixit shows the kind of alignment and reinforcement that matters when a strap has torn off.
Can You Fix It at Home or Should You Replace It?
Use this rule: if the damage is limited to stitching, edge fray, or a small tear in non-structural fabric, DIY repair is usually reasonable. If the strap has torn away from the load-bearing seam, or the anchor point is badly damaged, the repair becomes a safety question, not just a craft project.
A home repair makes sense when:
– the webbing is still mostly sound
– the bag body around the strap is not shredded
– you can follow the original stitch path or add reinforcement
– the backpack will carry light to moderate loads after the fix
A strap is not a good DIY candidate when the attachment point is load-bearing and the surrounding fabric is thin, shredded, or distorted. If the material around the anchor cannot reliably hold new stitches or a patch, treat it as unsafe to repair at home.
A temporary fix is acceptable when:
– you need the bag for the day
– the strap is stable enough to hold with support
– you can reduce the load until a proper repair is made
Replace the strap or seek professional help when:
– the fabric around the strap is worn thin over a wide area
– the strap has separated from a load-bearing seam
– the buckle or adjuster is broken in a way that affects support
– the bag is carrying heavy items and the repair would be carrying near-original stress
If you want a simple way to decide: cosmetic damage gets patched, isolated stitching gets resewn, and structural damage gets reinforced or handed off.
Tools and Materials You’ll Need
You do not need a full upholstery shop, but you do need the right basics.
Practical repair kit
- Heavy-duty needle
- Polyester thread
- Seam ripper
- Scissors
- Pins or clips
- Nylon webbing or nylon cloth for reinforcement
- Fabric patch for torn sections
- Replacement buckle if hardware failed
- Optional fabric glue or duct tape for emergency stabilization
For nylon straps, a Microtex needle often works well because it can help pierce dense synthetic material more cleanly, though a Universal needle may work in a pinch. A narrow presser foot can help if space is tight between the buckle and the area you need to sew. That detail matters when you’re trying to stitch close to hardware without fighting the machine, as noted in The Daily Sew’s backpack repair guide.
Material choice matters
Use polyester thread rather than lightweight all-purpose thread if the strap carries weight. Polyester handles abrasion and moisture better than basic thread in most everyday backpack repairs. If you’re patching a torn area, choose a patch large enough to spread force beyond the tear itself. A patch that is too small just moves the failure point.
If the fabric is synthetic and fraying, trim only the loose, damaged fibers before you sew. Don’t cut back so aggressively that you weaken the strap further.
How to Fix a Backpack Strap Step by Step
Here’s the method I’d use for a typical repair where the strap is loose, partially torn, or needs reinforcement at the seam.
1. Empty the bag and inspect the failure
Take everything out and turn the backpack over under good light. Look for:
– missing stitches
– pulled thread
– frayed webbing
– torn fabric
– cracked hardware
– stretched holes around the seam
If the damage extends into the bag body, mark the area with chalk or a pin so you know where the repair must cover.
2. Remove loose thread and clean the area
Clip away thread that is already failing. If there are tangled fibers or fuzz, trim them carefully. You want a clean edge, not a ragged one. If the area is dirty, wipe it lightly and let it dry before sewing so the thread doesn’t trap grit.
3. Open only what you need
If the strap is buried under a seam or binding, use a seam ripper to open just enough of the surrounding stitching to access the repair zone. Don’t rip farther than necessary. The goal is controlled access, not dismantling the bag.
4. Reposition the strap in its original place
Align the strap exactly where it belongs before sewing. If the original stitch holes are visible, follow them when possible. That helps preserve the bag’s shape and keeps the repair from drifting into a weak angle. One iFixit guide for a torn-off shoulder strap specifically recommends aligning the handle with the shoulder of the backpack and securing it before sewing with a backstitching technique, which is the kind of alignment you want here as well: iFixit’s torn-strap repair guide.
5. Pin or clip the strap in place
Before sewing, hold the strap with pins or clips so it won’t shift. This is especially useful if the strap has to sit under tension or if you’re working near a buckle.
6. Choose the right sewing method for the repair
For a sewing machine repair, use it when you can feed the strap and reinforcement layers through the machine without forcing them. Machine sewing is best for straighter seams, heavier reinforcement, and repairs where you can keep the layers flat and controlled.
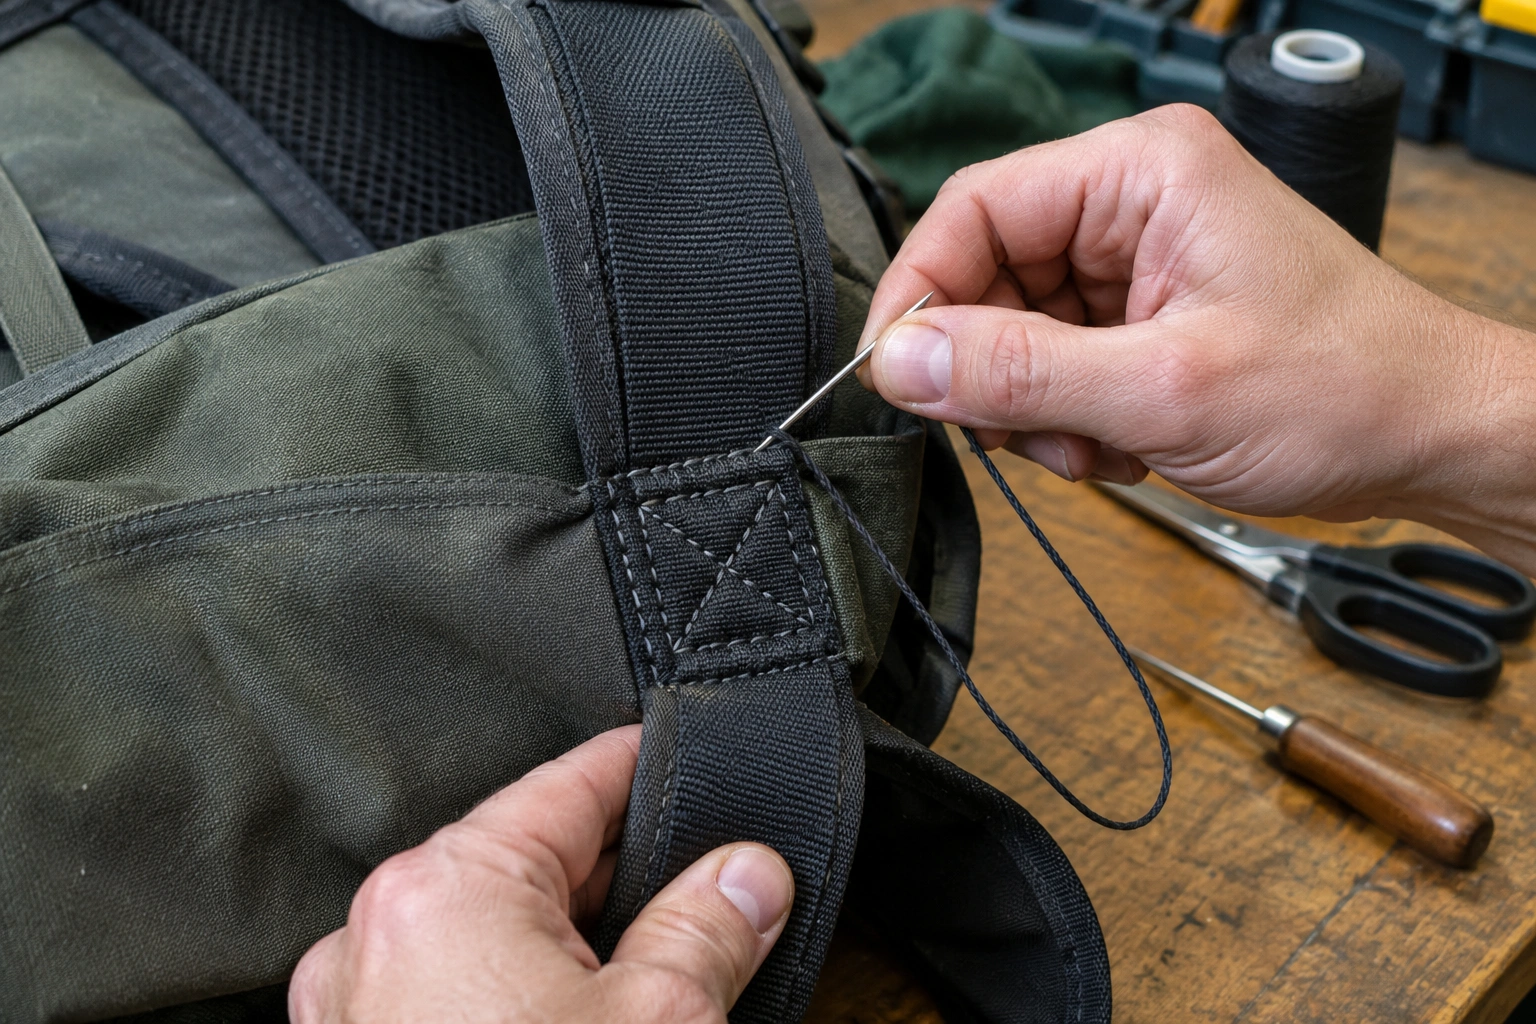
For hand sewing, use it when the area is too thick, too tight, or too close to hardware for the machine to handle safely. A backstitch is the usual hand-sewing choice because each stitch locks into the previous one and holds better than a simple running stitch. If you’re repairing by hand, make several passes rather than one single row.
In either case, sew through all the layers that carry the load. For a machine repair, stitch through the strap, the patch if you’re using one, and the bag fabric or anchor area. For hand sewing, the goal is the same: bind the layers together, not just tack them in place.
7. Reinforce the seam
Add extra stitching across the stress point. A bar tack is a strong reinforcement pattern often used where fabric gets pulled repeatedly. If you can’t make a true bar tack, add short, dense rows of stitching over the highest-stress section.
8. Finish the thread securely
Tie off the thread on the back side and trim it cleanly. If you leave long tails, they can snag and work loose over time.
9. Check the shape before loading the bag
The strap should lie flat, sit in the correct position, and not twist under its own tension. If it looks puckered or pulled sideways, redo the alignment before trusting it.
How to Repair Specific Strap Damage Types
Different failures need different fixes. That’s where a lot of DIY repairs go wrong.
Loose seam at the strap base
If the strap is still attached but the seam has opened, resew directly through the original stitch line if possible. Add a second row of stitching just inside the first one if the fabric allows it. This is one of the best cases for a home repair because the material is still doing most of its original job.
Frayed webbing
If only the edges are fraying, trim the loose fibers and seal the area with a stitched patch. If the webbing is thinning through the middle, don’t trust a simple edge treatment. Webbing that has lost body has also lost strength.
Torn fabric near the buckle
If the tear is around a buckle or adjuster, reinforce the area with a patch behind the damaged fabric and stitch through both layers. The patch helps spread the pulling force. Without it, the tear often grows from the same spot again.
Detached anchor point
If the shoulder strap has pulled away from the bag body, this is a structural repair. Sew the strap back on through all the thicknesses, not just the top layer. Following the old holes helps, but only if those holes are still sound. If the surrounding fabric is shredded, distorted, or too thin to hold a reinforced seam, do not treat it as a simple stitch repair. It may need a larger reinforcement panel, a full strap replacement, or professional help.
The general pattern from The Daily Sew’s repair notes is useful here: sew through all the thicknesses, and use a narrow presser foot if space is tight near hardware.
How to Reinforce the Repair for Heavy Loads
A backpack strap repair should survive real use, not just look neat.
Use a patch to spread force
A patch is useful when the fabric around the tear is weak or thin. It gives the stitches more material to bite into and spreads the stress over a wider area. A patch is better than a tiny seam fix when the load is concentrated at one point.
Add overlapping stitch lines
One row of stitches may hold a light bag for a while, but repeated pulling can work it loose. A second row, placed close to the first, helps resist that movement.
Reinforce the ends of the seam
The ends of a seam are common failure points because the force concentrates there. Add a few extra stitches or a short bar tack at each end so the seam doesn’t start peeling open.
Match the repair to the load
If the backpack carries textbooks, a laptop, or travel gear, be more conservative. A repair that feels fine with a nearly empty bag may not hold once the bag is full. That’s why I always test repaired straps with partial weight first.
For general gear-handling expectations, REI’s pack care guidance is a useful place to cross-check common backpack maintenance principles, especially if your bag is built for outdoor or heavy-use carry.
Start with a very light load
Before you return the bag to normal use, load it lightly first and lift it by the repaired strap. If the seam shows no puckering, shifting, or thread stress, increase the weight gradually in small steps. If anything starts to distort, stop and reinforce the repair before going heavier.
Temporary Fixes for Same-Day Use
Temporary fixes are for getting through the day, not for replacing sewing.
Duct tape
Tape can hold loose fabric together briefly or prevent fraying from spreading further on the way home. It should not be your final answer on a strap that carries weight. It is only short-term stabilization, not acceptable long-term support for a load-bearing strap.
Fabric glue
Glue can help stop a frayed edge from unraveling, but it is not reliable as the main support for a load-bearing repair. It may stiffen the fabric enough to buy time, but it should be treated as a temporary stabilizer only, not a permanent repair.
Quick wrap or tie-off
If the strap is partly detached and you need to carry light items immediately, you may be able to secure it with a temporary wrap or by shifting the load to the other strap. That only works if the bag is light and you can avoid sudden pulling. If sewing materials are not available, this can help hold the strap in place briefly until you can properly repair backpack strap damage.
The rule is simple: if you can’t see a real stitched repair underneath the temporary fix, don’t trust it for commuting or travel.
Common Mistakes to Avoid
The fastest way to make a strap fail again is to repair the symptom instead of the structure.
- Using weak thread on a load-bearing seam
- Sewing only through the outer fabric when the strap needs deeper reinforcement
- Leaving frayed fibers under the stitches
- Relying on glue or tape as the final repair
- Ignoring cracked hardware
- Skipping the test load after sewing
- Making the repair too small to spread stress
A neat-looking stitch line is not the same thing as a strong one. If the repair area still flexes sharply when you pull on it, it is not ready.
How to Test the Repair Safely
Test the strap before you trust it with your normal load.
A simple load test
Put a light load in the bag first, then lift it by the repaired strap and watch the seam closely. Look for:
– thread stretching
– fabric puckering
– popping sounds
– movement at the anchor point
– fresh fraying
If it passes that test, increase the weight gradually. Don’t jump straight to a full commuter load or packed travel kit.
What failure looks like
If the seam starts to open, the strap shifts position, or the fabric around the stitches begins to distort, stop using it for heavy carry. That’s a sign the repair needs reinforcement or replacement.
For travel-specific caution, it’s worth remembering that even a strong-looking strap can fail if the load and movement are high. If you’re preparing a bag for a trip, TSA’s travel guidance is useful for general packing and carry-on awareness, though the strap itself still needs to be structurally sound before you rely on it.
When to See a Luggage Repair Specialist
Some repairs are simply too risky to wing at home.
See a specialist if:
– the strap tore away from the main body at a load-bearing seam
– the fabric around the anchor point is badly weakened
– the bag is expensive, heavily used, or carries valuable gear
– the repair area is too thick for your needle or machine
– the buckle, webbing, and seam all failed together
This is especially true for travel backpacks and school bags that get loaded hard every day. A professional repair can be the safer choice when the strap is part of the bag’s structure, not just an accessory.
Real-World Repair Examples
A commuter bag with a loose shoulder strap seam is usually a straightforward resew job. Clean the area, align the strap, stitch through the original holes if possible, and reinforce the ends.
A student backpack with fraying near the buckle often needs a trimmed edge, a small patch, and fresh stitching before it goes back into rotation. If the webbing is worn through the middle, replacement is safer than patching the edge and hoping for the best.
A traveler who needs the bag for the same day can use tape or glue only as a stopgap, then do a proper repair later. That temporary fix should be treated like a spare tire, not a permanent solution.
A strap that has torn completely away from the body may need a reinforced reattachment, and if the surrounding fabric is weak, that’s where a repair specialist earns their keep.
Final check before you carry it again
If the strap sits flat, the stitches are tight, and the bag holds a light test load without shifting, you’ve likely done the repair correctly. If anything feels soft, wobbly, or stressed, don’t “see how it goes” on a full day out. Fix it properly first.