
How Long Does a Backpack Take to Dry? A Practical Guide for Safe, Fast Drying

If you need the short answer, most backpacks dry in about a day or less when they’re lightly wet and hung in a warm, well-ventilated space. A thin nylon or polyester daypack may be ready sooner; a heavily padded school bag, travel pack, or canvas backpack can take longer, especially if moisture has worked into seams, pockets, and foam.
Important: machine drying is not recommended for most backpacks, even on low heat, unless the care label explicitly allows it. Heat can warp foam, weaken adhesives, damage coatings, or shrink certain materials.
The part that surprises people is this: the outside can feel dry while the inside still holds damp air. That hidden moisture is what causes musty smells, mildew, and that “I should have waited one more day” feeling. Deuter notes that backpacks are easily affected by moisture, and its care guidance also points out that zippers and seams can let moisture through during sustained rain. Deuter’s backpack care advice is a good reminder that drying is about more than the shell.
Quick Answer: How Long a Backpack Usually Takes to Dry
Here’s the practical estimate I use when people ask me this in the shop:
- Lightly wet backpack after rain: often 4–8 hours
- Washed thin backpack with little padding: usually 8–24 hours
- Heavily padded backpack or canvas pack: often 18–36 hours
- Humid conditions or a damp room: add several more hours, and sometimes a full extra day for thick packs
- Damp interior, seams, straps, or bottom panel: can add extra time even after the outer fabric looks dry
If the weather is humid, the room is closed up, or the pack has thick foam, expect drying to slow down. Alpinetrek’s care guide notes that the drying process can take a while depending on outside temperature and the kind of pack you have. Their backpack drying advice matches what I see in real life: structure matters as much as fabric.
A useful rule: if you can still feel coolness, dampness, or a slightly heavy feel in the straps or back panel, it is not ready for storage yet.
What Affects Drying Time
Drying time is mostly a mix of material, thickness, airflow, room temperature, and trapped moisture. If you understand those pieces, you can estimate your own bag pretty accurately.
Material matters
- Nylon and polyester usually dry faster because they’re lighter and less absorbent.
- Mesh dries quickly because air passes through it.
- Canvas usually takes longer because it holds more water in the weave.
- Water-resistant coatings can slow evaporation if moisture is trapped under layers or in seams.
Thickness and padding matter even more
A simple commuter pack with thin fabric dries much faster than a student backpack with padded shoulder straps, a cushioned laptop sleeve, and a structured back panel. Foam and lining hold water the way a sponge does: the outside may release moisture quickly, but the core stays damp.
Airflow beats “just waiting”
A still room is a slow room. A moving breeze removes moisture from the surface and helps the fabric keep releasing water. Distance matters too: a fan works best when it can move air across the backpack rather than from too far away to make a difference.
Room temperature can speed or slow the process
A moderately warm room usually dries a backpack faster than a cold one, but warmth alone is not enough. Without airflow, even a warm room can leave moisture trapped inside the padding and seams.
Humidity can stall the process
If the air is already damp, the backpack has nowhere to “give” the moisture. In humid weather, a bag can seem stuck halfway dry for hours. That’s normal; it just means the surrounding air is not helping.
How wet it got matters
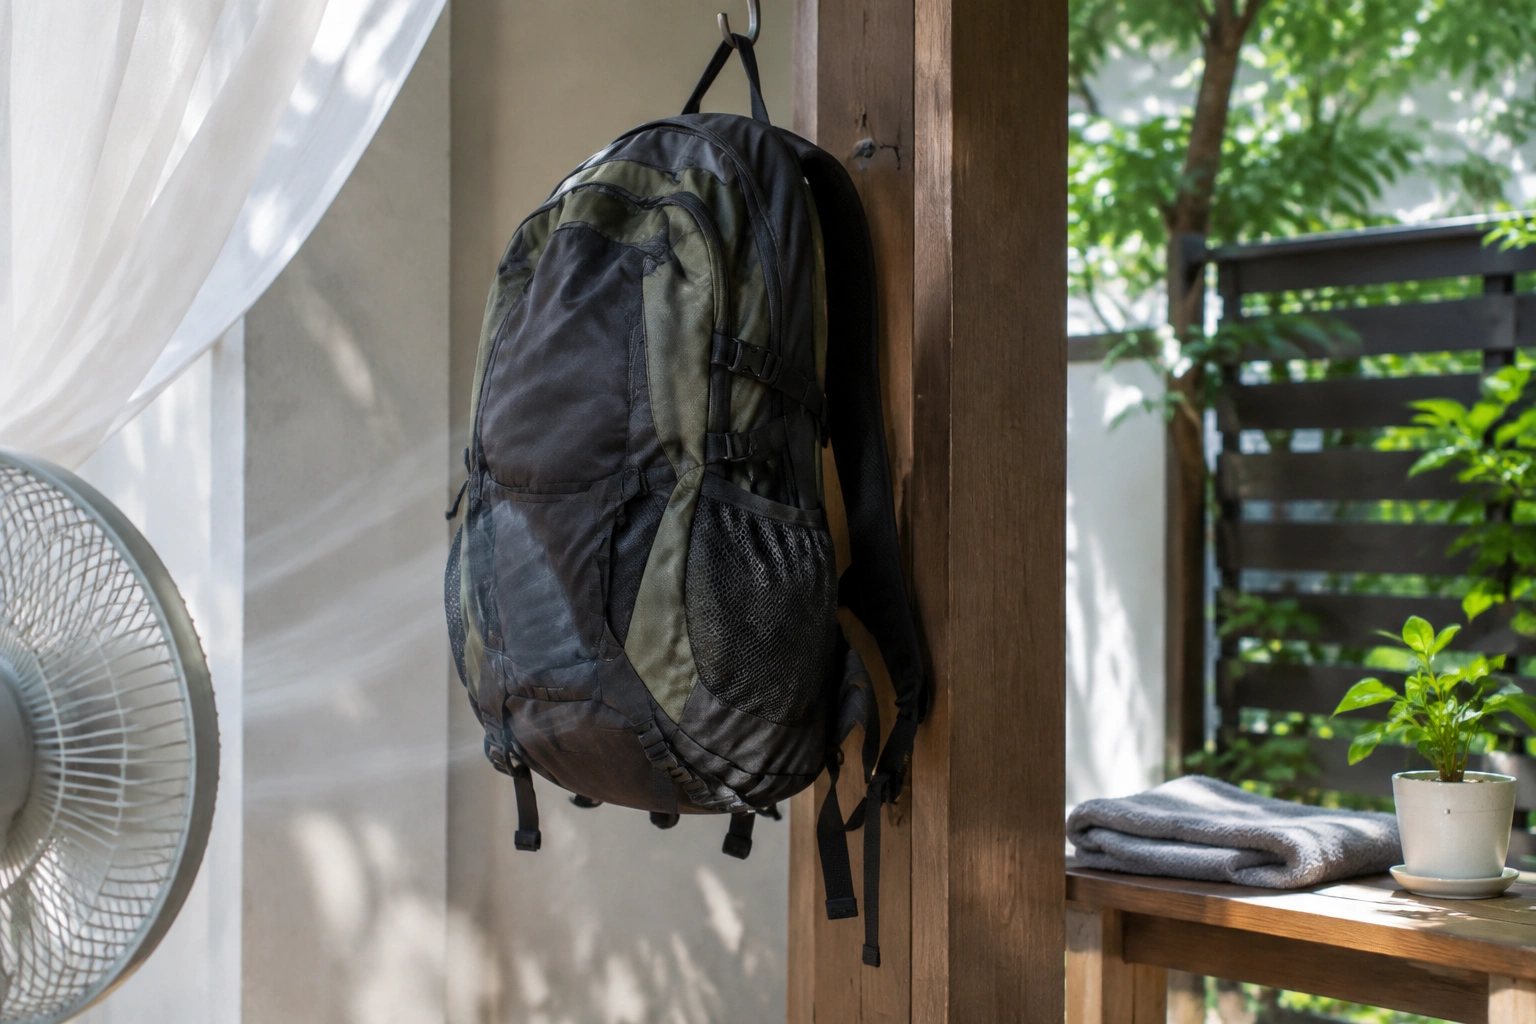
A backpack that was just damp from light rain is much easier to dry than one that was fully soaked through or washed thoroughly. Once moisture reaches the lining, foam, and seam tape, drying time stretches out.
Shape and construction create hidden wet spots
The usual trouble spots are:
- bottom corners
- padded straps
- foam back panels
- seam lines
- zip pockets
- interior lining
- laptop sleeves
- mesh bottle holders
Those areas dry last because water settles there and air reaches them less easily.
Tools and Materials You’ll Need
You do not need anything fancy. In most cases, the safest setup is basic:
- a clean, dry towel
- a fan
- a hanging rack, hook, or clothesline
- a well-ventilated shaded area
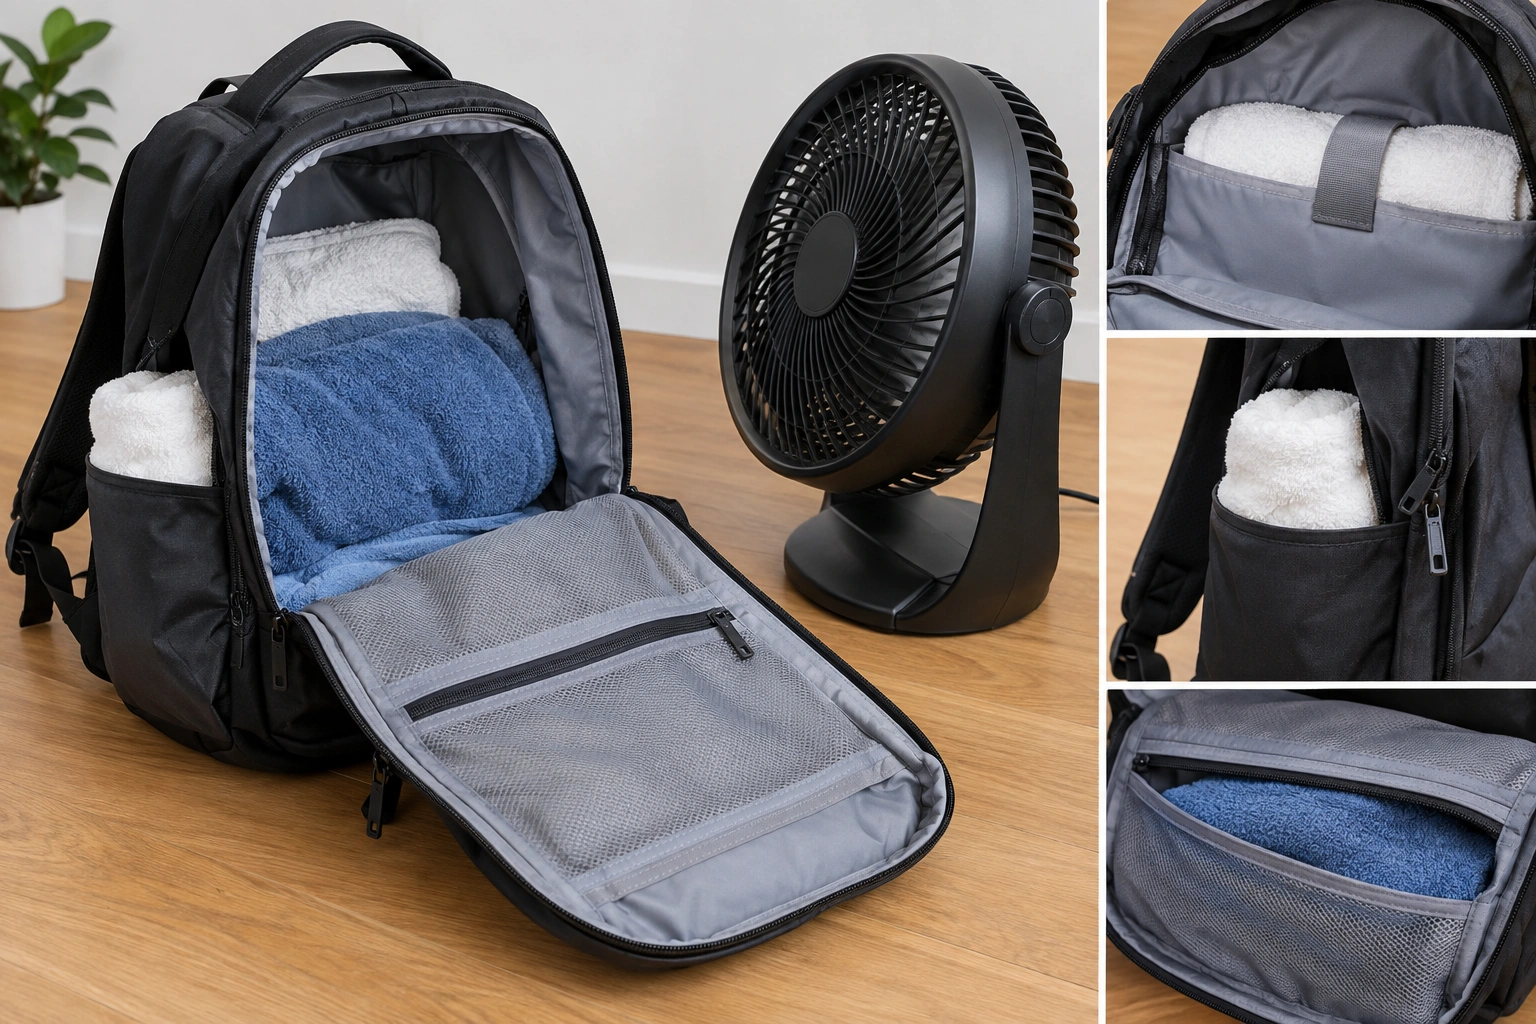
- optional crumpled paper or dry towels for pockets and interior spaces
Cinomadist recommends opening zippers and pockets, stuffing the bag with dry towels or crumpled paper to help it keep its shape and absorb moisture, and using a fan if needed. That approach is practical because it speeds drying without relying on heat.
Step-by-Step: How to Dry a Backpack Safely
1) Empty the bag completely
Remove everything, including pens, crumbs, chargers, tags, and removable inserts. If there’s a laptop sleeve insert or detachable organizer, take it out. Anything left inside slows drying and can trap odor.
2) Blot off surface water first
Use a towel to press, not rub, the wet areas. Focus on the bottom panel, straps, and pockets. This does not “dry” the backpack, but it removes the excess water that would otherwise lengthen the whole process.
3) Open every zipper and pocket
Open the main compartment, front pockets, side pockets, and any hidden compartments. Air needs a path through the bag, not just around it.
4) Shape the backpack so air can move through it
Hang it or prop it so the opening stays wide and the fabric is not pressed flat against a wall or chair. If the back panel is thick, tilt the bag slightly so air can reach the underside too.
5) Put it in shade with good airflow
A shaded, ventilated area is usually the safest drying spot. Direct sun may speed surface drying, but it can fade colors and stress coatings. Brief sun exposure is sometimes acceptable if you are just giving the bag a quick finish and can keep an eye on it, but prolonged direct sun is best avoided. Shade plus airflow is usually the safer combination.
6) Use a fan if you want faster drying
A fan is one of the best low-risk tools here. Aim it at the backpack from a short distance so air moves across the fabric and into the open compartments. You’re trying to move moisture away, not blast the bag.
7) Replace damp stuffing
If you use paper or towels in the pockets, check them after a while. Once they become damp, swap them out. Wet stuffing stops helping and can slow the process.
8) Check the hidden areas before you store it
The bag is not done just because the shell feels dry. Check the seams, padded straps, bottom corners, and lining. Those are the areas that usually stay damp the longest.
Drying Times by Backpack Material and Build
This table gives a realistic comparison. Think of it as a planning guide, not a stopwatch.
| Backpack type | Typical drying speed | Why it dries that way |
|---|---|---|
| Thin nylon daypack | Fastest | Light fabric, low absorption, good airflow |
| Polyester commuter backpack | Fast | Similar to nylon, usually not very absorbent |
| Mesh-heavy pack | Fast | Air moves through the material easily |
| Canvas backpack | Slower | Thicker weave holds moisture longer |
| Padded student backpack | Slower | Foam, lining, and straps trap water |
| Travel backpack with many compartments | Slower | More seams, pockets, and layers to dry |
| Water-resistant or coated backpack | Variable | Outer shell may dry quickly, but trapped moisture can linger inside seams or lining |
If you want the simplest comparison: lightweight packs dry faster than heavily padded packs. That trade-off is useful to remember when you’re deciding whether to wash the bag now or wait for a better drying window.
Best Drying Methods: Air, Towel, and Fan
Air drying
This is the safest method for most backpacks. It protects fabric, foam, stitching, and coatings. The downside is speed. If you can wait, air drying is usually the least risky choice.
Towel drying
This works best right after washing or after a heavy rain soak. It removes the water sitting on the surface, which shortens the total drying time. It does not replace air drying; it just makes the air-drying stage shorter.
Fan-assisted drying
For most people, this is the sweet spot. You keep the safety of air drying but speed it up by improving airflow. If you need the backpack ready by tomorrow, a fan is usually the best compromise.
What Not to Do
This is where people damage a perfectly good bag.
- Do not put a backpack in a machine dryer.
- Do not place it on a radiator or heater.
- Do not use a blow dryer on hot.
- Do not leave it baking in direct sunlight for hours.
Alpinetrek warns that a blow dryer or radiator can damage the material and even ruin the backpack. Their guidance is blunt because the risk is real: heat can warp foam, weaken adhesives, and stress coatings.
Sunlight is a mixed bag. It can help with drying, but prolonged direct sun can fade colors and damage coatings. Shade plus airflow is usually the safer combination.
How to Dry the Inside, Straps, Padding, and Zippers
The outside shell is the easy part. The real drying work happens in the places that hide moisture.
Inside the backpack
Start by opening the main compartment as wide as possible. If the bag has a clamshell opening, unzip it fully so air can reach the whole interior. If it opens from the top, keep the mouth open and position the bag so air can move down into the cavity instead of only across the outside.
If you use paper or towels inside, place them where they support the shape without blocking airflow completely. Replace them once they feel damp. The goal is to pull moisture out, not seal the interior shut.
Interior pockets and lining
Open every compartment. Turn pockets inside out only if the construction allows it without stressing seams. If not, leave them open and use dry paper or towels to help pull moisture out.
Padded straps and back panel
These parts hold water longer than the shell. Press them gently with a towel, then hang the bag so air can reach both sides. If the pack has thick foam, expect extra time.
Zippers and seam lines
Zipper tape and stitching often stay damp after the rest of the bag feels dry. Run a dry cloth along those lines and leave the zippers open during drying.
Bottom corners
Water naturally settles in the lower corners. Tilt the backpack slightly or change its position halfway through drying so those areas do not stay hidden from airflow.
Is Sunlight Safe for Drying a Backpack?
Usually, brief sunlight is okay if the bag needs a quick boost and you can watch it, but shade with airflow is the better default.
- Best choice: shaded, breezy spot
- Okay in a pinch: short sun exposure to help finish drying
- Avoid: prolonged direct sun, especially for colored, coated, or synthetic packs
Why? Sun can speed surface drying, but it can also fade colors, dry out coatings, and stress some materials over time. If you want the safest route, use shade and a fan instead.
How to Tell When the Backpack Is Fully Dry
Use more than one check.
- Touch check: no cool, damp, or spongy spots
- Smell check: no musty or wet-fabric odor
- Weight check: it should feel noticeably lighter than when damp
- Hidden-area check: seams, straps, corners, and pockets should all feel dry
Cinomadist advises waiting until the backpack is completely dry before storing or using it, because damp pockets encourage mildew. That advice matters because mildew often starts where you can’t see it.
If you are unsure, give it more time. A backpack that is “probably dry” is not the same as one that is safe to put away.
Troubleshooting: If It Still Smells Damp or Takes Too Long
If the bag still smells off after drying, the cause is usually trapped moisture, not the fabric itself.
Try this:
- Reopen all compartments.
- Put it back in a drier, breezier spot.
- Add a fan if you were relying on room air alone.
- Replace any paper or towel stuffing.
- Check the padding and seam lines again.
If the backpack smells musty even after it feels dry, that usually means moisture or odor has stayed in the lining, foam, or seam areas. In that case, air it out again with good circulation and recheck the hidden spots before storing it. If the smell remains after repeated drying, the bag may need a deeper clean.
Do not cover it, fold it, or store it “for now.” That is how mildew gets a head start.
Practical Examples: Common Backpack Drying Scenarios
Nylon commuter backpack after rain
If the pack got wet on the walk home but was not soaked through, towel it off, open the pockets, and hang it with a fan nearby. In a dry room, it may be ready the same day or by the next morning.
Heavily padded student backpack after washing
This one needs patience. The shell may look dry before the foam does. Give the straps, back panel, and laptop sleeve extra time, and check the inside before reuse. Overnight is often not enough for a thick pack if humidity is high.
Canvas backpack with damp seams
Canvas can fool you. The outside may feel fine while the seams and bottom corners stay damp. Spread the bag open and let airflow reach the stitched areas. Don’t store it until the odor is gone and the corners feel dry.
For more care basics, it helps to pair drying with the right cleaning method. If you want the full wash sequence, see how to wash a backpack and how to clean a backpack. For more gear-care guides, the backpack and luggage care hub is a useful place to start.
When to See a Luggage Repair Specialist
If a backpack keeps smelling musty after repeated drying, or if the lining, foam, or seams stay damp far longer than they should, a repair specialist can help you figure out whether the issue is trapped moisture, damaged lining, or a construction problem. That’s especially worth considering for expensive travel packs, waterproof models, or bags with glued-in foam that seem to hold water unusually long.