
How to Replace Suitcase Wheels Without Damaging the Bag

A broken suitcase wheel does not automatically mean the whole bag is done. In many cases, you can swap the wheel or the full wheel assembly and keep the suitcase in service for years longer. The key is matching the replacement to the way your luggage was built, not just buying a wheel that “looks close.”
Before you start, use this quick decision tree:
- Can you see screws, bolts, nuts, or an access zipper near the wheel?
- Yes: the wheel is often replaceable with basic tools.
- No: keep checking the corner housing and interior lining.
- Is the wheel separate from the corner mount?
- Yes: you may only need a wheel or axle part.
- No, the wheel and bracket come off together: you likely need a full wheel assembly.
- Is the wheel housing molded into the shell, cracked, or badly deformed?
- Yes: it may not be worth repairing, especially if the part is discontinued.
- No: a DIY replacement is more likely to make sense.
I repair luggage for a living, and the same mistake comes up again and again: people measure the wheel diameter, but forget about the mount, axle, screw pattern, or rivet style. That is how a simple fix turns into a wasted part and a cracked corner housing. If you take the time to identify the attachment method first, the repair gets much easier.
Can You Replace Suitcase Wheels?
Usually, yes — but not always in the same way.
Some suitcases use a wheel assembly that is held on with screws or bolts, which makes replacement fairly straightforward. Others use rivets or pin-style hardware, which can still be repaired, but the process is more involved. A few low-cost bags have wheels molded into the corner housing, and those are often not worth the trouble unless the manufacturer sells the exact part.
A quick way to judge repairability is to inspect the wheel area from both sides. If you can see screws, nuts, or a maintenance zipper that exposes the mount, that is a strong sign the wheel is meant to come off. If the wheel and bracket appear to be one integrated unit, or the corner is molded as part of the shell, replacement may still be possible but is less likely to be practical as a DIY repair.
If the wheel is riveted on, replacement is still possible, but you need the right part and a bit more care. A riveted wheel usually means drilling out the old fastener and fitting a matching replacement mount. That is where many DIY repairs go wrong: they buy the wheel before confirming the mount pattern.
A good rule: if the suitcase shell is cracked, the wheel housing is split, or the corner is badly deformed, stop and reassess. Replacing the wheel will not fix a broken structure.
What You Need Before You Start
Gather everything first so you do not have a half-disassembled suitcase sitting on the floor while you hunt for a missing wrench.
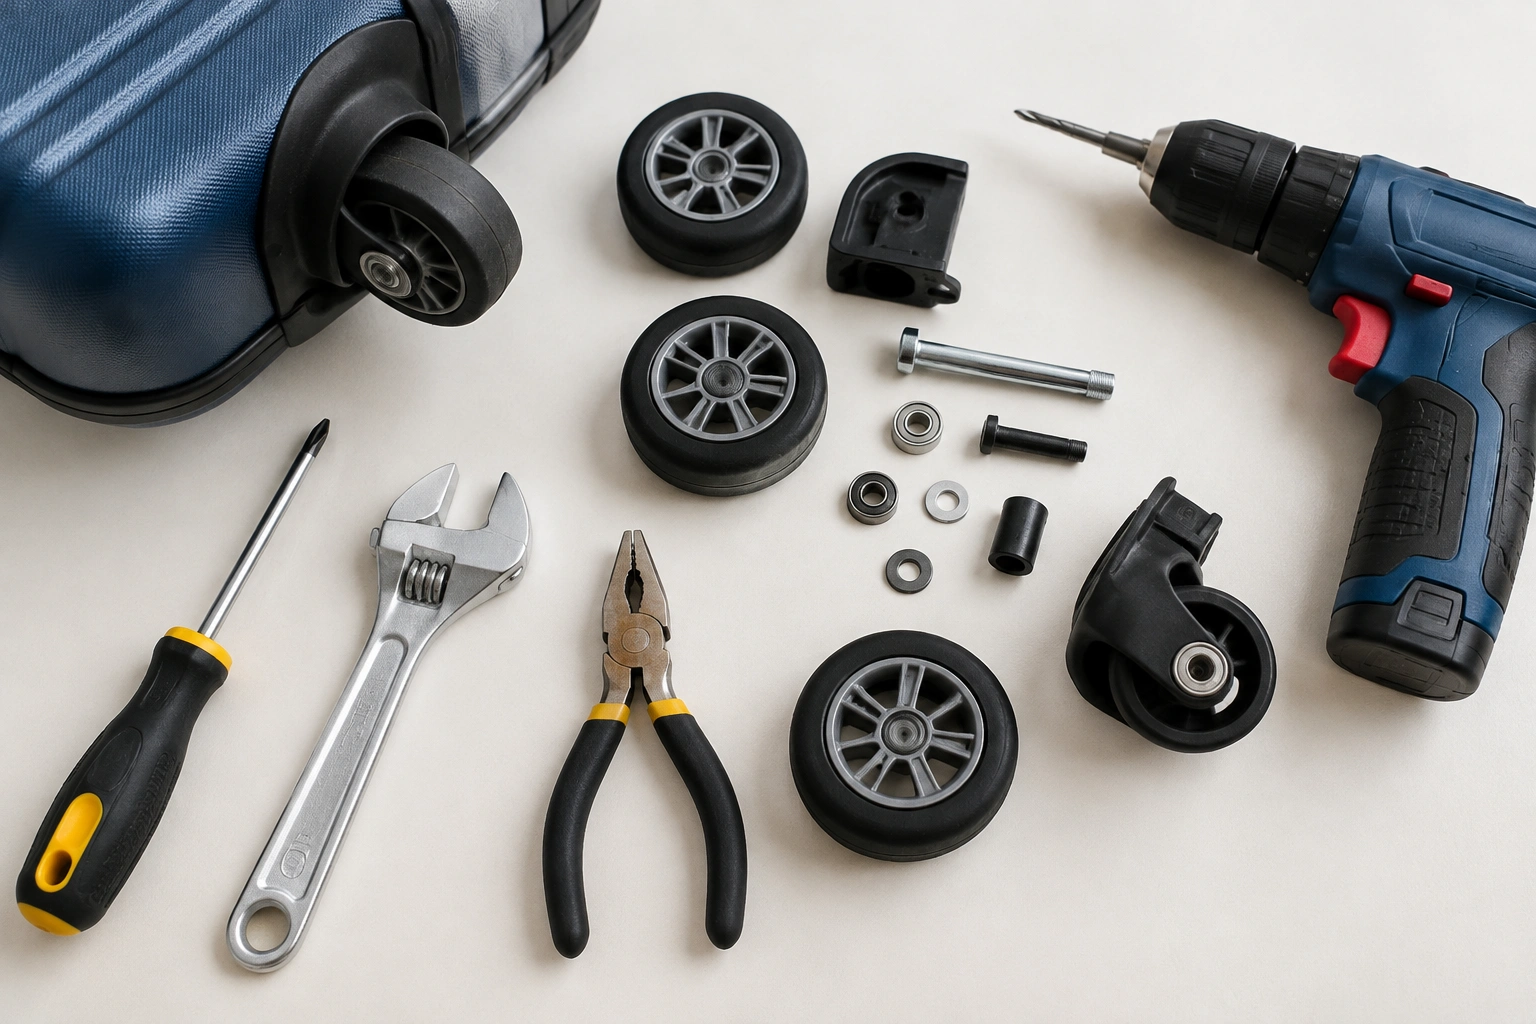
Basic tools and supplies
For most suitcase wheel repairs, keep these on hand:
- Phillips screwdriver
- Flathead screwdriver
- Small wrench or socket set
- Pliers
- Replacement wheel or wheel assembly
- Washers and nuts, if your model uses them
- Marker or painter’s tape for labeling parts
- A towel or folded blanket to protect the shell
- Eye protection if drilling rivets
If you are removing rivets, add a drill and the correct drill bit for the fastener head you are drilling out. If you are not sure which bit to use, take the suitcase to a hardware store and match the rivet head before you start drilling.
Safety and setup
Work on a flat surface and turn the suitcase upside down so the wheels are easier to reach. Keep the suitcase stable so you are not twisting the shell while removing hardware.
If the lining has an access zipper near the corner, open it before forcing anything. Some luggage hides the wheel hardware behind the interior fabric, and pulling on the shell from the outside can tear the lining or stress the corner mount.
Identify the Wheel Type and Measure the Replacement
This is the part that saves you from ordering the wrong part.
Spinner wheels vs inline-style wheels
Spinner wheels usually rotate in multiple directions and are mounted in a corner housing. They often come as a small assembly with a wheel, axle, and mounting plate. Inline-style wheels are more like skate wheels and tend to sit in a fixed direction, often with a narrower profile.
Do not assume the wheel style by appearance alone. Some spinner casters look similar to universal replacements, but the mounting holes and orientation can still differ.
Measure these dimensions exactly
Use the old wheel as your reference if it is still intact enough to measure.
- Wheel diameter — measure across the wheel from edge to edge at the widest point.
- Wheel width — measure the thickness of the wheel itself, not the whole bracket.
- Axle diameter — if the wheel rides on a shaft, measure the shaft with calipers or a drill-bit gauge. If you do not have calipers, compare the axle to known drill-bit sizes, but treat that as an estimate until you verify it.
- Axle pin length or bolt length — measure only the usable length from under the head to the end of the pin or bolt, not the full hardware including the head.
- Hole spacing — measure from the center of one mounting hole to the center of the next. If there are four holes, measure center-to-center across the pattern and note whether the holes form a rectangle or square.
- Washer thickness and stack height — measure each washer if possible, then note the total stack thickness if the wheel depends on spacers or multiple washers.
If the old wheel is too damaged to measure directly, use the opposite wheel if it is identical, or measure the mount on the suitcase instead. You can also compare the broken part against a ruler and photograph it next to a coin, screwdriver, or known-size drill bit for reference, but direct measurement is better whenever possible.
Check the orientation
Some wheel assemblies are left- or right-specific, or front/rear-specific. Before ordering, take a photo of the damaged corner from several angles. That photo is more useful than memory when you are comparing replacement listings.
Suitcase-repair specialists also warn that replacement wheels are often designed for a specific model, and a different shape or hole pattern may not align correctly. That is why a “close enough” part usually is not close enough.
Choose the Right Replacement Part
You usually have two decisions: OEM versus universal, and wheel-only versus full assembly.
OEM parts vs universal parts
OEM replacement parts are made for your suitcase brand or model. They are the safest choice when the model is still supported, because the hole pattern and shape are more likely to match.
Universal replacement wheels can work when the suitcase is discontinued or the brand no longer sells parts. The trade-off is that you must match dimensions and mounting style carefully. Universal parts can save an older suitcase, but they are less forgiving if the measurements are off.
If your bag is a newer brand-name suitcase, check the manufacturer first. Brand support pages and parts sellers often provide model-specific replacements, but availability varies by product line.
Replace one wheel or the whole assembly?
Replace one wheel only when:
– the mount is solid
– the axle and bearing are still in good shape
– the other wheel on the same side is wearing normally
Replace the full assembly when:
– the bracket is cracked
– the bearing is seized
– the wheel sits crooked in the housing
– the replacement wheel alone would not match the original mount
If one wheel on a pair is badly worn, replacing both matching wheels on that side can help keep rolling resistance more even. That is especially useful when the old wheel is still usable but noticeably flatter, rougher, or noisier than the new one.
Remove the Damaged Suitcase Wheel
The removal method depends on the hardware.
If the wheel is screwed in
- Turn the suitcase upside down.
- Open any lining zipper that hides the corner hardware.
- Hold the nut or bolt head on the inside with a wrench or pliers.
- Use the correct screwdriver on the outside screws.
- Remove the fasteners and keep them organized.
- Lift off the wheel assembly.
If the screws are corroded or stripped, stop and use the right bit rather than forcing them. A stripped screw is far easier to deal with before the head rounds completely.
If the wheel is riveted on
- Protect the surrounding shell with tape or a cloth.
- Put on eye protection.
- Support the wheel mount so it does not flex.
- Drill carefully through the rivet head until the fastener loosens.
- Remove the old rivet and wheel hardware.
- Clean the hole area before fitting the replacement.
Do not drill deeper than necessary. The goal is to remove the rivet, not enlarge the hole or damage the internal lining. If the rivet is buried in a hard-to-reach corner, that is a good point to pause and decide whether a repair shop is the better move.
If the wheel uses a bolt, nut, pin, or clip
Some luggage uses a through-bolt with a nut, while other models use a retention clip or axle pin.
- Bolt and nut fastener: hold the nut on the inside with a wrench or pliers and back the bolt out from the outside.
- Pin or clip fastener: remove the clip first, then slide the pin out with pliers if needed.
Do not mix up these methods with rivet removal. A rivet has no removable nut and must be drilled out; a bolt or pin assembly should come apart without drilling.
Install the New Wheel or Wheel Assembly
This is the part where patience matters more than force.
Dry-fit first
Before tightening anything, line up the new wheel assembly over the mounting holes and check the fit. Place the new part in position, insert the bolt or screws loosely, and confirm that the holes line up before you fully tighten anything.
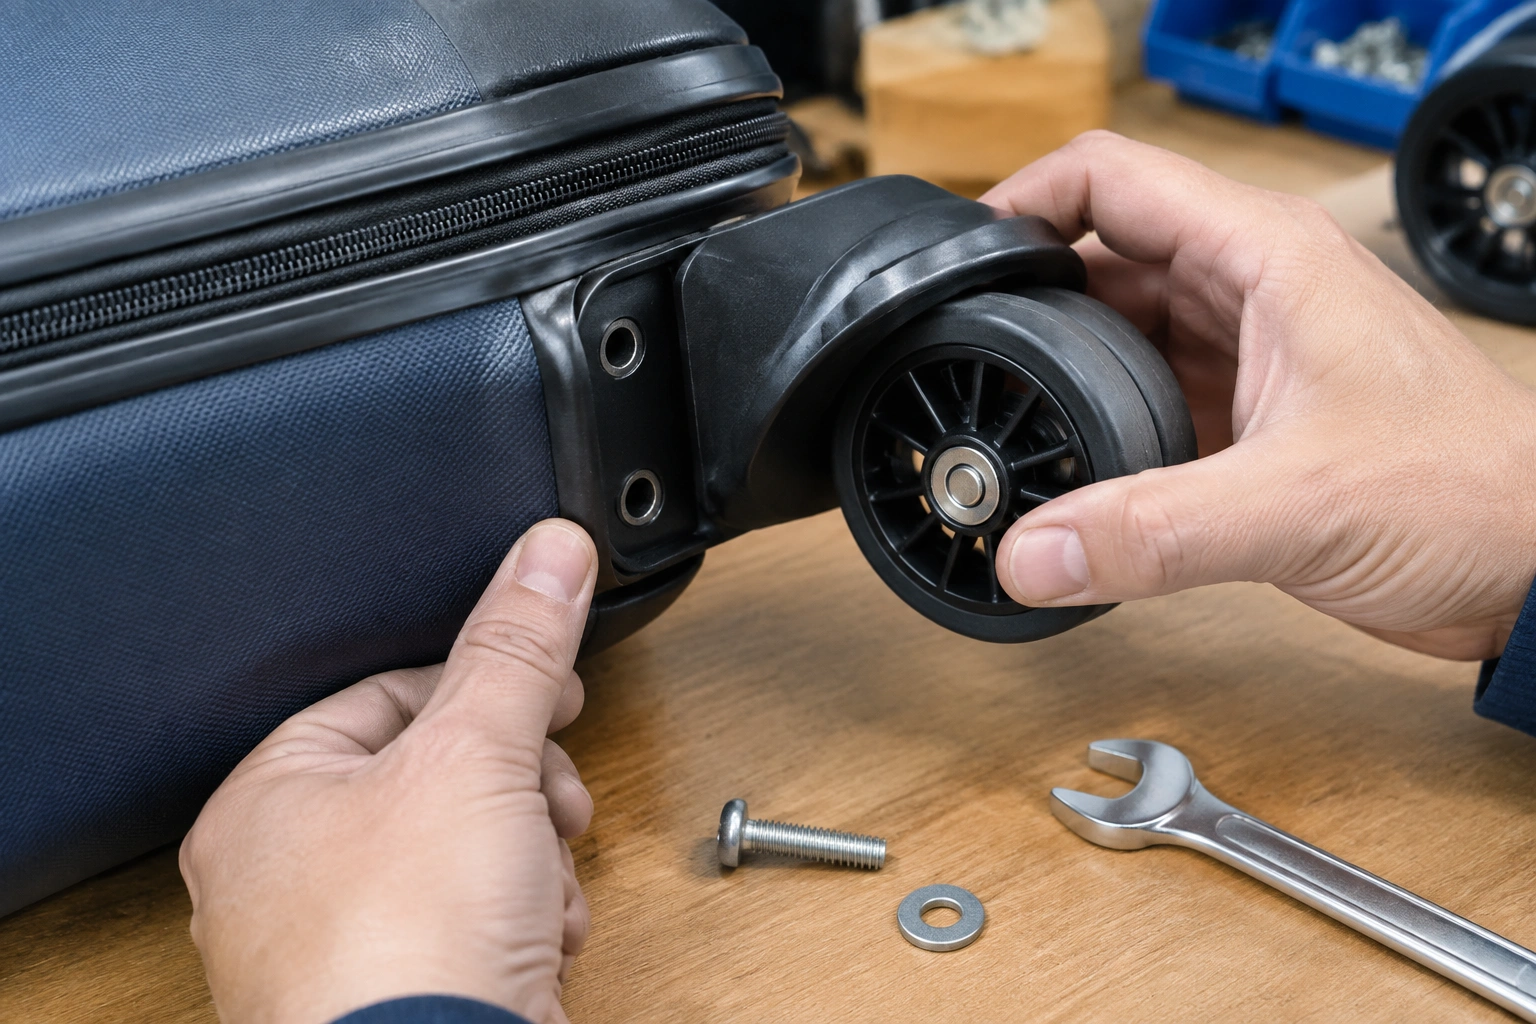
That hand-tight step matters. It lets you confirm the holes line up before you commit to full torque.
Tighten in the right order
- Insert the fasteners loosely.
- Make sure the assembly sits flat against the shell.
- Tighten each fastener a little at a time.
- Alternate between screws if there are multiple mounting points.
- Stop once the hardware is snug.
Use threadlocker only if the hardware originally relied on it or if the fasteners tend to back out during use. If the replacement kit includes locknuts, use them only where the bolt length and thread size match the original hardware. Do not add threadlocker to a fastener that needs to be removed later for routine service.
Before the final snug-down, spin the wheel by hand. It should rotate freely without rubbing the shell or binding against the bracket. If it feels tight, back off slightly and recheck the washer stack, axle alignment, and fastener tension.
Over-tightening can pinch the wheel, distort the bracket, or crack a plastic corner mount. If the wheel stops spinning freely after tightening, back off slightly and test again.
Reassemble the lining
If you opened an interior access zipper, close it after confirming the wheel mount is secure. Make sure no fabric is trapped under the bracket, because that can rub and wear through the lining later.
Test the Repair and Check Alignment
Do not wait until your next trip to find out the wheel is crooked.
Spin the wheel by hand and look for these signs:
– it turns smoothly
– it does not rub the shell
– it sits straight in the housing
– it does not wobble side to side
Then set the suitcase on the floor and roll it lightly unloaded. If it tracks straight, you are in good shape. If it drags or veers, the mount may be misaligned or one fastener may be tighter than the others.
A good test is to push it across a flat floor in both directions. If the wheel only binds when the suitcase is loaded, the replacement may be slightly too small or the axle may be too tight.
Common Mistakes to Avoid
The most expensive mistake is buying by appearance instead of measurement. Two wheels can look nearly identical and still differ in width, hole spacing, or axle size.
Other common errors:
– mixing up left and right wheel assemblies
– replacing a wheel without checking the bearing
– drilling rivets without supporting the housing
– tightening one screw fully before the others are seated
– installing a wheel that rubs the shell at one point in the rotation
Those mistakes usually show up as wobble, scraping, or a wheel that feels “almost right” but not smooth enough for real travel.
Troubleshooting Wheel Fit and Rolling Problems
If the new wheel does not behave properly, work through the problem logically.
Wheel wobbles
Check whether the fasteners are seated evenly. A bracket that is slightly tilted can wobble even when the hardware feels tight. If the wheel itself is loose on the axle, the bearing may be the issue rather than the mount.
Wheel rubs the shell
The replacement may be slightly too wide, or the washer stack may be wrong. Remove the wheel and compare it to the old part side by side. Even a small width difference can cause rubbing.
Wheel binds after tightening
Back off the hardware a little. Binding often means the bolt or nut was tightened enough to squeeze the wheel or bearing. If the wheel still sticks after loosening, check for two common causes:
- Seized bearing: the wheel does not spin smoothly even when removed from the suitcase or when the axle is loose. In that case, the wheel or bearing may need replacement.
- Misaligned mount: the wheel spins freely off the suitcase but binds once installed. That usually points to a crooked bracket, uneven washer stack, or fastener tension pulling the assembly out of square.
Replacement part will not fit
Compare the old and new parts in this order:
1. hole spacing
2. wheel diameter
3. wheel width
4. axle or bolt size
5. left/right orientation
If one of those is off, the part is probably the wrong match, even if the listing claimed it was universal.
When to Replace One Wheel, Both Wheels, or the Whole Assembly
Use the damage pattern as your guide.
Replace one wheel when the rest of the assembly is sound and the suitcase rolls straight.
Replace both wheels on the same side when they are the same age and one has clearly worn more than the other. That gives you more balanced rolling and avoids uneven wear.
Replace the entire assembly when the mount, bearing, or corner housing is damaged. If the bracket is cracked, a new wheel alone will not solve the problem.
DIY Repair vs Professional Luggage Repair
A DIY repair usually makes sense when the wheel is screwed, bolted, or lightly riveted, and the replacement part is easy to match. It can save time if you already have the tools and the hardware comes apart cleanly.
A repair shop is often the better choice when:
– the wheel is deeply riveted into reinforced hardware
– the fastener is seized, stripped, or rusted in place
– the shell or frame is cracked
– the corner is molded into the bag and the part is hard to source
– you want to avoid enlarging holes or damaging the lining
The trade-off is simple: DIY is usually cheaper in parts but can take more time and carries more risk if the hardware is stubborn. A shop may cost more, but it is often faster and safer when the wheel mount is integrated, brittle, or difficult to access.
Practical Examples of Common Wheel Repairs
Here is how this plays out in real life.
A carry-on spinner with one cracked wheel is often the easiest case. If the wheel assembly is screwed in and the model is still supported, you can usually swap the part with basic tools and a careful fit check.
An older suitcase with riveted wheels takes more work. You may need to drill out the old rivets, match the replacement mount exactly, and be careful not to enlarge the holes. That repair is still possible, but it is less forgiving.
A discontinued model with no OEM parts often pushes you toward a universal wheel kit. In that case, the old wheel becomes your template. Measure the diameter, width, axle size, and mounting pattern, then compare those numbers before ordering. If the mount shape is off, keep looking rather than forcing it.
For readers who want a broader maintenance routine after the repair, our guide to cleaning a backpack and how to wash a backpack show the same principle: protect the gear first, then clean or repair it in a way the material can actually handle.
Final Check Before You Travel
Once the wheel is on, roll the suitcase across a flat floor, lift it by the handle, and listen for scraping or clicking. If it feels smooth empty and still rolls cleanly with light packing, the repair is ready for use.
A good wheel replacement is not about making the suitcase look new. It is about restoring reliable movement without creating new problems in the shell, mount, or lining. If you match the part carefully and tighten it with restraint, the suitcase usually rewards you with many more trips.