
How to Fix a Backpack Buckle Without Replacing the Whole Bag

A broken backpack buckle feels minor until your strap won’t stay put, your chest clip pops open, or your commute bag starts slipping off one shoulder. The good news: many buckle problems are fixable at home with the right diagnosis and a small replacement part. The bad news: not every buckle should be “fixed” the same way. A slipped strap can often be rethreaded. A cracked side-release buckle usually needs replacement. A frayed webbing end may be the real problem.
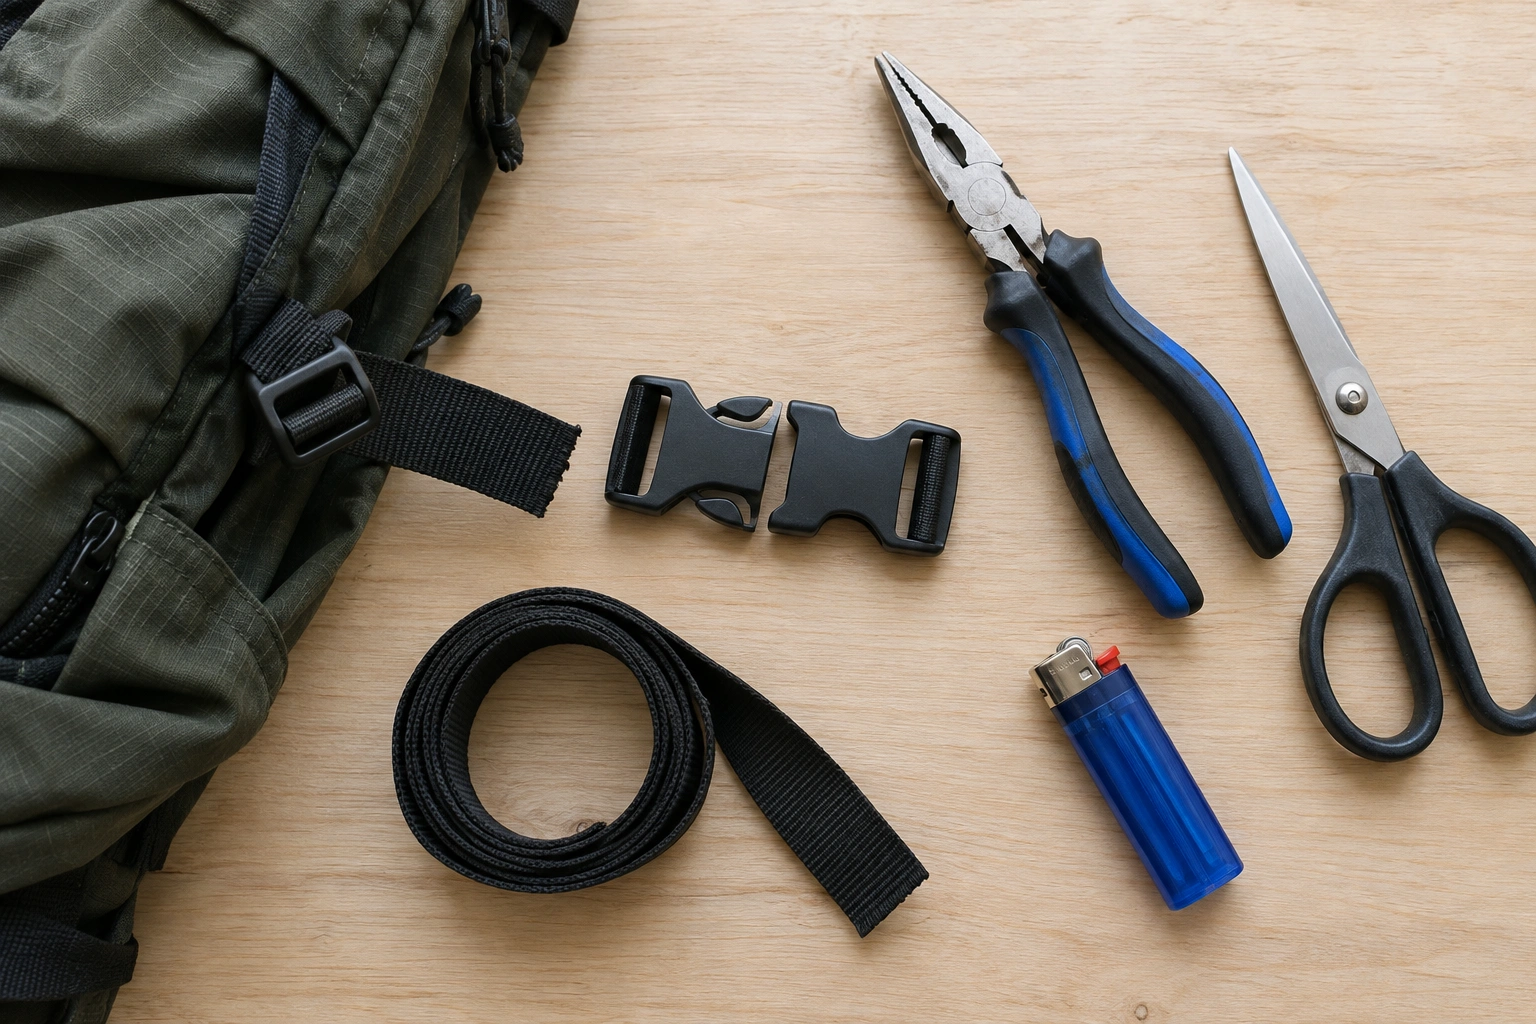
The fastest repairs usually come from one rule: identify the failure before you buy parts. If you replace the wrong piece, you waste time and still end up with a bag you can’t trust. If you match the buckle type and strap width correctly, most repairs are straightforward.
What to Know Before You Start
Before you touch the buckle, follow this order:
- Identify the buckle type
- Measure the strap width
- Inspect the webbing
- Decide whether to rethread or replace
Use this quick framework:
- If the buckle is intact but the strap slipped out or loosened: rethread it.
- If the buckle body is cracked, bent, or won’t latch: replace it.
- If the webbing is frayed, melted, or torn near the buckle: replace or repair the strap end, not just the buckle.
- If the buckle is load-bearing and the pack carries heavy gear: be more conservative. A “works for now” fix is not the same as a reliable travel repair.
Some packs have manufacturer repair guidance for specific hardware. Checking the maker’s instructions before forcing a repair is a good idea, especially if the pack is still under warranty or uses a nonstandard part. If you’re carrying expensive gear or traveling soon, general repair resources from outdoor retailers and luggage support pages can also help you think through the repair, even though backpack hardware varies widely.
One useful reality check: if the buckle is made of plastic and has visible stress whitening, a crack, or a missing hinge bar, don’t count on bending it back into shape. Plastic that has already failed usually fails again.
Identify the Type of Backpack Buckle
Backpack hardware looks similar at a glance, but the repair method changes depending on the part.
| Buckle type | What it does | Common failure | Best fix |
|---|---|---|---|
| Side-release buckle | Main clip on straps, chest straps, some accessory straps | Cracked body, broken side tabs, won’t latch | Replace the buckle |
| Ladder lock buckle | Adjusts strap length by gripping webbing | Strap slips through, bar breaks, webbing routed wrong | Rethread or replace |
| Adjuster buckle / strap adjuster | Tightens shoulder, sternum, or accessory straps | Webbing slipped out, buckle body cracked | Rethread if intact; replace if cracked |
| Chest strap buckle | Connects sternum strap across the chest | Clip won’t hold, strap came loose | Rethread or replace |
| Tension lock / similar strap hardware | Holds webbing under tension | Snapped bar, poor grip, worn strap | Replace or rethread depending on damage |
If you’re unsure, look at how the webbing passes through the hardware. A side-release buckle usually has two matching halves that snap together. A ladder lock or adjuster buckle has a fixed shape that the strap weaves through and clamps against itself.
That distinction matters because a side-release buckle that cracks is usually done for. A ladder lock with a slipped strap may be perfectly fine once the webbing is routed correctly again.
Check Whether the Problem Is the Buckle or the Webbing
A lot of “broken buckle” complaints are actually strap-routing problems.
Inspect three things:
- The plastic body
- Look for cracks, missing teeth, bent arms, or a snapped center bar.
-
If you see a split near the stress point, replacement is the safe call.
-
The webbing
- Check for fraying, melted edges, glazing, or thin spots where the strap bends through the buckle.
-
If the strap is worn, the buckle may be fine but still fail under load.
-
The threading
- Compare the strap path to the other side of the pack or to any product photos from the manufacturer.
- If the webbing slipped out, the buckle may work normally once rethreaded.
A good example: a commuter backpack chest strap often pops loose because the webbing slid out of the adjuster, not because the buckle itself broke. In that case, you don’t need a new buckle first—you need to thread the strap back through correctly.
If the strap end is frayed, rethreading alone may not hold. That’s when the repair shifts from “fix the buckle” to “stabilize or replace the strap end.”
When the Webbing, Not the Buckle, Is the Real Failure
Replace or repair the webbing instead of the buckle when you see:
- Fraying that extends beyond the folded end
- Melted or glazed fibers
- A thin, stretched section where the strap repeatedly bends
- Tears, cuts, or separation near the hardware
- A strap end that slips even after correct rethreading
If the webbing is badly worn, a new buckle will not solve the problem. The strap may hold for a moment and then slip again under normal use. In that case, the safer repair is to replace the strap end or have the webbing section repaired.
Tools and Replacement Parts You May Need
You can handle many repairs with a small kit.
Required for most repairs
– Matching replacement buckle
– Pliers
– Scissors or a sharp blade
– A ruler or tape measure
Sometimes needed
– Lighter or heat-sealing tool for synthetic webbing
– Needle and thread for securing a webbing end
– Thread ripper or seam ripper if stitching must be opened
For no-sew repairs, pliers help remove stubborn broken parts or guide webbing through tight openings. A thread ripper is useful when the strap end is stitched closed around a buckle and you need to open that seam cleanly.
Some repairs can be done without sewing at all. For example, a simple ladder lock rethread may only require removing the old part and feeding the webbing back through correctly. But if the strap end was originally sewn shut to keep it from slipping, you may need to resew that seam or use the pack’s original retention method.
If you cut webbing, melt the end lightly to stop fraying. Use caution: you want to seal the fibers, not create a hard blob that won’t pass back through the buckle.
Measure Strap Width and Match the Right Replacement Buckle
This is the step that prevents most bad purchases.
Measure the webbing width, not the buckle body. Use the flat strap itself and measure it in millimeters if possible. Common backpack webbing sizes often fall around 20 mm, 25 mm, or 38 mm, but don’t guess. A buckle that is even slightly off can be hard to thread, slip under load, or refuse to sit correctly.
Here’s the practical rule:
- Match the strap width first
- Match the buckle style second
- Match the load use third
A 25 mm side-release buckle may look close enough to a 1-inch strap, but if the fit is sloppy, the repair won’t inspire confidence. Likewise, a chest strap buckle and a ladder lock are not interchangeable just because the plastic shape seems similar.
If the buckle uses a nonstandard size, look for the original part number first. If you can’t find an exact match, a repair shop, outdoor gear shop, or online parts seller may have a compatible replacement. The key is to confirm the width and style before ordering.
If you’re buying online, check the product description for:
– Strap width
– Buckle type
– Whether it is side-release, ladder lock, or adjuster style
– Whether it is designed for sewn-in or split-replacement installation
How to Tell Whether the Buckle Is Sewn-In or a Split-Replacement Style
Before you start the repair, check how the buckle is attached.
- Sewn-in buckle: the webbing is stitched around the buckle end, so removing it usually means opening stitches and then resewing the strap.
- Split-replacement buckle: the buckle opens or separates so you can swap it without opening the sewn seam.
- No-sew style: the buckle is designed to thread on without stitching, often used on adjusters and ladder locks.
This matters because the repair steps are not the same. A sewn-in buckle takes more time and may require basic sewing. A split-replacement buckle is usually faster and simpler. If you are not sure which style you have, inspect the strap end before cutting any stitches.
How to Fix a Strap That Slipped Out of an Adjuster or Ladder Lock
If the buckle is intact and the strap simply came loose, this is usually the fastest repair.
- Remove the strap from the buckle completely
- Note how it was threaded before you pull it apart.
-
Take a quick photo first if the routing is confusing.
-
Inspect the webbing end
- If it is frayed, trim only the damaged fuzz.
-
If you trim, seal the end lightly with heat so it doesn’t unravel.
-
Thread the webbing back through the buckle in the original path
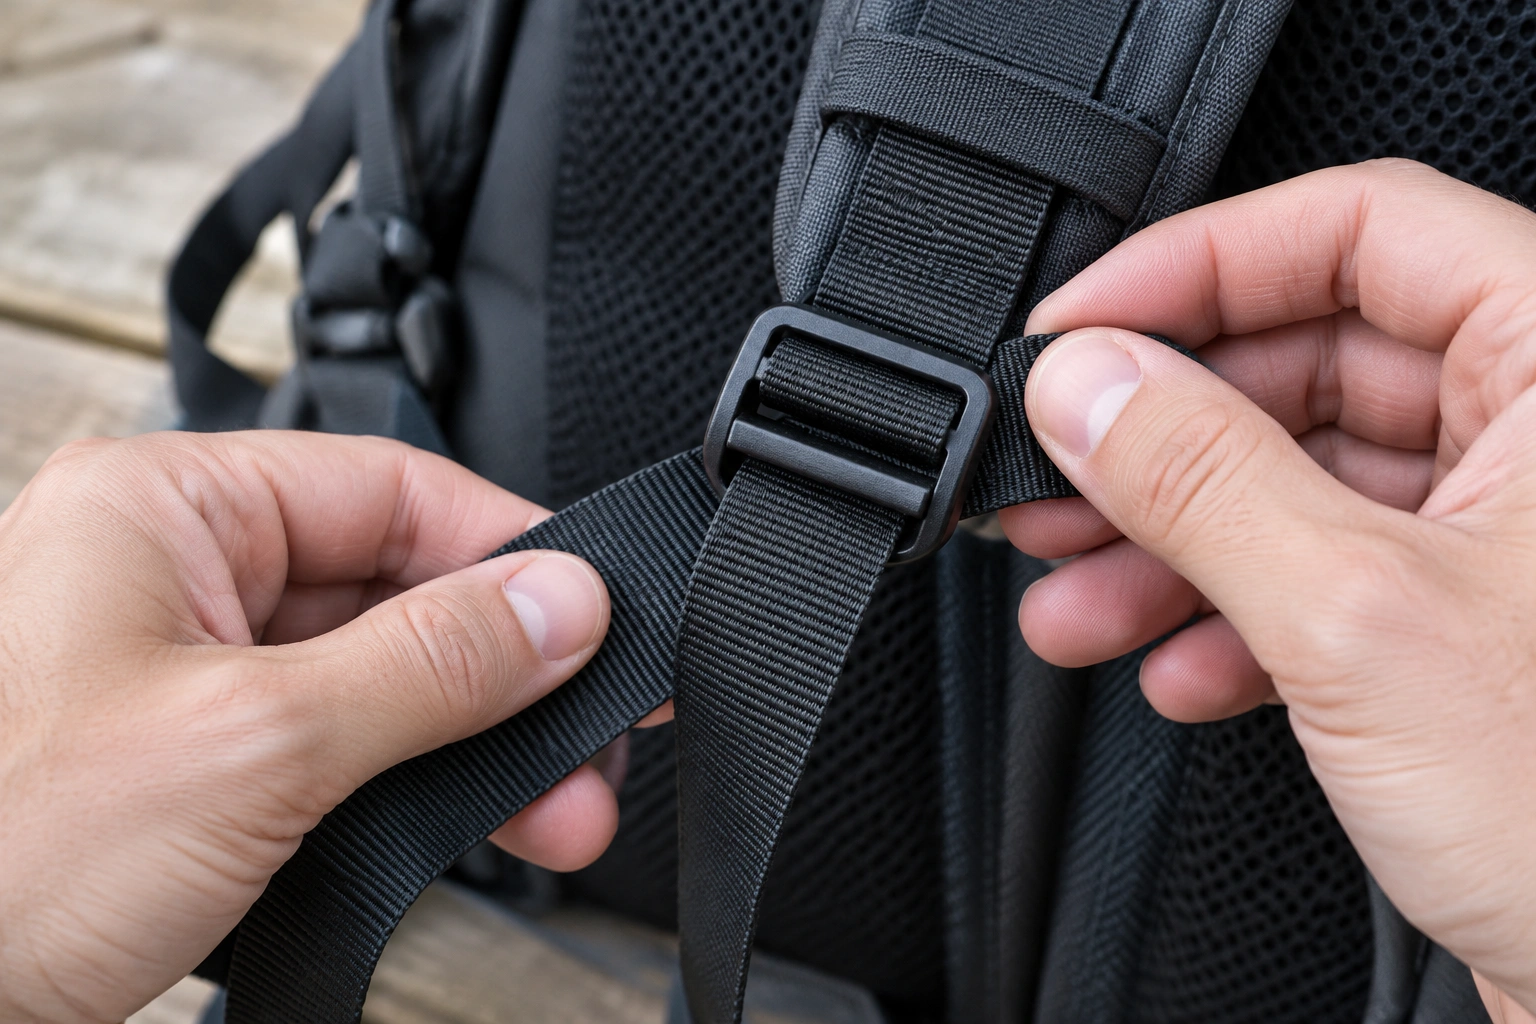
Rethreading webbing through a backpack adjuster buckle - Follow the same over-under route the strap used before.
-
If the strap was routed incorrectly, the buckle may slip instead of gripping.
-
Pull the strap tight and test the grip
- The buckle should hold without the webbing sliding back through.
-
If it slips immediately, the strap may be worn or the buckle may be cracked.
-
Secure the end if needed
- Some straps are stitched after threading to keep the tail from wandering.
- If the original seam was opened, re-stitch it or use the pack’s original retention method.
This fix is common on sternum straps and shoulder strap adjusters.
How to Replace a Broken Side-Release Buckle
If the side-release buckle is cracked or won’t latch, replacement is usually the right move.
- Buy the correct replacement
- Match the strap width and buckle style.
-
Confirm whether both halves are needed or only one side is damaged.
-
Remove the damaged buckle
- If the webbing is sewn into the buckle end, open the stitching carefully with a seam ripper or thread ripper.
-
If the buckle is a split-style replacement, you may be able to swap it without opening the seam.
-
Install the new buckle in the same orientation
- The male and female sides must face the same direction as before.
-
A reversed buckle can twist the strap or make the clip awkward to use.
-
Re-thread and reseal the webbing end
- Follow the original strap path.
-
If you trimmed the end, heat-seal it so fraying doesn’t undo your work.
-
Close the seam or secure the strap end
- If stitching was removed, sew it back using the original holes when possible.
If you do not sew often, this part can take longer than the buckle swap itself. That’s normal. The goal is a secure finish, not speed.
How to Repair or Replace a Chest Strap Buckle
Chest strap buckles fail in a slightly different way because they’re often smaller and more adjustable.
If the buckle is fine but the strap slipped out:
– Rethread it exactly as it was before.
– Make sure the strap tail has enough length to hold after adjustment.
If the buckle is cracked or the clip won’t hold:
– Replace the buckle with the same width and style.
– Check both sides of the sternum strap, since one side may be stitched while the other is adjustable.
A chest strap doesn’t carry the same load as a hip belt, but it still matters. If it keeps popping open, the backpack can shift and feel unstable during commuting or walking through airports. For daily carry, that’s annoying. For hiking or crowded travel, it becomes more than an annoyance.
Temporary Emergency Fixes Until the Replacement Arrives
Sometimes you need the pack usable today, not after the new part ships.
For non-load-bearing straps only, short-term options can include:
– Re-threading a slipped strap and using a small strap keeper or gear tie to keep the tail from sliding out
– Using a simple tie or clip to hold a loose accessory strap closed until the replacement arrives
Do not use a temporary workaround on:
– Shoulder straps
– Hip belts
– Load-bearing chest straps on a heavily packed bag
– Any strap that supports expensive gear or could affect balance while walking
Treat these as temporary only. They are not the same as a secure repair, especially on load-bearing straps. If the buckle is cracked, don’t trust a makeshift fix for a heavy commute, a flight, or a long walk with a full pack.
A useful rule: if the temporary fix would fail in a tug test, it should not be your travel solution.
Common Mistakes to Avoid
A few errors show up again and again:
- Buying the wrong width
-
Even a small mismatch can make the buckle unreliable.
-
Assuming every buckle is interchangeable
-
Side-release, ladder lock, and adjuster hardware are not the same.
-
Forcing cracked plastic back into shape
-
Once a stress crack is there, the part is weakened.
-
Cutting webbing too short
-
Leave enough tail to rethread and adjust later.
-
Ignoring frayed strap ends
-
A new buckle won’t fix worn webbing.
-
Using a temporary fix for heavy loads
- If the bag carries a laptop, books, or travel gear, test carefully before relying on it.
Test the Repair Before You Trust It
After the repair, don’t immediately load the pack and leave.
Test it in this order:
- Latch and unlatch the buckle several times
-
It should connect cleanly without sticking.
-
Pull on the strap with your hands
-
The webbing should hold without slipping.
-
Load the backpack with normal weight
-
Use the kind of weight you actually carry: books, laptop, or travel items.
-
Walk around for a few minutes
-
Check whether the strap loosens, twists, or shifts.
-
Recheck after the pack settles
- Some poor threading looks fine at first and slips once tension builds.
For a commuter bag, a few minutes of walking and a firm hand pull are usually enough to catch a bad rethread. For a hiking pack or travel bag, use the heaviest normal load you would actually carry and pay close attention to any slipping after the straps settle. If the buckle slips under a normal tug, don’t “hope it gets better.” Re-thread it again or replace the part. A repair is only useful if it holds under real use, not just on the bench.
When to Repair, Replace, or Stop Using the Backpack
Use this final decision rule:
- Repair it if the buckle is intact and the issue is only slipping, misrouting, or a loose strap end.
- Replace the buckle if the plastic is cracked, bent, or no longer latches securely.
- Replace more than the buckle if the webbing is badly frayed, melted, or torn near the hardware.
- Stop using the backpack for heavy loads if the repair fails repeated tug tests or the load-bearing strap still slips.
If the pack is expensive or the buckle is part of a more complex harness, a luggage repair specialist may be the smarter move. That’s especially true for a sternum strap, hip belt, or travel pack where a failure could make the bag uncomfortable or unsafe. If you’re already dealing with other wear issues, it may also be worth reading our guides on how to fix luggage wheels and how to fix a broken suitcase zipper so you can decide whether one repair or several make more sense.
A backpack buckle is often a small, inexpensive part. But when it fails, it can make a perfectly good pack feel useless. The right fix depends on what actually broke: the buckle, the threading, or the webbing. Once you identify that correctly, the repair is usually much simpler.
Frequently Asked Questions
Can I fix a backpack buckle myself?
Yes, if the problem is a slipped strap, misthreading, or a straightforward buckle swap. If the plastic is cracked or the webbing is badly worn, replacement is the safer route.
How do I know if my buckle size is correct?
Measure the webbing width and match the replacement buckle to that measurement. Don’t rely on appearance alone.
Can I use glue to fix a cracked buckle?
Glue alone is not a reliable long-term repair for a load-bearing backpack buckle. A cracked buckle usually needs replacement.
What if the strap keeps slipping after I rethread it?
That usually means the webbing is worn, the routing is wrong, or the buckle is damaged. Recheck the threading first, then inspect the strap and buckle for wear.
Is a temporary fix okay for commuting?
Only for non-load-bearing straps or very light use. If the strap supports the pack’s weight or affects balance, replace the part before relying on the bag.
Where can I get a replacement buckle?
Look for the original manufacturer, a repair shop, an outdoor gear shop, or an online parts seller. Match the width and style before buying.
When should I take it to a repair specialist?
If the buckle is sewn into a tight spot, the strap is part of a complex harness, or the pack is valuable enough that you don’t want to risk a bad DIY repair.